How to run NGINX using the Docker run command
Jul 20, 2026
/
Ariffud M.
/
4 min Read

Running NGINX in Docker simplifies web server deployment by removing the need for complex OS-level installations. To start an NGINX container using Docker, run the following command:
docker run --name my-nginx -p 80:80 -d nginx
This single command triggers a sequence of actions: Docker checks for the official image (downloading it if needed), creates an isolated container, maps the necessary port, and starts the server in the background.
What are the prerequisites for running NGINX in Docker?
- Virtual private server (VPS) access. You need a VPS running a modern Linux distribution (such as Ubuntu or Debian) with root or sudo privileges.
- Docker Engine 20.10 or later. The host machine must have Docker installed, and the service must be active. Run docker –version to verify.

- User permissions. The user performing this task should be part of the docker group to execute commands without sudo.
- Docker Compose. This is optional for single containers, but Docker Compose is recommended for defining more complex multi-container environments later.
1. Pull the official NGINX Docker image
Run this command to download the nginx image from Docker Hub:
docker pull nginx
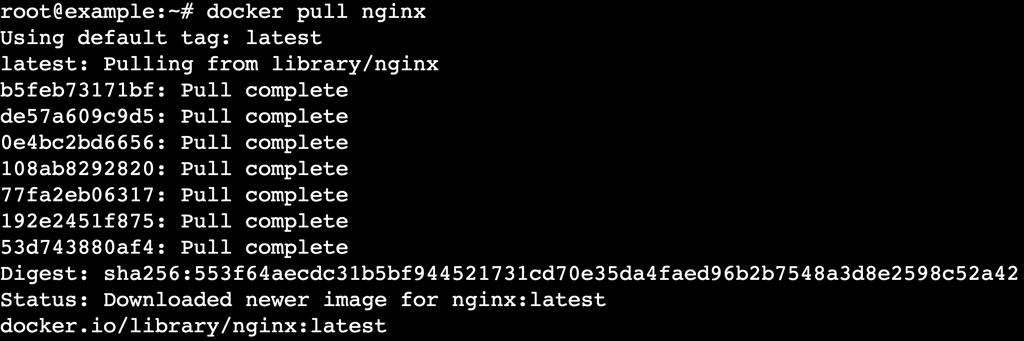
This command downloads the latest stable NGINX image to your host machine.
Using the official image means you’re working with a secure, maintained version of the software directly from the NGINX team without unnecessary bloat or outdated dependencies.
Verify that the image was downloaded successfully:
docker images nginx

2. Run NGINX in detached mode
To keep your terminal free for other tasks, run the container in the background using detached mode. Use the -d flag to start the container and immediately return control to the console.
docker run --name my-nginx -p 80:80 -d nginx

- –name my-nginx. Assigns the custom name my-nginx to the container for easier management.
- -d. Detaches the process, letting the container run in the background.
- nginx. Specifies the image to use.
Verify that the container is running by listing active processes:
docker ps

If you receive an error stating that the container name is already in use, remove the existing container with docker rm my-nginx, or execute docker run again with a different container name, for example:
docker run --name my-nginx-new -p 80:80 -d nginx
3. Expose ports when running NGINX
Use the -p flag to map a port on your host machine to a port inside the container.
By default, NGINX listens on port 80. To make the web server accessible outside the container, you must bind the container’s internal port to an open port on your host.
To map port 8080 on your host to port 80 in the container, run:
docker run --name my-nginx -p 8080:80 -d nginx
If port 8080 is in use, choose a different unused port, such as 8081:
docker run -d -p 8081:80 --name my-nginx nginx
If you receive an “address already in use” error, it indicates a port conflict. To check which ports are currently active on your system before running the command, use lsof:
lsof -i -P -n | grep LISTEN

4. Configure NGINX with a custom config file
To customize NGINX behavior, mount your own configuration file using the -v (volume) flag. This is useful for advanced setups, such as configuring NGINX as a reverse proxy.
First, create a custom configuration file named nginx.conf on your host using the nano text editor:
nano nginx.conf
Paste the following content:
events {}

http {
    server {
        listen 80;
        location / {
            proxy_pass http://host.docker.internal:3000;
        }
    }
}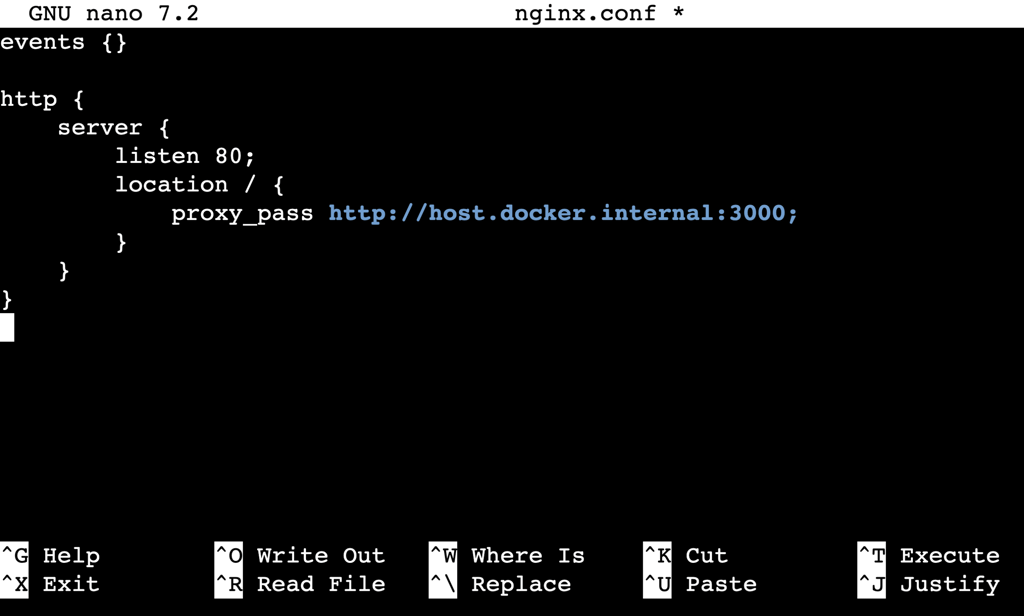
This configuration directs traffic to a backend service running on port 3000.
Save the file and exit the editor with Ctrl + X → Y → Enter.
Next, run the container and mount this file to overwrite the default configuration inside the container. On Linux, the special hostname host.docker.internal requires an additional flag to resolve correctly:
docker run -d
--name custom-nginx
-p 80:80
--add-host=host.docker.internal:host-gateway
-v $(pwd)/nginx.conf:/etc/nginx/nginx.conf:ro
nginx
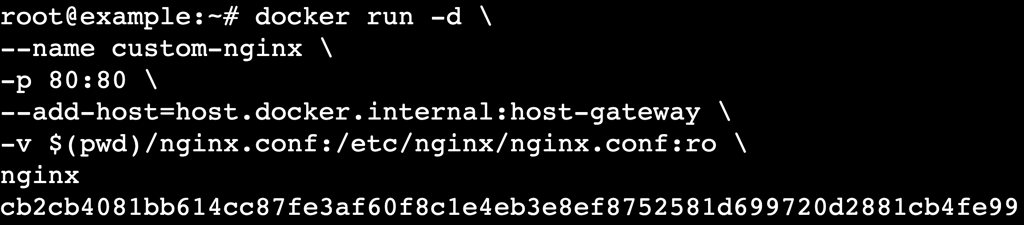
The –add-host flag maps host.docker.internal to the host machine’s IP address. The :ro option keeps the file read-only inside the container, preventing accidental modifications from within the running instance.
5. Serve static content using NGINX
To serve your own website files, mount a local directory containing your HTML, CSS, and JavaScript files to the default NGINX web root.
Create a directory named html:
mkdir html
Add an index.html file inside the directory with nano html/index.html, and include some basic content:
<!DOCTYPE html>
<html lang="en">
<head>
    <meta charset="UTF-8">
    <meta name="viewport" content="width=device-width, initial-scale=1.0">
    <title>My Docker NGINX Site</title>
</head>
<body>
    <h1>Hello from NGINX in Docker!</h1>
    <p>This page is being served from a mounted volume.</p>
</body>
</html>
Once saved, run the following command:
docker run -d
--name static-nginx
-p 80:80
-v $(pwd)/html:/usr/share/nginx/html:ro
nginx
Open your browser and navigate to http://your-server-ip to view the page.
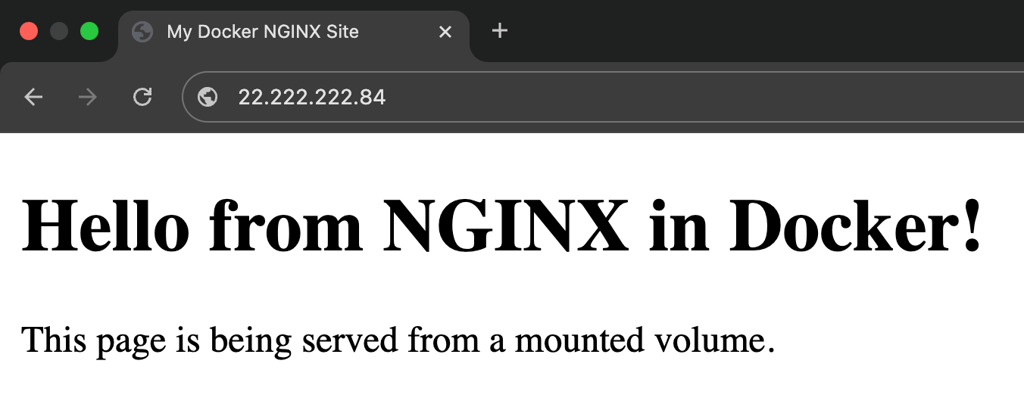
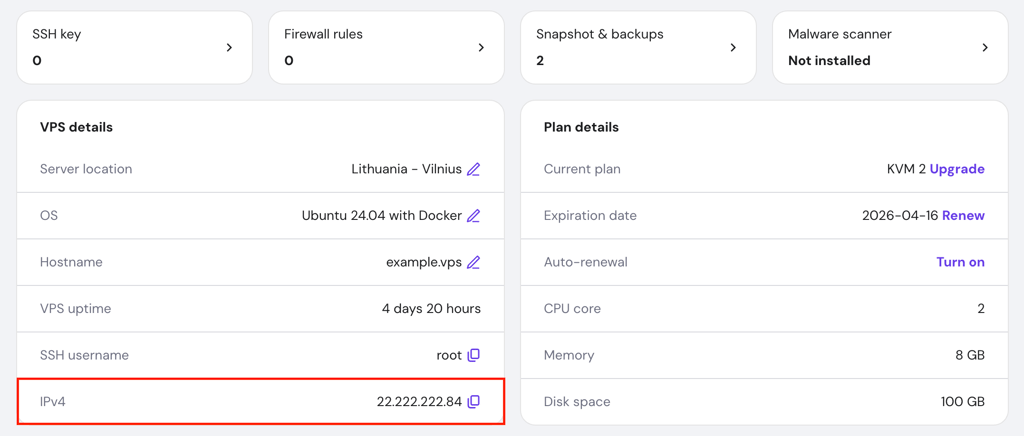
Hostinger VPS users can find their server’s IP address in hPanel by navigating to VPS → Manage → Overview → VPS details → IPv4.
Note that the default NGINX configuration automatically looks for an index.html file in the /usr/share/nginx/html directory.
If your application requires a different directory structure or specific routing rules, combine this step with the custom configuration method described in the previous section.

6. Manage NGINX containers
Once your container is running, use standard Docker commands to manage its lifecycle.
Stop the container using docker stop followed by the container name:
docker stop my-nginx

Start the container again if it’s currently stopped:
docker start my-nginx
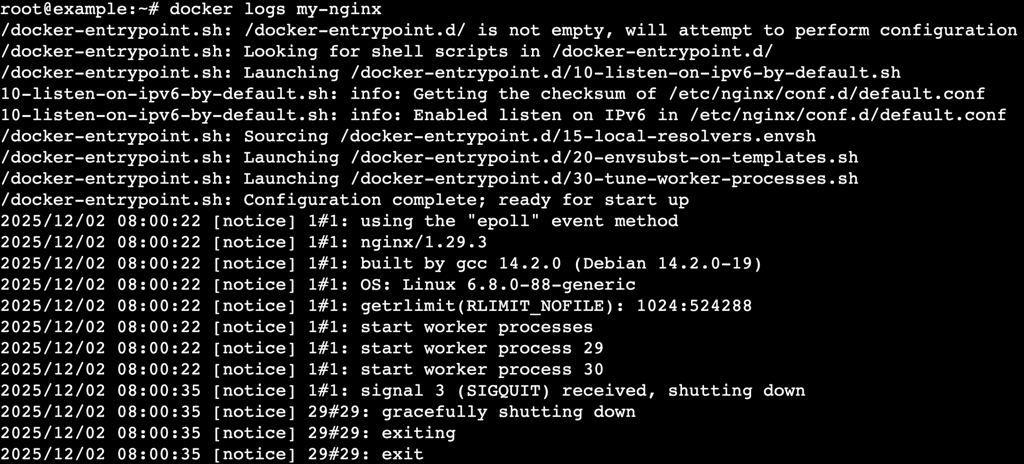
View logs to troubleshoot errors or check access requests:
docker logs my-nginx
Remove the container completely (make sure it’s stopped first):
docker rm my-nginx
7. Use Docker Compose with NGINX
For scenarios involving multiple services, such as a web server communicating with a database, consider using Docker Compose. It simplifies orchestration by defining the environment in a YAML file.
Create a file named docker-compose.yml and paste the following content:
services:
  web:
    image: nginx
    ports:
      - "80:80"
    extra_hosts:
      - "host.docker.internal:host-gateway"
    volumes:
      - ./nginx.conf:/etc/nginx/nginx.conf:ro
      - ./html:/usr/share/nginx/html:ro
This configuration defines a service named web that uses the NGINX image, exposes port 80, and mounts both a custom configuration file and a static content directory.
The extra_hosts directive enables the host.docker.internal hostname on Linux systems.
Start the environment with a single command:
docker compose up -d

Using Docker Compose makes your configuration reproducible and lets you manage the entire application stack with commands like docker compose stop and docker compose down.
What’s the next step after running NGINX in Docker?
Learning how to run NGINX in a Docker container gives you the foundation for deploying a portable web server. You don’t have to worry about OS-level installations or version conflicts because containers keep everything isolated and consistent.
But typing long commands for every container isn’t practical for larger projects. To handle real-world traffic and keep your application online during updates, you must move beyond single containers and explore orchestration.
Read our guide on how to deploy a Docker stack to learn how to manage a cluster of containers across multiple machines using Docker Swarm.
All of the tutorial content on this website is subject to Hostinger's rigorous editorial standards and values.

Ariffud is a Technical Content Writer with an educational background in Informatics. He has extensive expertise in Linux and VPS, authoring over 200 articles on server management and web development. Follow him on LinkedIn.