How to create a custom expense tracker with AI
Jun 02, 2026
/
Dainius K.
/
4 min Read
An expense tracker web app helps individuals and businesses monitor daily spending in one organized system. Instead of relying on spreadsheets or scattered notes, you get a centralized dashboard that shows where your money goes.
With AI and vibe coding, you can describe how expenses should be recorded, categorized, and summarized — and instantly generate a working web application. You focus on financial clarity while AI builds the tracking structure.
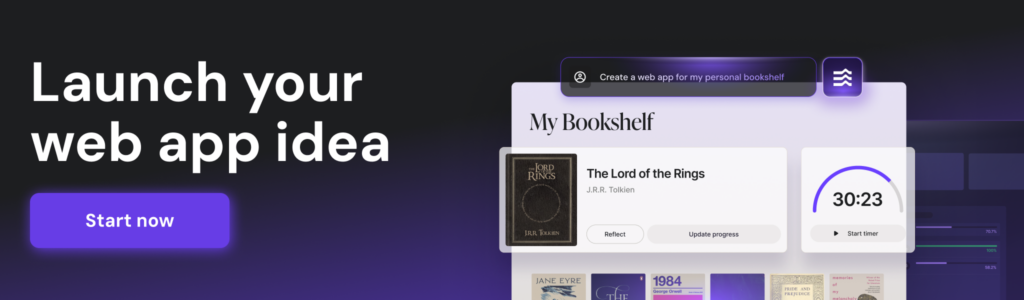
Using Hostinger Horizons, you can create, customize, and publish your expense tracker without writing code. Add categories, automatic totals, filters, and visual dashboards in just a few prompts.
TL;DR: How do you create an expense tracker fast?
- Define expense categories. Decide how you want to organize spending (e.g., food, rent, software).
- Generate input forms and dashboard with AI. Prompt Hostinger Horizons to create entry fields and summary views.
- Add automatic calculations. Track totals by category, month, or custom range.
- Publish and start tracking. Go live and manage expenses in one place.
Step 1: Define the problem your expense tracker solves
Start by identifying current budgeting challenges.
This tool helps individuals, freelancers, small businesses, and startups do structured daily expense tracking so they can control spending and improve financial planning.
For example:
- A freelancer may want to track business-related expenses. This simplifies tax preparation.
- A household may need visibility into monthly spending. This improves budgeting decisions.
- A startup may want team expense tracking. This supports financial accountability.
Define whether you’re building for personal use or business tracking.
Step 2: Outline what to include in the first version of your expense tracker
Keep your MVP focused and simple.
- Expense entry form. Include fields for date, category, amount, and description.
- Category management. Allow custom categories for flexible tracking.
- Dashboard overview. Display total spending and breakdown by category.
- Edit and delete functionality. Ensure easy corrections.
You can expand into advanced analytics later.
Step 3: Create a user flow from start to finish
Design a smooth expense tracking experience.
- Landing → Dashboard showing total monthly expenses. Immediate visibility improves awareness.
- Input → Add a new expense quickly. Simple forms encourage daily usage.
- Processing → System updates totals automatically. Reduces manual calculations.
- Result → Updated dashboard reflects real-time spending.
- Next step CTA → Add another expense or filter by category/date. Keeps engagement consistent.
Step 4: Generate the first version with Hostinger Horizons
Open Hostinger Horizons and describe your tool clearly.
For example: “Create an expense tracker web app where users can add expenses with category, date, and amount, and automatically calculate total monthly spending.”
Horizons will generate a working preview beside the chat. Test adding expenses and verify totals update correctly.
You can prompt: “Add a pie chart showing category breakdown,” or “Include a monthly filter.” The AI updates instantly using vibe coding.
Generate the first version of your expense tracker for free.
Step 5: Customize the design and layout
Make the tracker clear and easy to use.
- Use summary cards for totals. Highlight key numbers at the top.
- Apply color-coded categories. Improve visual clarity.
- Add simple charts. Visual spending trends enhance insight.
- Ensure mobile-friendly design. Users often track expenses on the go.
Use the select-and-edit feature in Hostinger Horizons to refine specific UI elements.
Step 6: Add logic, calculations, or scoring
Expense tracking relies on accurate financial calculations.
- Automatic monthly and yearly totals. Provide quick financial summaries.
- Category percentage breakdown. Show how spending is distributed.
- Budget comparison logic. Compare actual expenses against set budgets.
- Recurring expense tagging. Track regular payments separately.
Prompt: “Automatically calculate total monthly expenses and show category percentages.”
Step 7: Test your expense tracker before publishing
Test with realistic data.
Add multiple expenses across categories and months to verify totals and filters work correctly.
Checklist:
- Totals update correctly. Ensure calculation accuracy.
- Filters function properly. Date and category filters must work reliably.
- Editing expenses updates dashboard. Changes should reflect instantly.
- Mobile layout remains clear. Financial tools must be easy to use on all devices.
If issues arise, ask Hostinger Horizons to fix them automatically.
Step 8: Publish and share your expense tracker
Click Publish when ready.
Use a temporary domain or connect your own domain. Your expense tracker web app goes live instantly.
You can:
- Use it personally for budgeting. Gain control over spending.
- Share with a team. Improve expense transparency.
- Offer it publicly. Build a niche financial tracking tool.
Step 9: Improve your expense tracker after launch
As you use the system, refine and expand.
You can:
- Add reporting exports. Download monthly summaries.
- Introduce charts for long-term trends. Track spending patterns.
- Add user accounts. Allow multiple users to track expenses separately.
With Hostinger Horizons, improvements happen through simple prompts.
Why should you create expense tracker?
An expense tracker web app improves financial awareness and control.
It’s ideal for:
- Freelancers and entrepreneurs. Track business costs easily.
- Families. Monitor shared household expenses.
- Startups. Improve financial discipline and transparency.
Better expense tracking leads to smarter budgeting decisions.
What features should a good expense tracker include?
- Dynamic total calculations. Automatically update spending summaries.
- Category-based breakdown. Organize expenses logically.
- Date filtering. Track expenses by week, month, or year.
- Budget comparison logic. Identify overspending quickly.
- Responsive dashboard design. Ensure smooth experience across devices.
What initial prompt should you use to build expense tracker in Horizons?
Use the prompt below in Hostinger Horizons’ vibe coding tool to build your expense tracker. Simply copy and paste it into the chat to create your first working version instantly. As you build, you can add follow-up prompts to adjust features and refine the layout.
Here’s a template:
Create an expense tracker web app.
Allow users to add expenses with date, category, amount, and description.
Automatically calculate total monthly and yearly spending.
Display a category breakdown with charts.
Add budget comparison feature.
Example filled prompt:
Create an expense tracker web app for freelancers.
Allow users to add expenses with date, category, amount, and notes.
Automatically calculate total monthly and yearly expenses.
Display a pie chart showing category percentage breakdown.
Add a monthly budget comparison and highlight overspending.
What are common mistakes to avoid when building expense tracker?
Financial tools require precision and clarity.
- Manual total calculations. Always automate to reduce errors.
- Too many categories at launch. Start simple and expand gradually.
- No filtering options. Date-based filtering is essential.
- Overcomplicated dashboards. Keep the interface clean.
- Ignoring recurring expenses. Regular payments should be clearly marked.
- Poor mobile usability. Daily tracking requires convenience.
How can you leverage Hostinger Horizons to build expense tracker?
- Use AI chat to refine logic. Add new calculations or charts instantly.
- Automatically fix formula errors. Maintain accuracy without debugging.
- Integrate payment or banking tools. Expand into advanced finance tracking.
- Scale into a budgeting micro SaaS. Offer specialized expense tracking for niche audiences.
What other tools can you build with Hostinger Horizons?
- Create subscription tracker web app. Monitor recurring payments alongside daily expenses.
- Create savings goal tracker. Track financial milestones and savings progress.
- Create KPI dashboard web app. Analyze financial performance metrics in one place.
- Create invoice generator web app. Manage outgoing invoices and revenue tracking.
- Create personal finance tool. Combine income, expenses, savings, and budgeting in one unified system.
All of the tutorial content on this website is subject to Hostinger's rigorous editorial standards and values.

Dainius Kavoliunas is the Head of Product for Hostinger Horizons, with a passion for building innovative solutions. As an expert in product management, he combines deep expertise in UX, experimentation, and data analysis with a technical background to lead product strategy and build strong teams. He is particularly excited about the practical applications of AI and its potential to transform how we work and live. Follow him on LinkedIn.