How to set up shipping in WooCommerce
Dec 02, 2025
/
Jordana A.
/
7 min Read
When creating an online store with WooCommerce, you’ll need to take care of several things before you can start accepting orders. If you’re selling physical products, one key step is setting up your shipping options.
This article will show you how to set up shipping in WooCommerce, including local pickups. We’ll also share some plugin recommendations to improve the built-in shipping options.
Understanding shipping in WooCommerce
In WooCommerce, the basic shipping settings focus on two main aspects ‒ shipping classes and shipping zones.
Shipping classes group products with similar shipping needs. For example, you might have a “heavy” class for bulky items and a “small” class for lighter ones.
On the other hand, shipping zones let you determine shipping costs and methods based on customers’ locations. You can create specific zones for countries, states, or regions and assign different shipping methods to each zone.
You can choose to just use one of these settings. However, mixing shipping zones and classes allows you to offer more tailored and accurate shipping rates to your customers, so you’re not overcharging or undercharging them.

How to set up shipping classes
If your WooCommerce store has multiple product categories, consider using shipping classes to customize rates. Otherwise, skip to the next section.
Here’s how to set up shipping classes in WooCommerce:
- Head to WooCommerce → Settings in the WordPress dashboard.
- Open the Shipping tab and select Classes → Add shipping class.
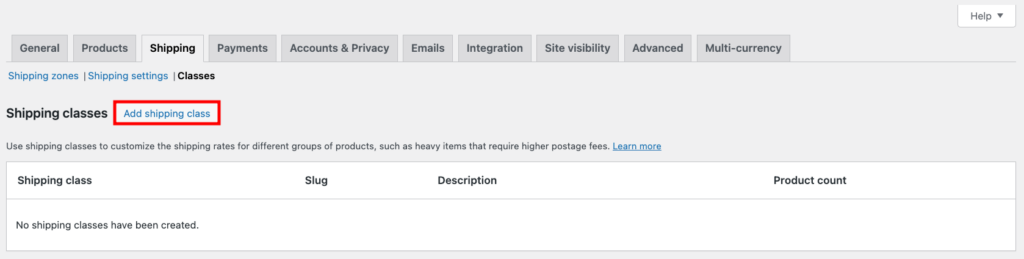
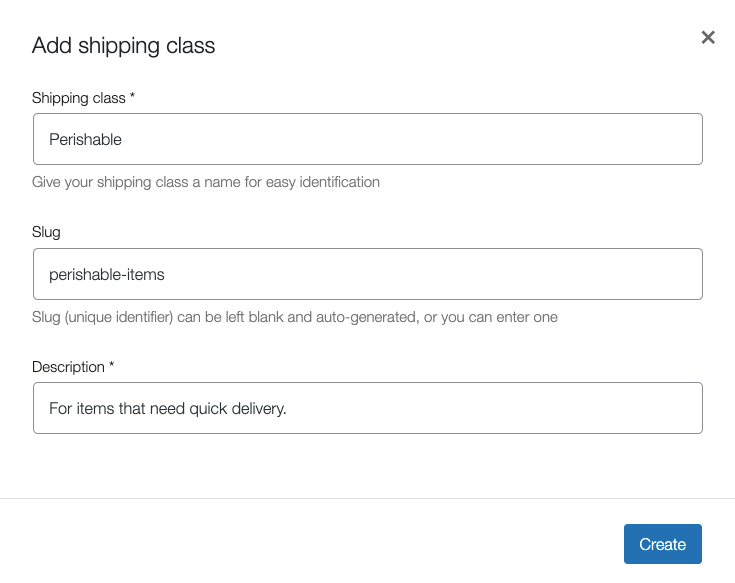
- Enter the new class’ name, slug or unique identifier, and description. Hit Create once you’re done.
After creating all the necessary shipping classes, follow these steps to assign them to your products:
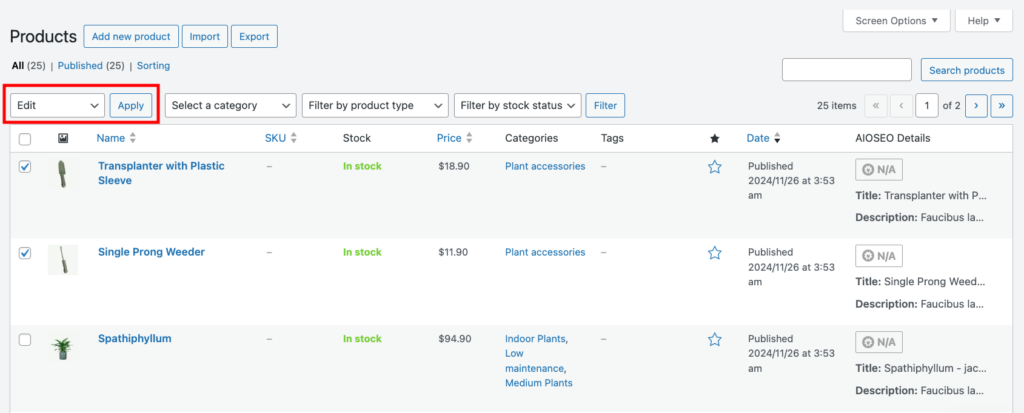
- Go to Products → All Products and check all the products you want to assign.
- Click Edit from the Bulk actions drop-down field and hit Apply.
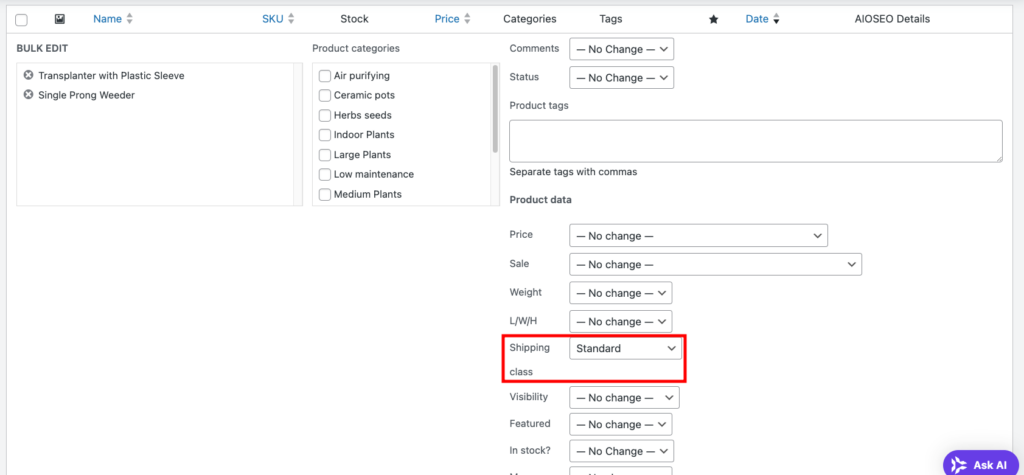
- Find the shipping class setting and pick the appropriate option from the drop-down field. Click Update.
How to set up shipping zones and methods in WooCommerce
Since WooCommerce shipping zones decide which shipping options customers see at checkout, we’ll cover both in this section. You can skip it if you’re just charging a flat rate for shipping to all locations.
Setting up shipping zones
WooCommerce assigns shipping zones based on the first criterion the customer matches. This allows you to create multiple zones without any overlap.
Here’s how to create a new shipping zone:
- Go to WooCommerce → Settings and configure the Shipping location setting in the General tab. Hit Save changes once you’re done.

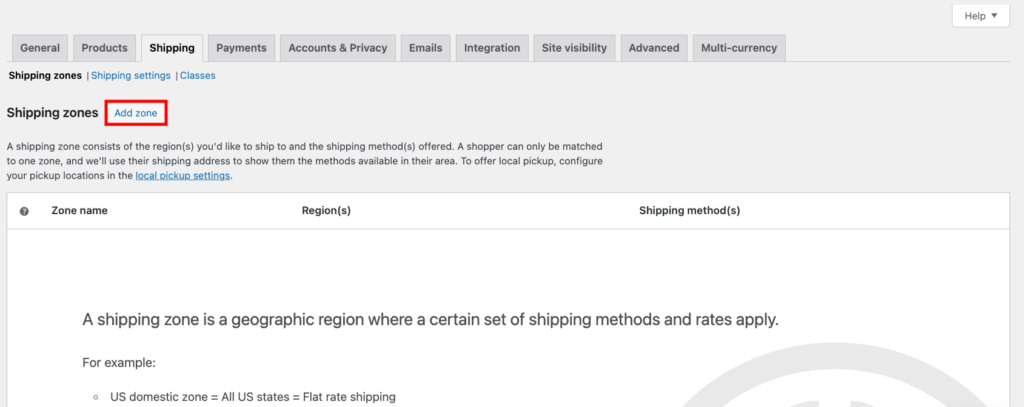
- Open the Shipping tab and hit Add zone.
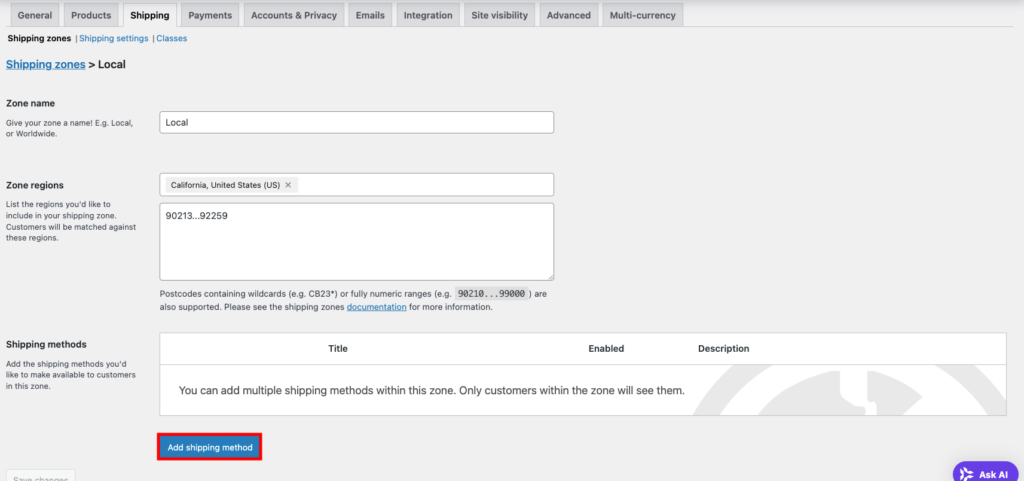
- Enter the zone name and check the regions you want to include in the shipping zone. Regions can include continents, countries, and states or provinces.
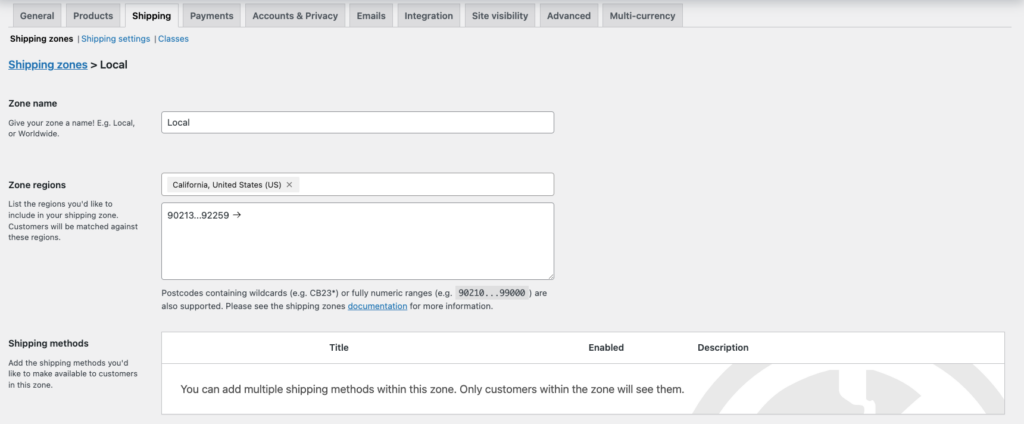
- You can also limit a shipping zone to specific postal codes by using one or a combination of these formats:
- Exact postal codes ‒ enter postal codes separated by commas or one per line (10001, 10002, 10003).
- Wildcard ‒ use the asterisk symbol (*) to match any postal code starting with a certain set of digits. For example, 100* would match any postal code starting with “100”.
- Numeric range ‒ add an ellipsis (…) between two postal codes to define a range. For example, 10001…10010 matches all postal codes between 10001 and 10010.
- Since we’ll cover shipping methods in the next section, skip it for now and hit Save changes.
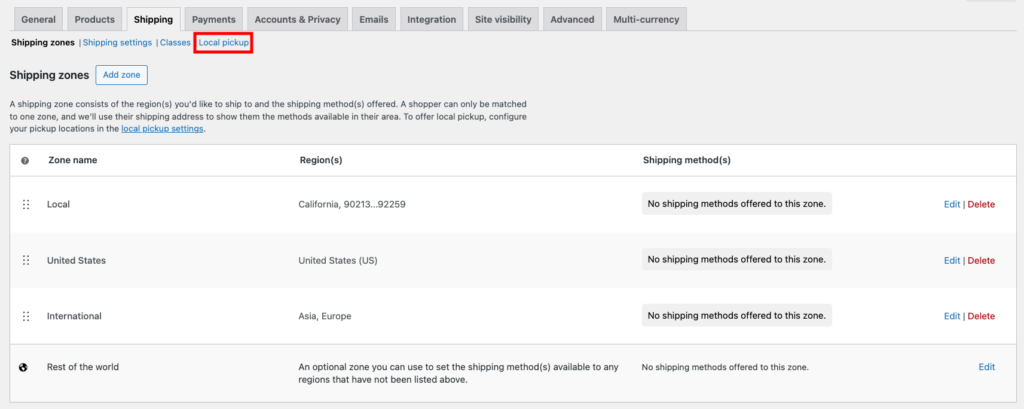
Repeat the process to add the rest of the shipping zones. You can manage them later in the Shipping zones section.
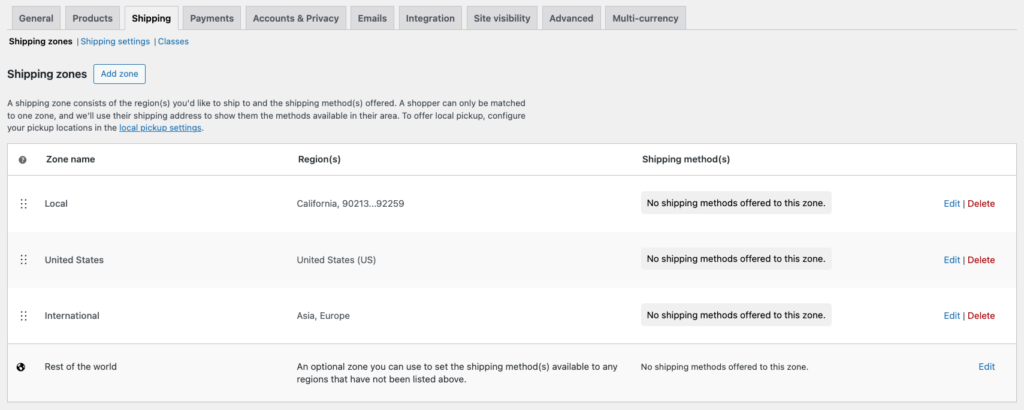
If you look at the list, you’ll notice that WooCommerce automatically adds a default shipping zone called Rest of the World. It applies to customers who don’t match any of the specific zones you’ve set up.
You can use this zone to exclude certain regions by removing all shipping options for customers in those areas. Just don’t assign any shipping methods to it.
Setting up shipping methods
Now that you have set up all the shipping zones, you can start assigning shipping methods to each zone.
In the Shipping zones section, pick a zone to modify and hit Edit. Then, scroll to the Shipping methods area and click Add shipping method.
A pop-up window will appear with three options ‒ free shipping, flat rate, and local pickup. Let’s go over them, starting with the first.
Free shipping
This shipping method is perfect for promotions and driving sales over a certain amount.
Setting up free shipping is pretty simple. Just give the method a name and pick one of the following requirements from the drop-down field:
- No requirement ‒ offer free shipping to all customers in that zone.
- Valid free shipping coupon ‒ free shipping applies if the customer uses a coupon for it. Check out our WooCommerce guide if you need help setting up a coupon.
- Minimum order amount ‒ the customer gets free shipping by spending a minimum amount. You’ll see a field to set this amount after choosing this option.
- Minimum order amount OR a coupon ‒ free shipping is available if the customer either spends the minimum amount or uses a free shipping coupon.
- Minimum order amount AND a coupon ‒ free shipping is available only if the customer meets both the minimum order amount and uses a free shipping coupon.
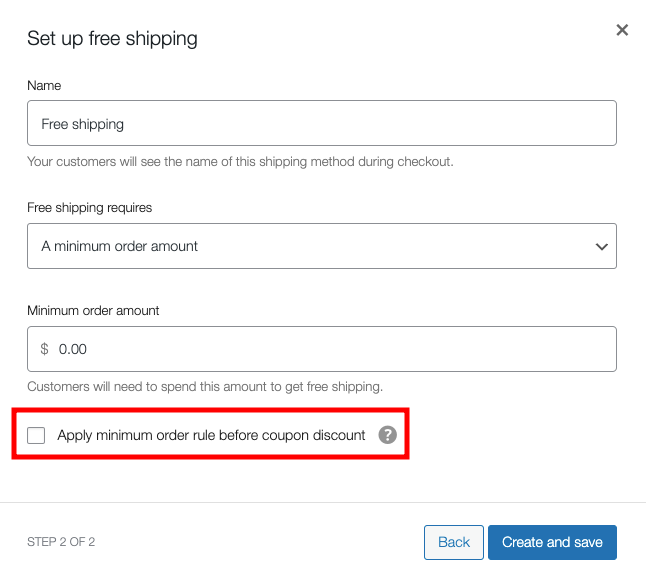
WooCommerce checks for free shipping eligibility after applying any coupon discounts by default. For example, if an order is $20 and a customer applies a $10 coupon, WooCommerce uses the $10 order amount to check eligibility.
To apply the rule before the coupon discount, simply check the box below the minimum order amount field. This option appears when selecting any requirement with a coupon code.
Flat rate
This shipping method is ideal for setting a standard shipping rate per item, shipping class, or order. It simplifies shipping calculations across products and regions.
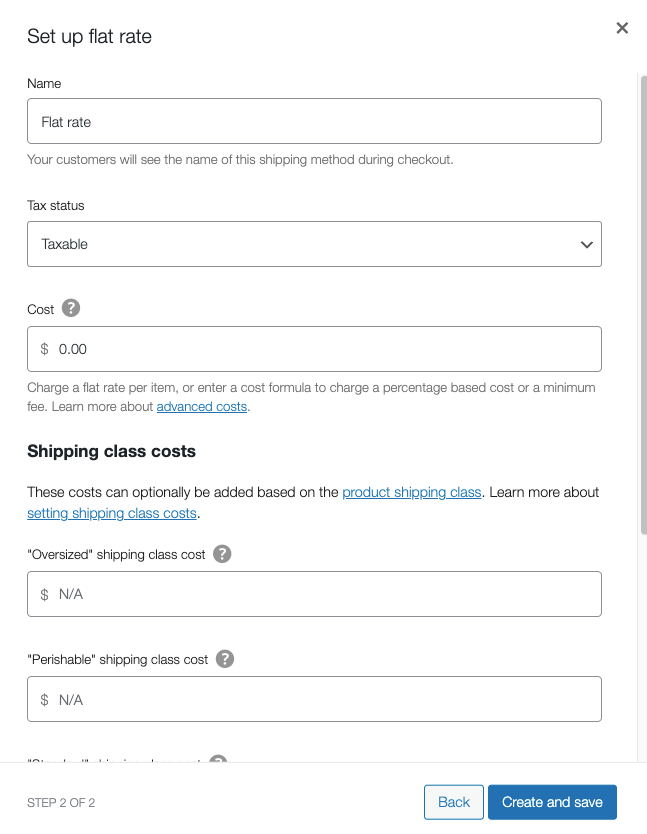
After choosing the Flat rate, WooCommerce will prompt you to enter the name, tax status, and shipping cost for the entire cart.
WooCommerce accepts custom flat shipping rates based on percentage or minimum fee using these parameters:
- [qty] ‒ the quantity of items in the cart.
- [cost] ‒ the cost per item for shipping.
- [fee percent=] ‒ the percentage fee to apply to the order.
- [min_fee=] ‒ the minimum fee to charge (even if the calculation results in a lower amount).
- [max_fee=] ‒ the maximum fee to charge (even if the calculation results in a higher amount).
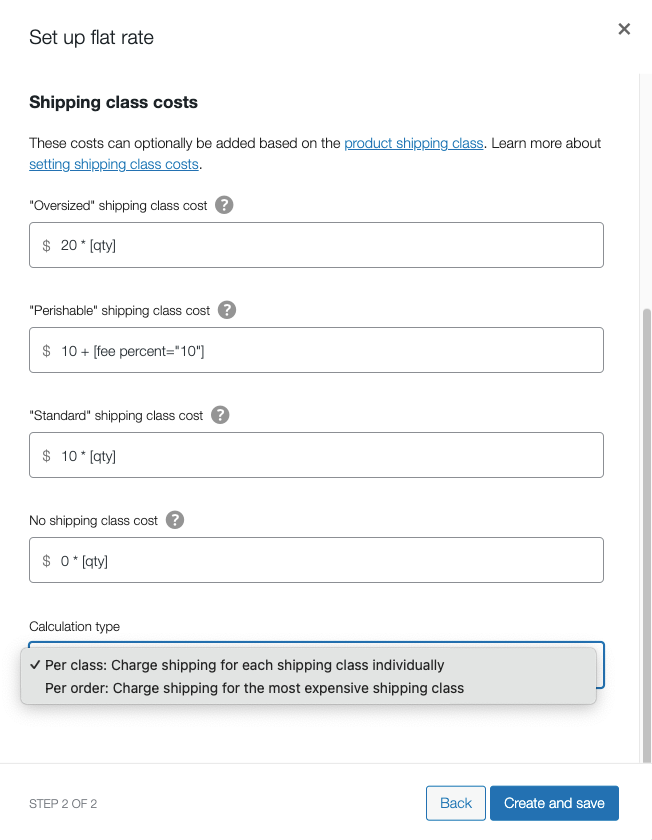
You can mix and match these parameters to create a custom cost formula. For example, if you want to charge a $10 flat rate + a 10% fee on the order total, you would write the formula as:
10 + [fee percent="10"]
To charge a flat rate of $10 + $2 for each item in the customer’s cart, add this formula:
10 + ( 2 * [qty] )
Check out WooCommerce’s documentation for other examples and tips on creating custom Cost formulas.
If your online store has shipping classes, you can also use those parameters in your Cost formula to create custom shipping rates for different types of products. This method lets you offer free shipping for certain products and flat rates for others.
Remember to set the Calculation type to apply rates per class or for the most expensive shipping class. Once you’re done, hit Create and save.
Additional option: Local pickup
If your WooCommerce store has a physical location, you can offer local pickup. This shipping method saves customers money and provides a convenient option for those nearby.
Local pickup relies on the WooCommerce Checkout block. To check whether your checkout page uses this block, go to WooCommerce → Shipping and find the Local pickup submenu.
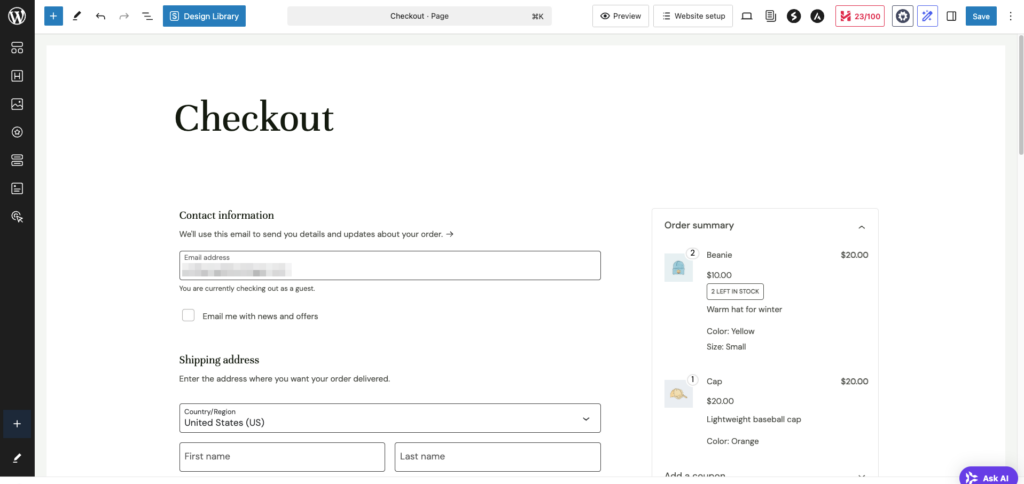
If you can’t find it, you must replace the old Checkout shortcode with the block. To do so, head to Pages and edit the Checkout page. Delete the Shortcode block and replace it with the Checkout block. Don’t forget to hit Save once you’re done.
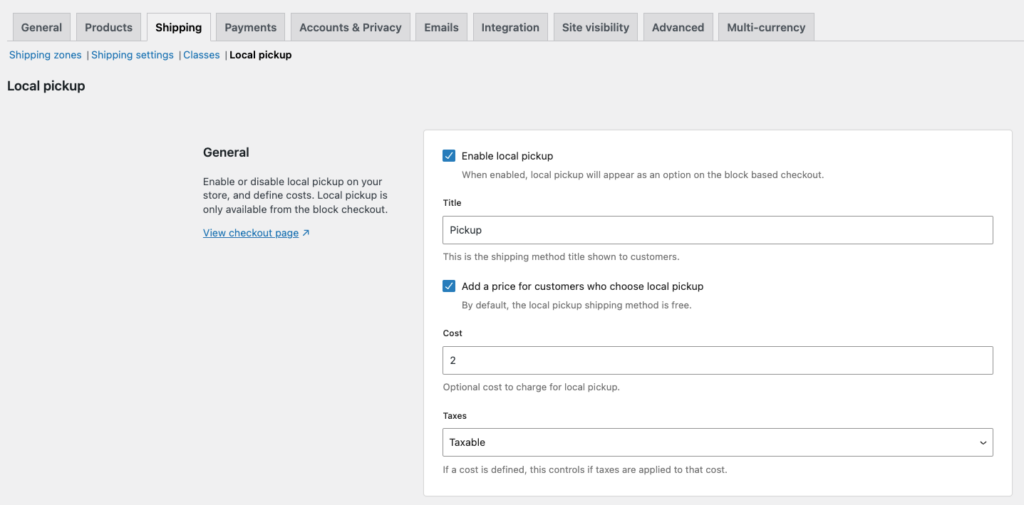
Once the Local pickup submenu appears on your end, click on it and check the Enable local pickup option. You can also rename the method to something specific by modifying the Title.
By default, the local pickup shipping method is free. To add a pickup cost, check the Add a price for customers who choose local pickup option and set the rate and taxes.
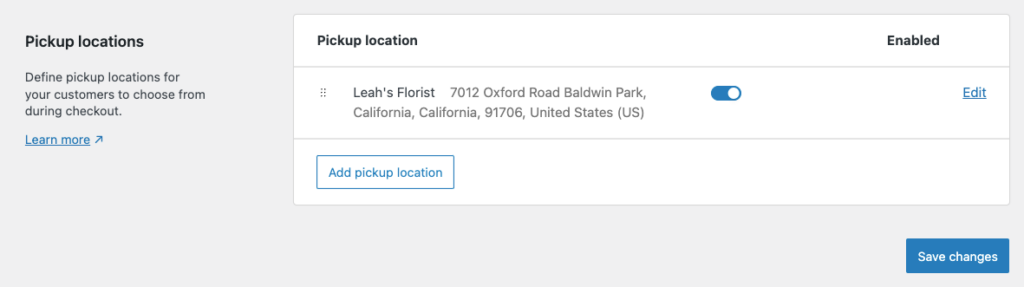
If you enable local pickup, WooCommerce will ask you to add a pickup location. Just scroll down to the Pickup locations section and click Add pickup location. Make sure to enter the correct address, as WooCommerce will use it to calculate taxes for the order.

The pickup locations section will display all the added locations. Click the toggle button to enable or disable each location. Once you’re done, click Save changes.
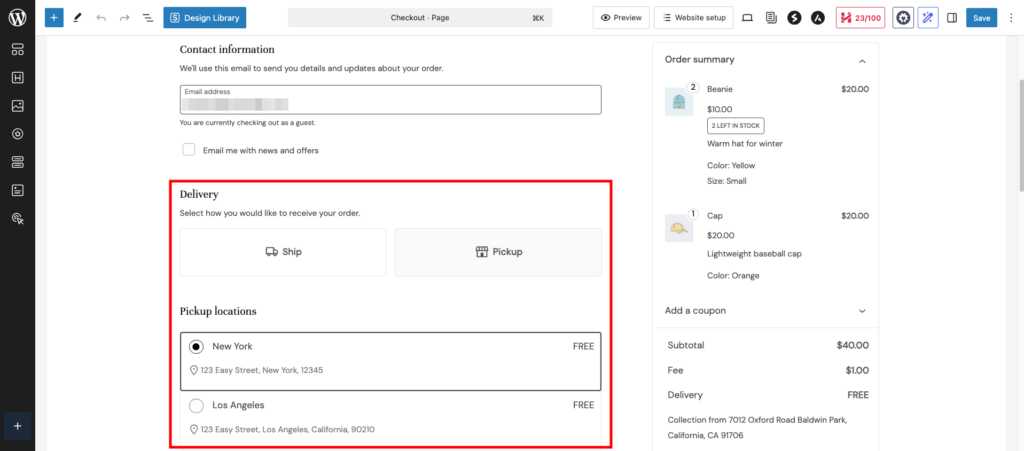
That’s it! The local pickup shipping method should now appear on your Checkout page.
Need help with WordPress Gutenberg?
Check out our WordPress Gutenberg guide for the best practices on using the block editor.
Recommended plugins to manage your shipping
Every WooCommerce store is unique, so its native shipping features might not cover all your needs. Luckily, many WordPress plugins can help you expand your shipping options and make delivery more flexible for your customers.
Here are some of the most popular WooCommerce shipping extensions and plugins:
- Table Rate Shipping ‒ set multiple shipping rates per zone based on conditions like price, shipping class, or weight and order them by priority.
- Conditional Shipping and Payments ‒ restricts shipping and payment options available on your store using conditional logic, such as user roles and the chosen billing country.
- Flat Rate Shipping for WooCommerce ‒ simplifies the native flat rate setup process while allowing you to add advanced rules at the same time, such as offering specific shipping methods during certain periods.
- AfterShip Tracking ‒ track shipments from various carriers directly from your dashboard and provide tracking links for customers to follow their orders.
Did you know?
Hostinger offers Smart WordPress auto-updates with all WooCommerce hosting plans, keeping your plugins as well as the core WordPress and themes updated and secure.
Conclusion
WooCommerce makes it easy to set up an online store and meets businesses’ various needs, including handling shipping. When you set up your shipping options properly, you can provide accurate rates, faster delivery, and a smoother experience for your customers ‒ making them more likely to shop with you again.
We’ve shown you how to set up shipping in WooCommerce. When applying them to your store, remember to:
- Set up zones based on where you’ll ship.
- Offer shipping methods that match your business needs and customer preferences.
- Use shipping classes to set custom rates and avoid overcharging or undercharging.
- Test your shipping setup to make sure shipping rates and options appear correctly during checkout.
Did you find this tutorial helpful? If you have any questions, leave us a comment below or contact our Customer Success team via 24/7 live chat. Good luck!
How to set up shipping in WooCommerce FAQ
What are the default shipping options in WooCommerce?
WooCommerce offers three default shipping options ‒ flat rate (charges a fixed fee), free shipping (no cost for eligible orders), and local pickup (customers collect orders in person). You can customize these options for each shipping zone to match your business needs.
How can I track my shipping in WooCommerce?
Since native WooCommerce shipping doesn’t include shipment tracking, you need to install a WooCommerce extension or plugin for tracking. Some of the most popular options include AfterShip Tracking, FedEx Shipping Method, and Advanced Shipment Tracking.
What is the difference between flat-rate shipping and free shipping?
Flat-rate shipping charges a fixed fee, no matter the order size or weight. Free shipping means the customer pays nothing for delivery, often offered as a promotion or for orders over a certain amount.

Jordana is a Senior Content Writer with a background in Information Systems. She has over five years of experience in WordPress and is casually dabbling with PHP and MySQL. Her passion for writing and technology drives her to create tutorials for anyone wanting to build their online presence. Follow her on LinkedIn.