How to import WooCommerce products: A comprehensive guide for store owners
Dec 02, 2025
/
Dennis H.
/
8 min Read

Managing product data is a top priority for WooCommerce store managers. Whether you’re launching a new shop, updating existing inventory, or moving from another platform, importing products can save you time and reduce errors.
In this WooCommerce tutorial, you’ll learn how product imports work, what data you can include, and which tools are available to help you do it.
We’ll cover both the built-in WooCommerce importer and a third-party plugin option so you can choose the right method for your needs.
Understanding WooCommerce product imports
In WooCommerce, product import is the process of uploading product data into your online store using a structured file, typically a CSV.
This method lets you add or update products quickly without having to create them manually one by one. Imports are especially useful when setting up a new store, switching platforms, or managing frequent product updates.
What data does a WooCommerce product import typically include?
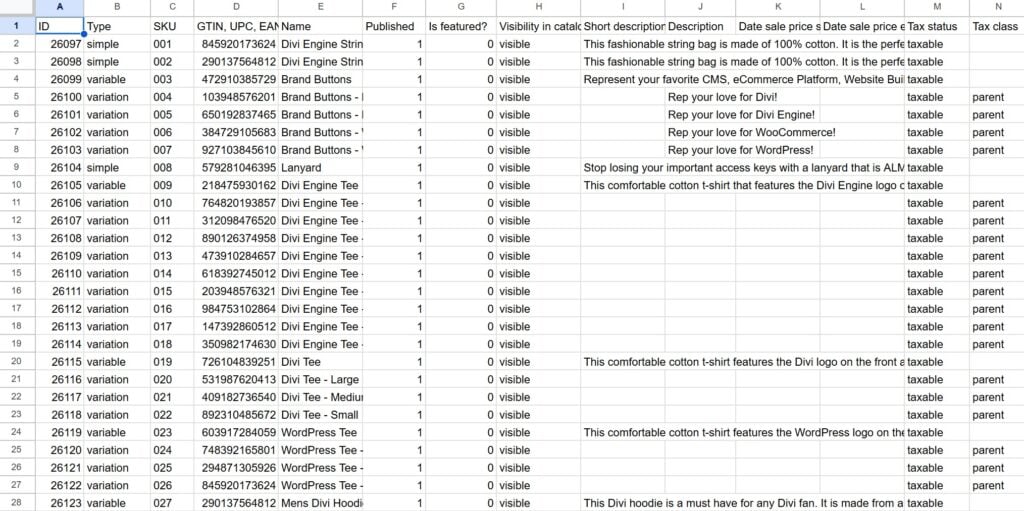
A well-executed product import contains all of the essential information that WooCommerce needs to create your product catalog:
- Product ID, name, price, and SKU
- Short and long product descriptions
- Product categories and tags
- Custom attributes (like size, color, or material)
- Stock quantity and status
- Featured and gallery images
- Metadata and custom fields
You can import all products at once or choose specific categories or product types, such as simple, variable, grouped, or external products.
Some plugins also let you apply filters or conditions to update only specific product records, like those low in stock or missing images.
What happens during a WooCommerce product import?
When importing product data, you’ll need to upload a structured file (such as a CSV) through the built-in importer or a third-party plugin. The tool will then scan and validate the file to make sure the data is properly formatted and matches WooCommerce’s product fields.
Next, you’ll map the columns in your file to specific WooCommerce fields (like SKU, price, or description). Once confirmed, the system will process the file and add or update the products in your store.
After the import finishes, the importer will display a confirmation message showing how many products were successfully imported and if there were any errors.
How do you prepare product data for import?
Import tools (whether the native WooCommerce tool or third-party plugins) require a CSV file formatted with specific rows and columns. Each row represents a product or variation, and each column corresponds to a product field, such as name, price, or SKU.
As long as your file follows this structure, WooCommerce can map the data and add it to your store in just a few steps.
What file formats are compatible with WooCommerce product imports?
The most common import file formats are CSV, XML, and XLS. CSV is the default format supported by WooCommerce’s native import tool and works well for spreadsheets.
XML is often used for system-to-system transfers and automated feeds, while XLS is perfect for users who prefer working directly in Excel.
Why you might need to import WooCommerce products
Importing products into WooCommerce can save time, keep you organized, and help avoid manual errors. It’s especially useful if you have a large or complex catalog.
Here are the most common reasons to import WooCommerce products:
- Initial store setup with bulk products. You can quickly populate your new store with hundreds or thousands of items.
- Migrating from another platform. Move your entire product catalog from Shopify, BigCommerce, or another platform to WooCommerce.
- Updating existing product information. Update prices, manage your inventory, or edit descriptions in bulk using a spreadsheet and then simply re-import the changes.
- Adding seasonal inventory or new product lines. Easily upload new batches of products during seasonal sales or product launches.
- Restoring products from a backup file. Re-import your saved product data to recover lost or corrupted listings.
- Synchronizing inventory across multiple stores. If you have multiple WooCommerce stores, you can keep your product data aligned between them.
Two methods to import WooCommerce products
There are two ways to import data to WooCommerce: the built-in CSV importer tool or a third-party party. Here we’ll look at both methods.
Before we explain how to import WooCommerce products, make sure you have a valid product data file. You can create your own using WooCommerce’s CSV import template or export your existing products following our guide on exporting WooCommerce products.
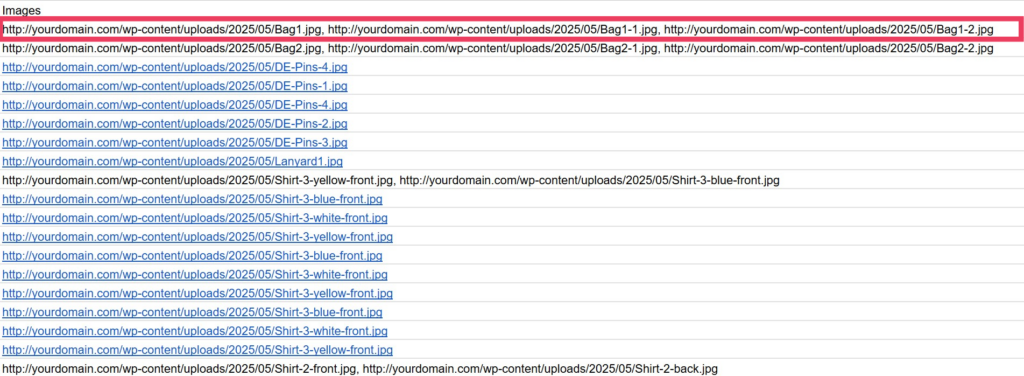
All of the data for your WooCommerce products should be typed into the CSV. The only exception are product images.
WooCommerce handles images during an import by referencing their URLs in the CSV file. It will download each image from the provided URL and add it to your Media Library. If the image URL is incorrect, broken, or leads to a restricted location, the product will be created, but no image will appear.
This means you’ll need to upload your images to a public server, such as your web host, Dropbox, or Google Drive, though any source with a public URL will do.
List your image URLs (separated by commas) in the Images column of your CSV. The first image in the list will be used as the featured image. Subsequent images in the list will be set as gallery images.
Method #1: Using the built-in WooCommerce import tool
WooCommerce includes a native import tool that lets you quickly add or update products to your store from a CSV.
The built-in importer is useful for basic product uploads, but it has some limitations. It only supports CSV files and doesn’t allow you to schedule imports or automate recurring updates. You also can’t import custom fields, product reviews, or customer data without a plugin.
- To access the import tool, log in to your WordPress dashboard. Navigate to Products → All Products.
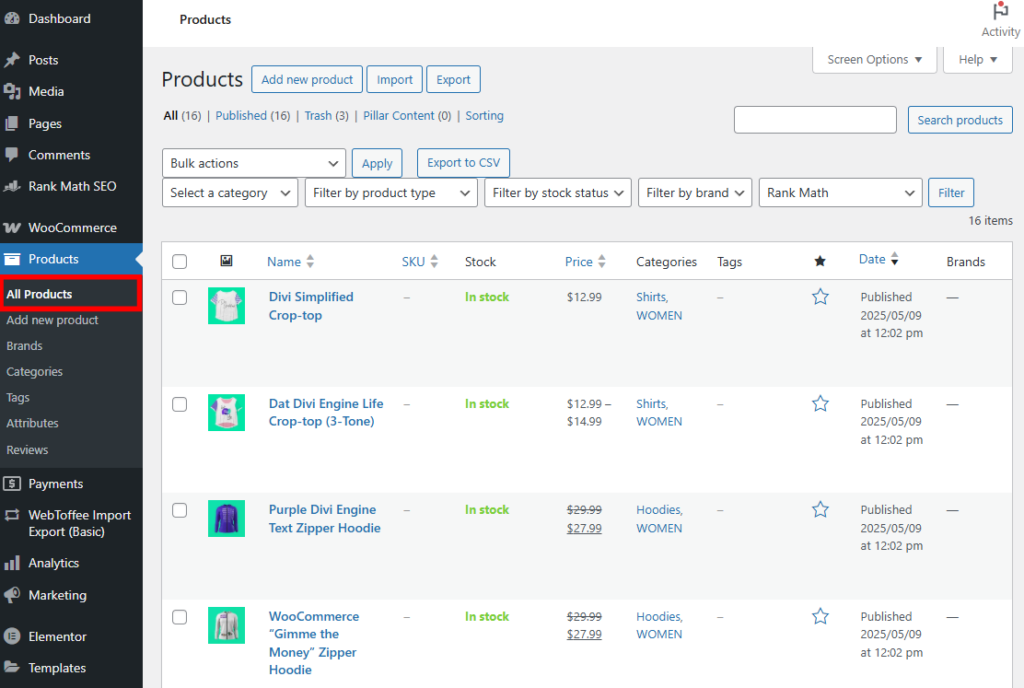
- Click the Import button at the top of the page.

- Click Choose File and select the file from your device.

- If you want to update existing products, check the box next to Update existing products. This will overwrite any of the values in products with matching IDs or SKUs.
- Click Show advanced options to see more options.
- Enter the path to a CSV that already exists on your web server.
- Define a CSV delimiter in case you use something other than commas.
- Use column mapping settings that were defined in a previous import.
- Choose the character encoding of the file. WooCommerce prefers UTF-8, but other formats will work, though you may see errors in the final import.

- Click Continue to move to the next step.

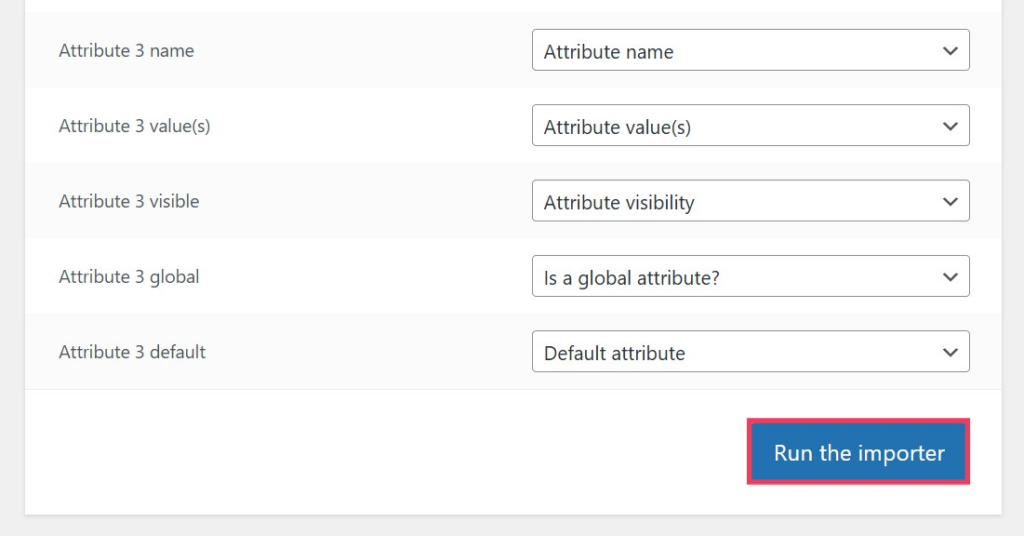
- Select columns from your CSV file to map against product fields. This helps WooCommerce put your data in the right places. Choose fields in the right column from the drop-down selectors that correspond with your CSV columns. You can also choose the “Do not import” option to ignore that field.

- Click Run the importer to start the import. The duration of the import will depend on the size of your product catalog.
- When the import is complete, a success message will tell you how many products and variations were correctly imported. Click View products to see your list of new and/or updated products.

Method #2: Using a plugin
If WooCommerce’s native import tool doesn’t meet your requirements, you’ll need to use a third-party import plugin.
The WordPress Plugin Directory has plenty of free import plugins, including popular options like WP All Import and CTX Feed. WooCommerce also has its own Product CSV Import Suite extension, although it’s not free. These tools offer a full suite of features for store owners.
In this guide, however, we’ll show you how to import WooCommerce products using the popular Product Import Export by WebToffee, one of the best WooCommerce plugins due its simplicity and range of features.

Product Import Export lets you import simple, grouped, and external/affiliate products. For variable products, you’ll need to upgrade to the premium version. It offers several more unique features:
- Filter by product category, stock status, and tags before exporting or importing.
- Organize and structure CSV columns in the import file with the drag-and-drop UI.
- Control the pace of the import process by processing in custom batches.
- Export Woocommerce products with equal ease, too.
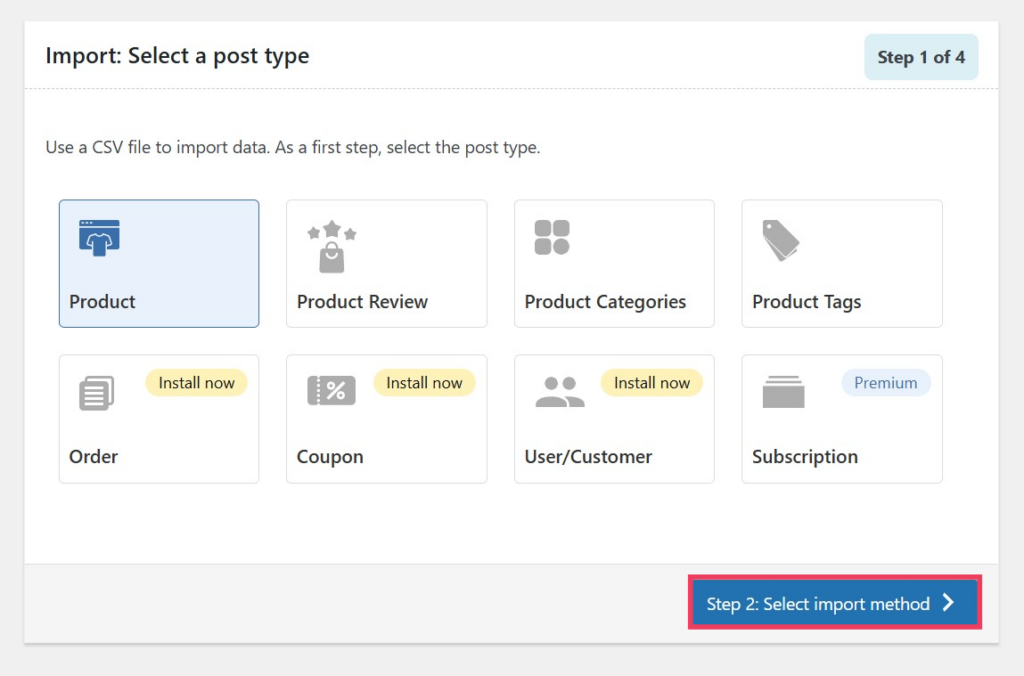
- After installing Product Import Export, navigate to WebToffee Import Export (Basic) → Import.

- Select the post type to import: products, reviews, categories, or tags. If you purchase the premium version of the plugin, you can also export orders, coupons, user/customer data, and subscriptions. After choosing a post type, click Select an import method.
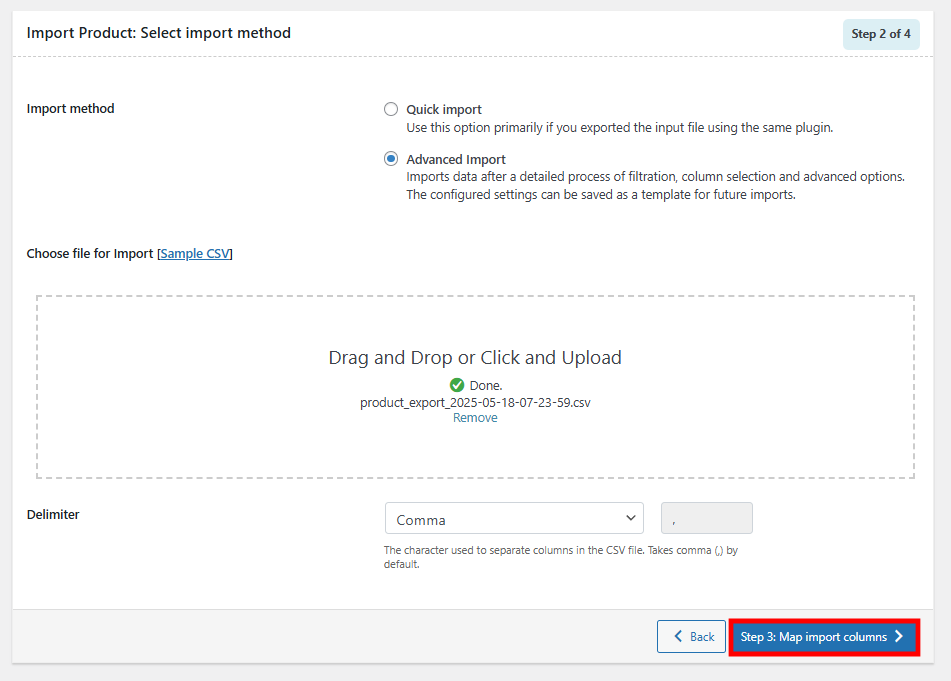
- Select an import method. You can choose Quick import, which is best if you’re using a CSV file that was exported from the same plugin, or Advanced import, which walks you through a comprehensive process of filtration, column selection, and other options.
- Drag your CSV into the upload space and click Import.

The next screen will show you the results of your import, including any errors that occurred. In our case, nine products were imported successfully without any errors.
If your import has errors, the plugin will explain why in the Message column. You can correct errors by fixing them in the CSV and re-importing or by simply editing the product through the WordPress dashboard.
- Click View Products when you’re satisfied.

- If you prefer to use the advanced options, return to the second step and select Advanced import. Drag your CSV into the upload space and click Map import columns.
- Review each row and make sure the product field (on the left) matches the columns of your CSV. If the column doesn’t match, select the appropriate column from the drop down menu. You can also uncheck a row to have that product field excluded from the import.
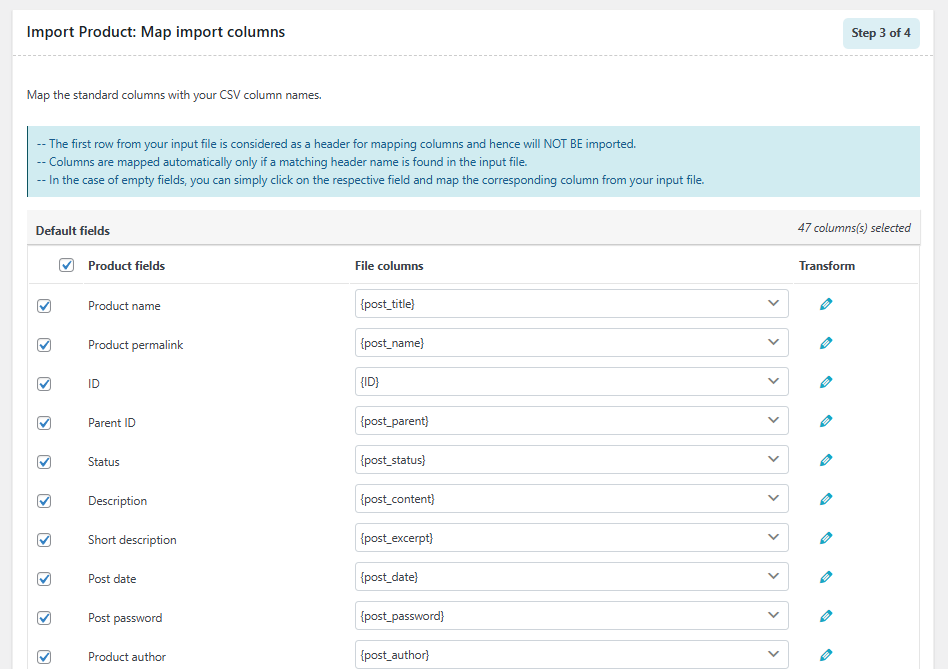
- Click Advanced options/Batch import to move to the next step.

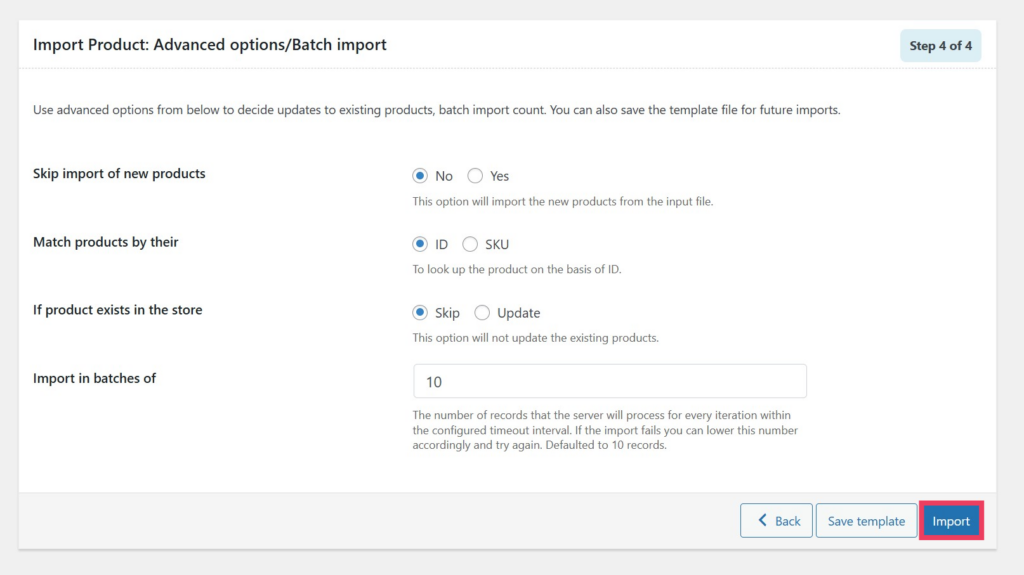
- Here, you’ll have to make a few simple choices. Decide if you’ll skip the import of new products, how you’ll match existing products to entries in your CSV (either by ID or SKU), what to do if a product already exists (skip or update), and how many records the server will process for each batch to avoid timeouts.
- Click Import when you’re ready to import your product data.
- Like the quick import, the plugin will show any errors in the Message column. Correct them in your CSV and re-import or edit them in the WordPress product editor. Click View Products when you’re satisfied.

Common WooCommerce import validation errors
When importing WooCommerce products, errors can occur if your file is missing required fields, contains formatting mistakes, or has invalid data. WooCommerce will display a summary of any errors after the import attempt. In some cases, it will highlight which rows failed and why.
Here are some common issues and how to fix them:
- Missing product name. Every product must have a name. Make sure this column is filled out for each row.
- Duplicate SKUs. SKUs must be unique. Check for duplicates and update them before importing.
- Broken image URLs. If images don’t appear, verify the links are correct, publicly accessible, and point directly to image files.
- Incorrect column mapping. Double-check that each column in your file is correctly mapped to the right WooCommerce field during the import preview.
- Invalid product types. Use valid product types like “simple,” “variable,” or “grouped.” Typos can cause the import to fail or create incomplete products.
To avoid issues, always review your import file in a spreadsheet tool first and use the preview step during import to confirm field mappings. For complex imports, consider using a plugin with advanced validation and error handling.

Conclusion
Importing products into WooCommerce is one of the most efficient ways to manage your store’s inventory. It’s useful for launching a new site, updating existing listings, or recovering from a backup. With the right file and tool, you can quickly bring in dozens or even thousands of products without manual work.
While the built-in WooCommerce import process handles basic tasks well, many third-party plugins give you more flexibility, control, and time-saving features, especially if you’re working with large catalogs or custom fields.
How to import WooCommerce products FAQ
How do I import WooCommerce products from another platform?
To import products from another platform like Shopify or BigCommerce, first export your product data as a CSV file. Then, format it to match WooCommerce’s structure or use a plugin like WP All Import to map the fields. Upload the file using the WooCommerce importer to bring the products into your store.
Can I import product variations with the built-in WooCommerce importer?
Yes, the built-in importer supports variable products and their variations. Each variation must be included in the CSV with proper parent and attribute information. Be sure to correctly map variation attributes like size or color and link them to their parent product using the same product ID or SKU during the import process.
How do I update existing products without creating duplicates?
To update existing products, include the correct SKU or product ID in your import file. WooCommerce uses these values to match and update existing records. If a matching product is found, it updates the data. If there’s no matching product, it creates a new product.
Can I schedule automatic product imports?
No, the built-in WooCommerce importer doesn’t support scheduling. To automate product imports, you’ll need a plugin like WP All Import or CTX Feed Pro. These tools allow scheduled tasks and recurring import configurations.
How do I import products with custom fields in WooCommerce?
The built-in importer does not support custom fields. To import products with custom metadata (such as additional specifications or plugin-generated fields) you’ll need a plugin like WP All Import or Product Import Export. These tools let you map custom fields manually during the import process.

Dennis Hammer is a content strategist, web developer, and WooCommerce store owner. He has extensive experience building and growing online stores for diverse audiences as well as crafting engaging and strategic storytelling content. Follow him on LinkedIn.