Set up a Linux VPN server using OpenVPN: connecting to devices and managing VPN
Mar 10, 2026
/
Ignas R.
/
9 min Read
A Virtual Private Network (VPN) secures users by creating a point-to-point connection that masks their internet traffic. Although paid VPN services are widely available, you may want to set up your own Linux VPN server with OpenVPN, a popular open-source option.
This tutorial will show you how to set up a Linux VPN server using OpenVPN. We will explain two methods – manual and automatic, using Hostinger’s operating system template.
You will also learn how to manage and test the tunnelling functionality. Moreover, we will also explain how to connect devices running various operating systems to the Linux VPN server.

Why Should You Use a Linux VPN Server
Using a VPN for Linux desktops and virtual private servers (VPSs) is one of the best ways to remain secure over the internet. Here are the key benefits of a Linux VPN server:
- Security – A VPN’s data encryption provides a higher VPS security level than a firewall. For example, the VPN will securely encrypt sensitive data like transactions.
- Remote access – many organizations only allow remote access through VPN to maintain security.
- Anonymity – a VPN masks a user’s actual IP address and perceived location from other parties, including the internet service provider (ISP). This ensures anonymity when browsing the internet.
- Unblock content – some VPNs let you bypass region-locked content. For instance, you may be able to access another Netflix locale’s library.
- Bypass ISP throttling – certain ISPs throttle internet speed and bandwidth. A VPN may be able to stop ISP throttling.
How to Install OpenVPN on a Linux VPN Server
In this section, we will demonstrate how to set up OpenVPN software on a VPS using an operating system template and commands. As both methods have the same outcome, choose whichever you prefer.
Prerequisites
To set up a Linux VPN server, ensure you have a compatible machine. While you can set it up on a local system, we recommend using a VPS hosting service since it is more affordable and simpler to manage.
When choosing a VPS hosting plan, ensure it works with your chosen software. For example, Hostinger KVM plans support various VPN solutions, providing flexibility and options for your needs.
In addition, your VPS must be accessible remotely via SSH and offer full root access to ensure a smooth installation process. At Hostinger, users can run commands on their server directly using the Browser Terminal feature.
Lastly, your system must allow TCP over port 943 and UDP on port 1194 via iptables or Uncomplicated Firewall (UFW). If you use Hostinger, you can do so by simply creating VPS firewall rules via hPanel or asking our AI assistant, Kodee, to open the necessary ports on your server.

Before proceeding with the VPN server installation, we recommend reading the OpenVPN documentation to learn more about the protocol.
Set Up a Linux VPN Server With OpenVPN Access Server
To manually set up OpenVPN on a Linux server, connect to your system using an SSH client like PuTTY or Hostinger’s Browser terminal. Find the login credentials under the SSH access tab on hPanel’s VPS overview menu.
Important! Instead of using root, switch to another account with superuser privileges when managing your server to avoid accidental destructive command execution.
Then, run the installation commands depending on your distribution:
Ubuntu and Debian derivatives
- Update the indexes using the following Linux command:
sudo apt update
- A net-tools package is needed to install OpenVPN successfully. If you don’t have it installed yet, enter the following command:
sudo apt -y install ca-certificates wget net-tools gnupg
- Download the client from the OpenVPN website. Copy the package link and download it using the wget command. A sample wget command for Ubuntu would look like this:
wget -qO - https://as-repository.openvpn.net/as-repo-public.gpg | apt-key add -
- Proceed with the command below:
echo "deb http://as-repository.openvpn.net/as/debian focal main">/etc/apt/sources.list.d/openvpn-as-repo.list
- Lastly, install the OpenVPN Access Server with the following command:
sudo apt update && apt -y install openvpn-as
CentOS and RHEL derivatives
OpenVPN installation for CentOS is simpler because it only consists of two commands:
yum -y install https://as-repository.openvpn.net/as-repo-centos9.rpm
yum -y install openvpn-as
Remember, the package URL differs if you are using other Red Hat Enterprise Linux (RHEL) derivatives.
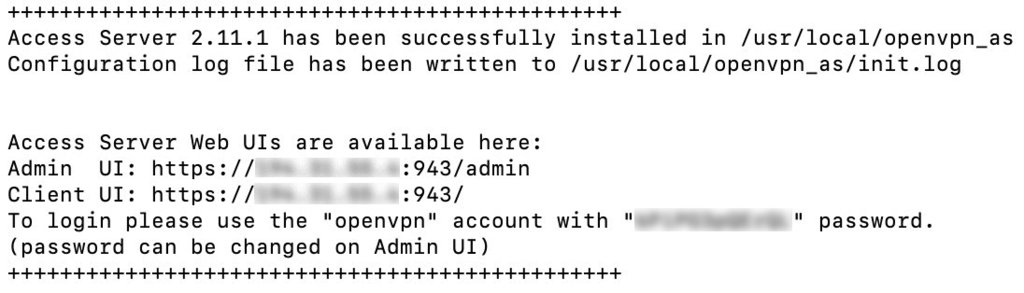
Once the installation is complete, you will see the Admin UI and the Client UI details. Remember the password since you will use it to log in.
Set Up a Linux VPN Server With Hostinger OpenVPN VPS Template
Installing OpenVPN might be complicated for VPS or Linux beginners as it requires executing various commands. However, Hostinger users can easily do so in one click using an operating system template, which is bundled with an application or control panel.
In addition to being simple, this method is safer since you won’t run wrong commands that might break your server. We provide different VPS operating system templates pre-installed with various software.
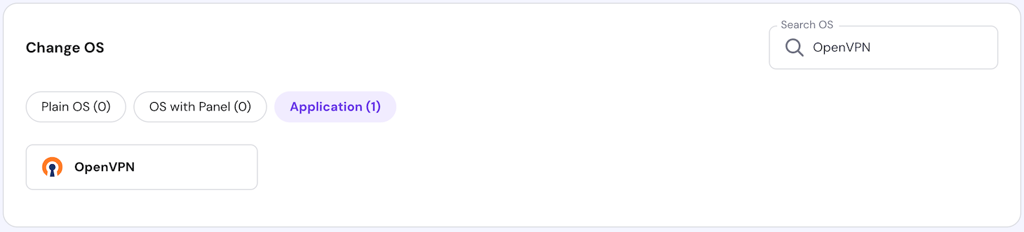
For example, we offer the Ubuntu 22.04 64bit with OpenVPN template. Follow these steps to install it:
- Log in to hPanel and click VPS on the top menu.
- Select the VPS you want to install OpenVPN on.
- Navigate to the sidebar → OS & Panels → Operating System.
- Click Applications.
- Select OpenVPN from the list and click Change OS.
Wait until the process is complete, which should take a few minutes. During the installation, you can’t access or modify your server.
Warning! Back up your VPS data before changing or reinstalling its operating system as the process will wipe all the data.
Remember, you can only use Ubuntu 22.04 if you install OpenVPN using this method. To run other distributions, you must set up the application and operating system separately using commands.
Set Up OpenVPN Dashboard and Account
Regardless of the installation method, you must configure the OpenVPN settings and account via the admin dashboard to complete the setup process. Here are the steps:
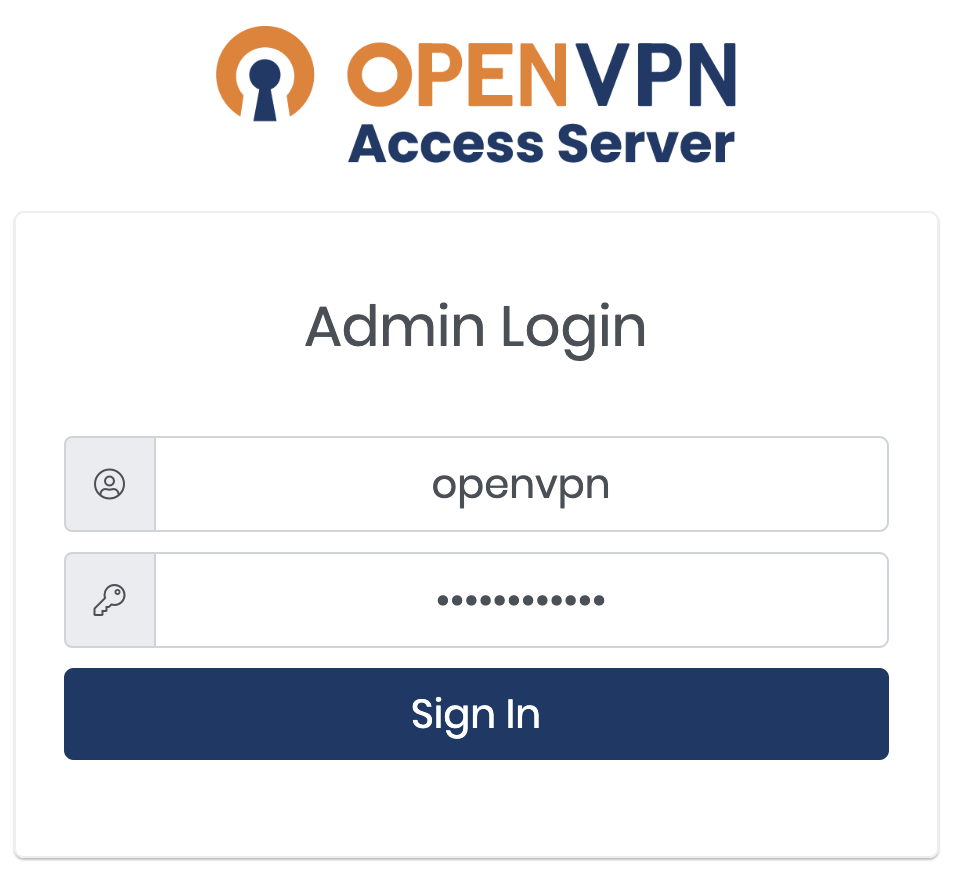
- Open the admin URL using your VPS IP address with 943 port and /admin subdomain. For example, it should look like https://185.185.185.185:943/admin.
- On the login page, enter the credentials shown in Terminal during the installation steps. If you use the template, enter openvpn as the username and use the password you provided when setting up the operating system. Click Sign In.
Pro Tip
If you see the Your connection is not private error, an SSL certificate may not be installed on the VPS server. Click Continue to the site to proceed to the web interface.
- Once logged in, you will see a Terms and Conditions page. Read it and press the Agree button to proceed. The next page will provide the OpenVPN configuration details and the server status.
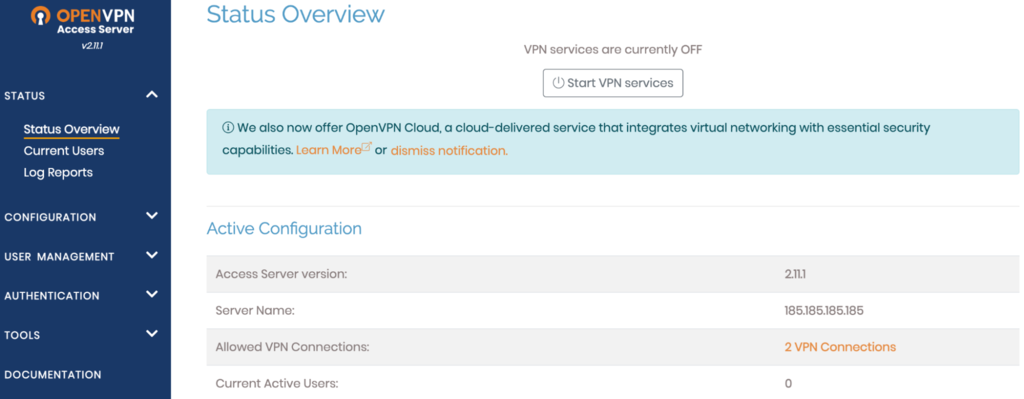
- Click the Start VPN services button on the OpenVPN Admin panel. The VPN service status should show as ON.

- The default OpenVPN settings are sufficient for normal use and compatible with macOS, Linux, Windows, Android, and iOS. However, if you want to tweak your Linux VPN server configuration, click Apply and Update Running Server to enable the changes.

Important! Keep in mind that the free version of OpenVPN allows up to two concurrent connections only.
Set Up OpenVPN Server Tunneling
A VPN tunnel is an encrypted connection between your device and the VPN. Follow these steps to enable it:
- To enable IP forwarding in your kernel, turn on traffic forwarding over IPv4 using the following command:
echo 'net.ipv4.ip_forward=1' | sudo tee -a /etc/sysctl.d/99-sysctl.conf
- To apply the changes, enter:
sudo sysctl -p
- Since the OpenVPN tunnel does not support simultaneous connections over IPv6 and IPv4 protocols, disable the latter by running these commands subsequently:
sudo sysctl -w net.ipv6.conf.all.disable_ipv6=1
sudo sysctl -w net.ipv6.conf.default.disable_ipv6=1
- To ensure IPv6 is disabled, turn it off manually by modifying the 99-sysctl.conf file in /etc/sysctl.d/ using a text editor like nano. To do so, run the following commands:
sudo cd /etc/sysctl.d/
sudo nano 99-sysctl.conf
- Set the following parameters inside the file. Press Ctrl + X, Y, and Enter to save the changes.
net.ipv6.conf.all.disable_ipv6 = 1
net.ipv6.conf.default.disable_ipv6 = 1
net.ipv6.conf.lo.disable_ipv6 = 1
- Activate the new settings using this command:
sysctl -p
- Open the /etc/hosts file using nano and add a hash sign (#) at the start of the IPv6 resolution line as shown below:
#::1 localhost ip6-localhost ip6-loopback
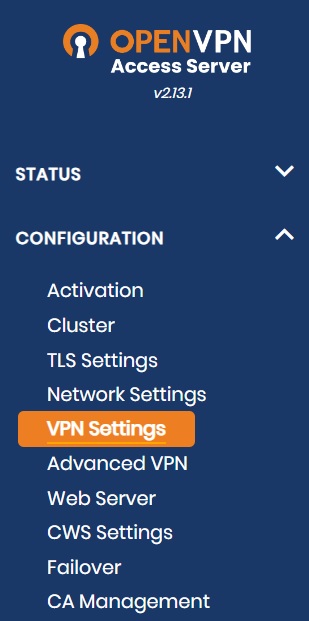
- Log in to the OpenVPN admin dashboard and open VPN Settings.
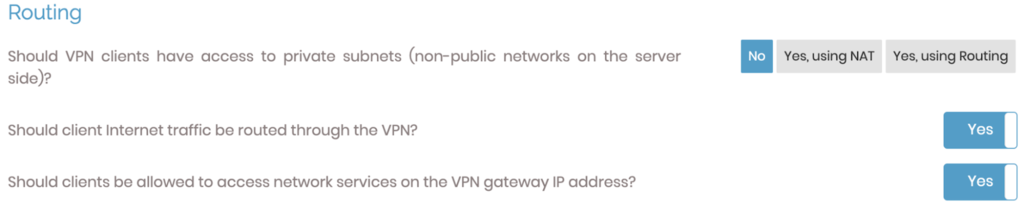
- In the Routing section, set the Should VPN clients have access to private subnets (non-public networks on the server side)? option to No. Then, set the Should client Internet traffic be routed through the VPN? option to Yes.
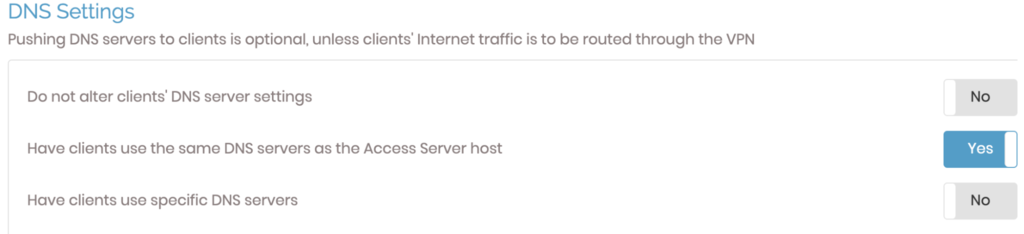
- To avoid any DNS leak, alter the DNS resolver settings. Enable the Have clients use the same DNS servers option.
- Save the new settings and click Update Running Server.
- Navigate to the Status tab. Click Stop and then Start to reboot the OpenVPN server.
How to Connect Linux VPN Server to Other Devices
Now that the server is running, users can connect devices to it. We’ll cover the most popular operating system options: Windows, macOS, Linux, Android, and iOS.
How to Install and Connect the OpenVPN Client for Windows
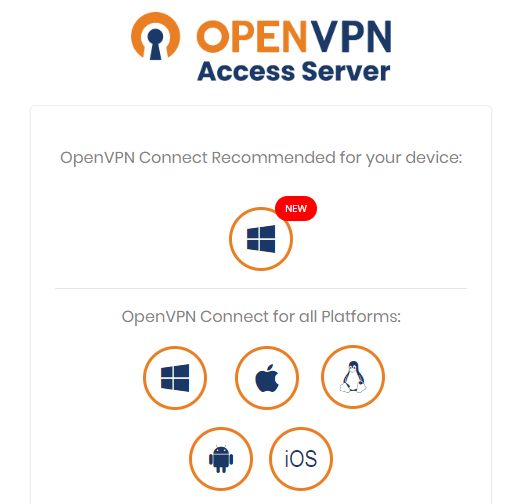
- Open the OpenVPN client URL: https://185.185.185.185:943/. Replace the IP address with your VPS’.
- Choose the Windows version of the client and run the installation.
- Once the installation is complete, a prompt will appear. Enter your OpenVPN username and password.
- Run OpenVPN from the Windows taskbar to disconnect, reconnect and view the connection status.
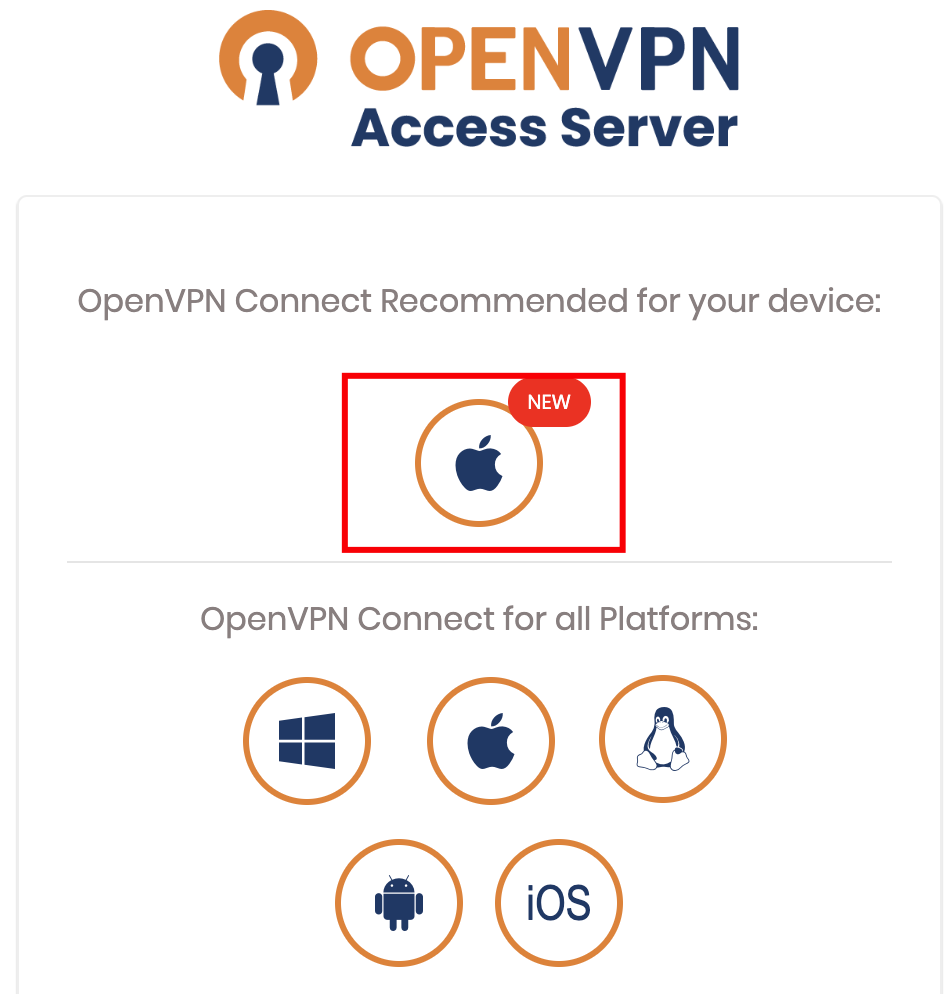
How to Install and Connect the OpenVPN Client for macOS
- Connect to the OpenVPN client UI and download the OpenVPN Connect software for macOS..
- Follow the macOS setup wizard procedure to complete the installation.
- A new OpenVPN icon on the macOS taskbar will appear. Right-click on this icon to see the different options.
- Click the Connect to option. A pop-up will prompt for your OpenVPN username and password. Enter the credentials.
- Click Connect to establish the Linux VPN server connection.
How to Install and Connect the OpenVPN Client for Linux
The client installation for Linux differs from Windows and macOS since it requires commands. Open Terminal by pressing Ctrl + Alt + T and follow these steps:
- Download and install the OpenVPN client software by running the package manager command. For Debian derivatives like Ubuntu, use:
sudo apt-get install openvpn
Meanwhile, run the following if you use CentOS 9 Stream or older:
sudo yum install openvpn
- Open the OpenVPN client UI and download the appropriate profile for your OS. You can also do so using the curl command with the download link.
- Copy the downloaded profile to /etc/openvpn and rename it to client.conf.
- Return to Terminal and start the OpenVPN Tunnel service by entering the following command:
sudo service openvpn start
- A prompt asking for your OpenVPN username and password will appear. Enter the correct credentials.
- Once the VPN interface is available, tun0 should show up in the existing network adapters list. To check it, run ipconfig or ip addr in Terminal.
How to Install and Connect the OpenVPN Client for Android
To connect to your OpenVPN Linux server from an Android device, open Google Play and install the OpenVPN Connect application.
Import a profile by entering the VPN server client URL, namely your VPS IP address with the OpenVPN port. Then, enter the following details:
- Port – 934 of your Linux VPN server.
- Username – the username set on your server. It is openvpn by default.
- Password – the password that Terminal displayed after successfully installing OpenVPN Access Server or the one you entered when setting up the VPS template.
Alternatively, use the client UI to import the OVPN file, which you must create first using the template within the /etc/openvpn/easy-rsa directory on your VPS.
How to Install and Connect the OpenVPN Client for iOS
To connect the OpenVPN client on iOS, download the OpenVPN Connect application from the App Store. Open the application and fill in all the required profile information or upload the profile file.
Refer to the previous section for the complete steps since configuring OpenVPN Connect on iOS is similar to Android.
How to Manage Linux VPN Server
Now that the VPN Access Server is running, check its configuration settings to ensure it works properly.
How to Manage Linux VPN Server Compression Settings
If you are connected to the VPN but cannot browse the Internet, check the OpenVPN logs at /var/log/openvpnas.log on the Access Server VPS.
If you find entries similar to the ones below, you are likely experiencing compression issues:
2022-03-23 18:24:05+0800 [-] OVPN 11 OUT: 'Mon Mar 23 08:59:05 2016 guest/123.45.67.89:55385 Bad compression stub decompression header byte: 251'
Resolve this error by disabling compression:
- Open the Admin console and click Advanced VPN.
- Go to Default Compression Settings and turn off Support compression on client VPN connections.

- Apply the changes and click on the Update Running Server option.
How to Add Users to a Linux VPN Server Running OpenVPN
Although you can create multiple accounts, the free OpenVPN client supports two concurrent user connections. You must purchase the paid plan to enable more users to use the server.
To add and manage users, open the Admin dashboard and follow these steps:
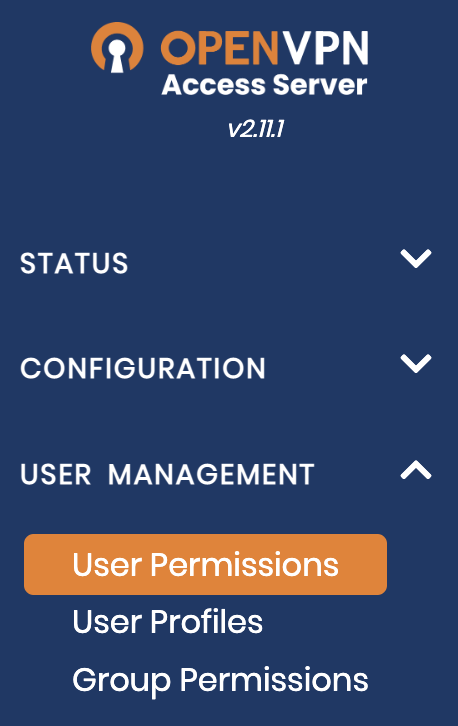
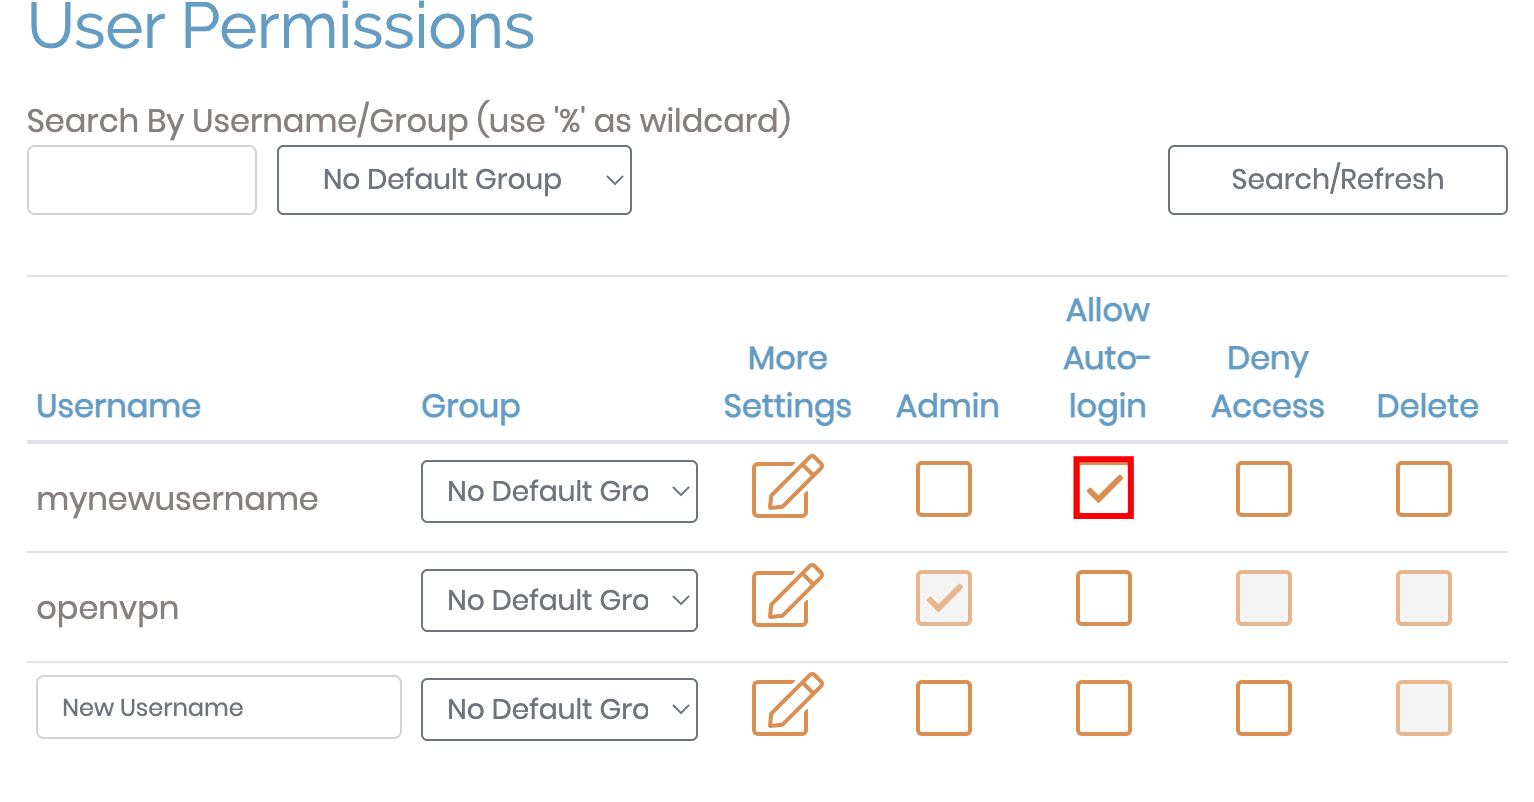
- Navigate to User Management → User Permissions.
- Enter the new username as shown below:

- For a new user, click More Settings to change other configurations like its password and permissions.
- Save the new settings and click Update Running Server.
How to Set Up Auto-Login Profiles for a Linux VPN Server With OpenVPN
OpenVPN lets you configure auto-login profiles, which will automatically route all non-local traffic via the VPN.
To set up auto-login, open the Admin dashboard and select User Permissions. Then, check the Allow Auto-login box on the profile you want to modify.
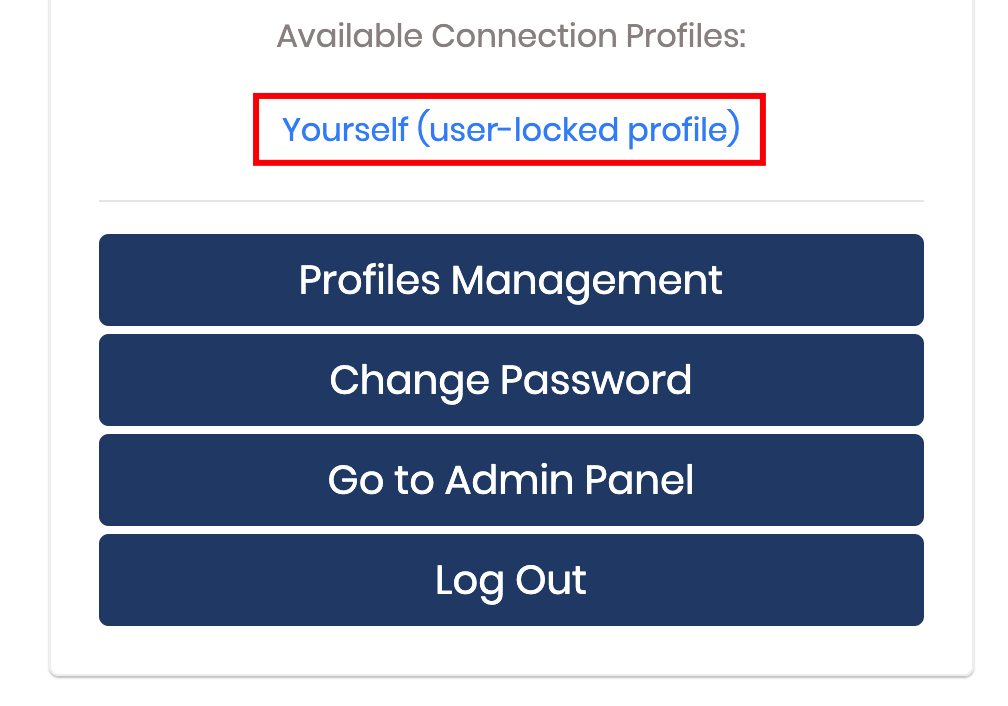
Alternatively, use User or Server-locked profiles to manually enable or disable the VPN.
How to Test a Linux VPN Server Running OpenVPN
Connect to the VPN client and check your IP to see if the OpenVPN server works as expected. You can use online tools like NordVPN’s What is My IP to check whether your IPv4 address changes.
Next, run a DNS leak test to check your OpenVPN server’s IPv4 address. On the website, choose the Extended test. The output should show the client devices’ DNS resolver IPs.
In addition, ensure the traffic uses the IPv4 protocol using Test your IPv6. The tool should display the server IP and a message stating that no IPv6 address was detected.
Conclusion
Setting up a VPN server can be beneficial, especially if you want to encrypt internet traffic and browse safely. In this article, we have explained how to configure one in a Linux VPS using OpenVPN.
To do so, download and install the software package using your package manager commands, like APT for Debian or yum for CentOS. Alternatively, Hostinger users can set it up in one click using a VPS template via hPanel.
We’ve also shown the OpenVPN server configuration procedure and client installations on various operating systems, including Windows, Linux, Android, iOS, and macOS.
We hope that you found this tutorial helpful. In case you have any questions, let us know in the comments section below.

Ignas takes great satisfaction in helping people tackle even the most complex technical issues. His current goal is to write easy-to-follow articles so that these issues will not happen at all. During his free time, Ignas likes to play video games and fix up things around his house.


Comments
0 responses