How to install and configure GitLab on Ubuntu: Using the Hostinger VPS template and commands
Mar 10, 2026
/
Aris S.
/
7 min Read

One of GitLab’s distinguishing features is that you can self-host it by installing it on a private server. This has several benefits, such as maintaining data integrity, enhancing security, and improving customizability.
However, if you’re unfamiliar with GitLab, installing the platform can be tricky due to various commands and dependencies.
In this article, we’ll explain how to install GitLab using two methods. The Hostinger OS template method is great for beginners, while more advanced users might prefer to do it manually.
Prerequisites for installing GitLab
To install GitLab, you need a host server that meets the hardware requirements. For example, GitLab recommends a system with 8 vCPU cores and 16 GB of RAM to host a repository with 1,000 users and 20 requests per second.
The Hostinger GitLab hosting KVM 8 plan is a great fit for these requirements. If your project is smaller, simply choose a plan with fewer resources and scale up as needed.
Upgrading your Hostinger VPS plan will only take a few minutes. And to top it all off, our system will automatically migrate your files and settings for a seamless process.

In addition to powerful hardware, Hostinger GitLab hosting comes with our Kodee AI assistant, which can write commands and guide you in configuring your system.
Hostinger’s weekly automatic backup and snapshot also ensures your GitLab repository data is safe. For maximum security, we provide tools like a malware scanner, a built-in firewall manager, and traffic filtering.
Lastly, we recommend pointing a domain to your VPS. If you haven’t done so, your GitLab web interface will only be accessible using your server’s IP address or hostname, which is inconvenient.
How to install GitLab using the Hostinger OS template
Hostinger VPS hosting users can easily install applications without commands using the OS templates. In addition to making the process more beginner-friendly, this method helps save time and minimizes potential misconfiguration errors.
Here are the GitLab installation steps using the Hostinger OS template:
- Log in to hPanel → sidebar → VPS → Manage.
- Navigate to the side menu → OS & Panel → Operating system.
- Go to the application tab and select Ubuntu 22.04 with GitLab. Alternatively, look it up using the search bar.
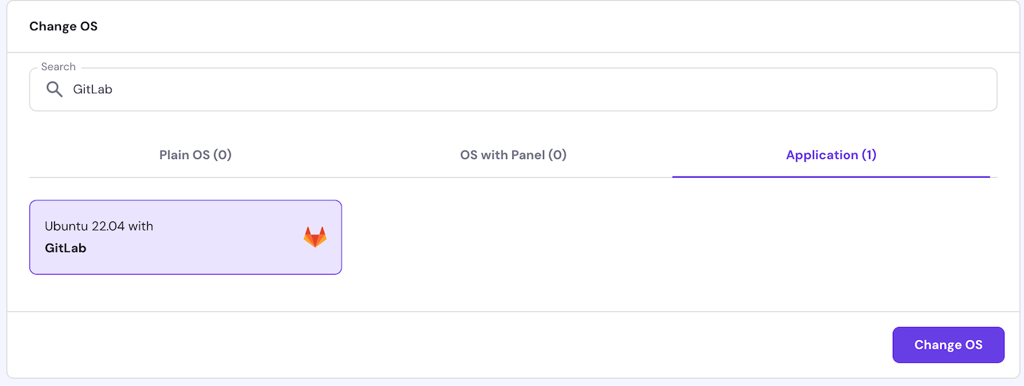
- Scroll down and click Change OS.
- Check the box to acknowledge the data deletion and hit Next.
- Enter a new panel password, which you will use to log in to the GitLab dashboard. Click Confirm.
Wait until the setup is complete, which should take about 10 minutes. During this process, our system will install the GitLab instance and configure its dependencies.
Moreover, this process will automatically create the root GitLab account, so you don’t need to make one manually.
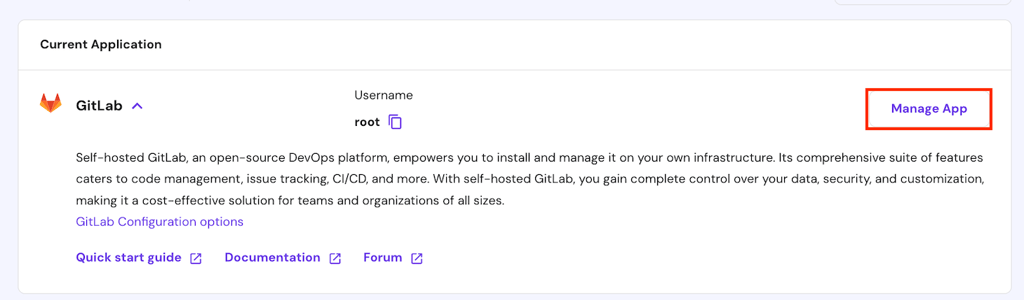
Once the setup is finished, click the Manage App button at the top of your screen to access the GitLab web interface. Log in as root using the panel password you created earlier.
How to install GitLab using commands
In this section, we will explain the steps to install a GitLab instance with commands. Before proceeding, access your VPS command-line interface (CLI) using an SSH client like PuTTY or terminal.
Need simpler remote access?
Hostinger users can access their server’s CLI through a web browser by clicking Browser terminal on the top right of the VPS management page. This also logs you in for a more efficient process.
1. Download and install dependencies
Dependencies are software components that an application needs to run properly. For example, GitLab dependencies include the Perl programming language and Postfix mail transfer agent.
Before installing dependencies, update your system repository to make sure you get the latest version of the packages:
sudo apt update
Install all the dependency packages using the following command:
sudo apt install -y ca-certificates curl openssh-server postfix tzdata perl
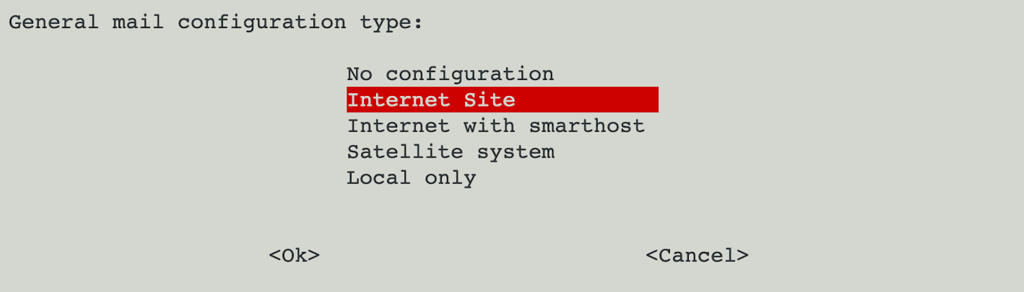
Your command-line interface might prompt a few questions during the Postfix installation. Select Internet Site as the configuration type and enter your system mail name.
2. Install GitLab
GitLab has two versions: the community and enterprise editions. This tutorial will explain how to install the enterprise edition. If you want to use the community one, replace gitlab-ee in the commands with gitlab-ce.
Run the following cURL command to add the GitLab repository to your system:
sudo curl https://packages.gitlab.com/install/repositories/gitlab/gitlab-ee/script.deb.sh | sudo bash
Your command-line interface should print a message confirming that the repository is set. Now, install the GitLab package using the following command:
sudo apt install gitlab-ee
The installation process might take a few minutes, depending on your internet speed.
3. Adjust the firewall rules
Change your server’s firewall settings to ensure your GitLab server accepts traffic. There are several ways to do this, but adjusting the Uncomplicated Firewall (UFW) is the most common in Ubuntu.
Run the following commands subsequently to allow traffic to the essential GitLab services:
sudo ufw allow http
sudo ufw allow https
sudo ufw allow OpenSSH
Now, run the following command to check if the new rules are set. You should see the previous services in the list:
sudo ufw status
If you don’t use UFW, you can add new firewall rules using iptables. Alternatively, Hostinger users can use a graphical user interface (GUI) via hPanel. Here are the steps:
- Go to hPanel → sidebar → VPS → Manage.
- Navigate to the side menu → Security → Firewall.
- Click Add Firewall on the top right corner.
- Enter a descriptive name for your firewall and click Create.
- Click the three-dot icon on the new firewall → Edit.
- Enter three rules with SSH, HTTP, and HTTPS as the protocol. For all of them, select Anywhere as the Source.
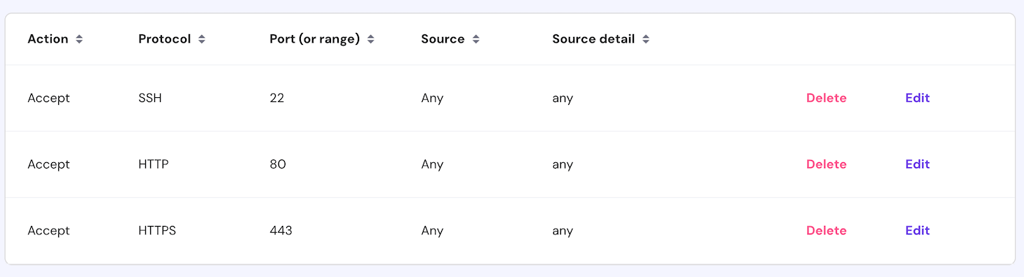
- Return to your firewall list and click the toggle to enable your GitLab rules.

Configure your firewall with Kodee
Hostinger VPS users can ask Kodee to set up a new firewall rule on your VPS. To do so, simply ask it, "Create and activate a firewall rule on my VPS that accepts connection on port 22, 80, and 443 from any IP address."
4. Configure GitLab settings
Before accessing the GitLab dashboard, you’ll want to change several settings to ensure the platform works properly and securely.
Start by changing the external_url parameter to make GitLab accessible using the domain name pointed to your VPS. To do so, run the following command to open the platform’s configuration file:
sudo nano /etc/gitlab/gitlab.rb
Find the external_url parameter and change the value to your domain address. We also recommend enabling the built-in Let’s Encrypt SSL by adding HTTPS like so:
external _url "https://domain.com"
Optionally, add your email address into the letsencrypt[] parameter if you want to receive the SSL expiration alert in your mailbox.
If you haven’t purchased a domain name, use your VPS IP address. By default, GitLab uses your server hostname as the external URL. However, it might not be resolved properly, potentially causing connectivity issues.
Press Ctrl + X, Y, and Enter to save the changes. Apply the new settings by rebooting the GitLab service using this command:
sudo gitlab-ctl reconfigure
During the installation, GitLab automatically sets up a root account and generates a random secure password. To check the credentials, run the following command:
sudo nano /etc/gitlab/initial_root_password
The root password is under the Password: parameter. You can change it directly by editing the file or through the GitLab dashboard, which we will explain in the next section.
Configure basic GitLab settings
Once you’ve installed GitLab, you should adjust several important settings from its dashboard. Open the web interface using your domain name and log in as the root account.
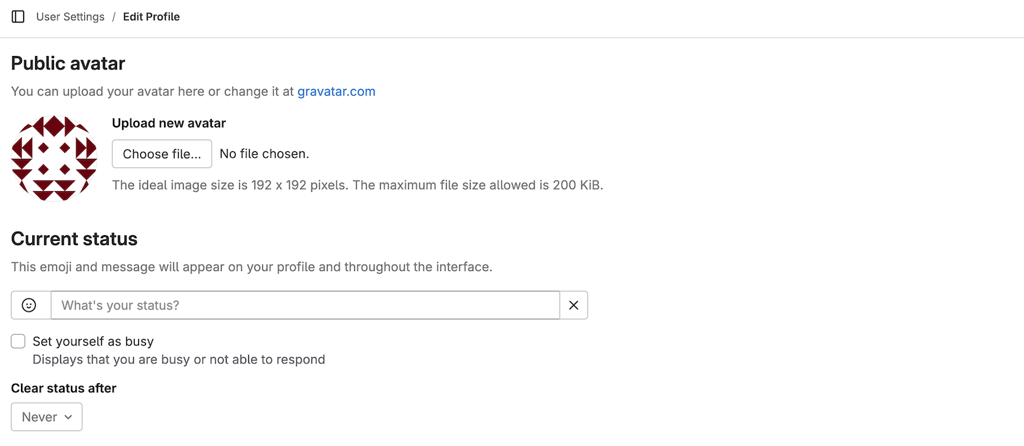
Add administrator information
Adjusting the administrator profile is crucial for security and communication. To do so, go to the left sidebar → profile picture → Edit profile. Change important information like your time zone, email addresses, and contact details.
You can also change the default root password by expanding the left-side menu and selecting Password. Enter your current and new passwords, then hit Save password to confirm.
Limit account creation
By default, anyone accessing your GitLab instance login page can create a new account. This presents security risks since cyber criminals or unauthorized parties might set up a malicious user to infiltrate your Git repositories.
To improve security, limit new account creation by going to the sidebar → Admin → side menu → Setting → General. Expand the Sign-up restriction menu and check the Require admin approval for new sign-ups box.

Now, the administrator must approve every new account creation, ensuring only legitimate users can access the dashboard.
Enable two-factor authentication (2FA)
Enforcing 2FA is an important GitLab best practice to ensure the safety of all accounts, even if their passwords are compromised.
To do so, open your GitLab admin menu → sidebar → General. Expand the Sign-in restrictions section and check Two-factor authentication as well as Enforce Two-Factor authentication for administrator users.
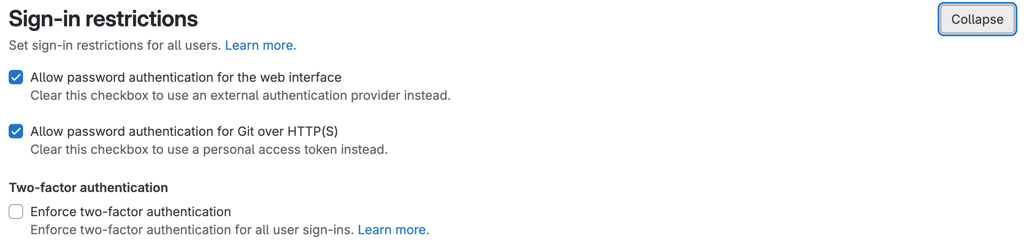
Change the Two-factor grace period value to zero if you want all accounts to set up 2FA immediately. By default, it is set to 48, meaning users can wait up to two days before doing so.
Add SSH key
Developers often interact with GitLab repositories using Git commands on their local computers. While you can do so via HTTPS using your account credentials, it can be inefficient and insecure.
Instead, set up an SSH key pair to link your local system to GitLab. It allows you to connect to the platform without entering the account login details, streamlining the process and improving security.
Here’s how to set one up and add it to GitLab:
- Generate a key pair on your local machine by running the following command.
ssh-keygen
- Run the following to check the public SSH key:
cat ~/.ssh/id_rsa.pub
- Copy the output and store it in a safe location.
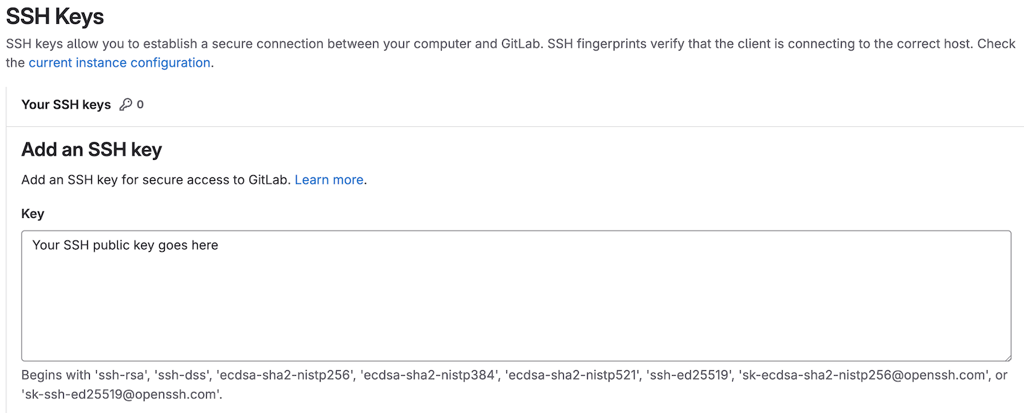
- Head to your GitLab dashboard → sidebar → Profile picture → Edit profile.
- Expand the left side menu and select SSH keys.
- Click Add new key.
- Paste your public SSH key and enter other information.
Suggested reading
Want to learn more about the basics of using GitLab? Check out our Gitlab tutorial to find out how to create a repository, manage an issue, and more.
Conclusion
You can self-host GitLab on a private server for improved security and isolation. The easiest way to install it is using the Hostinger OS template. Simply select the GitLab template on hPanel, and you will be set.
Alternatively, you can install GitLab manually using commands. To do so, connect to your server via SSH and follow these steps:
- Install all dependencies, including Perl, Postfix, and OpenSSH server.
- Download the official GitLab repository and install the package.
- Create firewall rules to allow HTTP, HTTPS, and SSH via UFW.
- Change the default GitLab URL and enforce the built-in SSL certificate.
Once installed, access the GitLab dashboard and change the basic settings. For example, you can add information about your admin account, enable the sign-in restrictions to improve security, and set up SSH keys.
How to install GitLab FAQ
What are the minimum system requirements for installing GitLab?
GitLab’s minimum requirements will vary depending on your project size. For a repository with 1,000 users and 20 requests per second, GitLab recommends a server with 8 vCPU cores and 16 GB of RAM.
Can I install GitLab on a different Linux distribution?
Yes, you can install GitLab on any distribution, including Debian, Ubuntu, openSUSE, and AlmaLinux. However, it might not support older operating systems, like Ubuntu 18.04. Note that the Hostinger GitLab OS template is pre-packaged with Ubuntu, meaning you can’t choose other distros.
Is it possible to upgrade GitLab after installation?
Yes, you can upgrade GitLab to a newer version after installation using commands. To do so, back up all your repository files and download the new version using your distro’s package manager command. The GitLab dashboard is inaccessible during the upgrade process

Aris is a Content Writer specializing in Linux and WordPress development. He has a passion for networking, front-end web development, and server administration. By combining his IT and writing experience, Aris creates content that helps people easily understand complex technical topics to start their online journey. Follow him on LinkedIn.


Comments
0 responses