GitLab tutorial: How to use GitLab for project management and CI/CD
Mar 10, 2026
/
Aris S.
/
10 min Read

GitLab is a powerful Git repository platform that helps improve development efficiency through version control, branching, as well as continuous integration and continuous delivery (CI/CD).
In this GitLab tutorial, we will explain all about this platform. We will show you how to navigate its dashboard, set up a CI/CD pipeline, and use commands for different tasks. You will also learn several advanced techniques, like using webhooks and GitLab Pages.
Setting up GitLab
First, purchase a GitLab hosting plan from a provider like Hostinger. Alternatively, you can install GitLab manually on your personal machine.
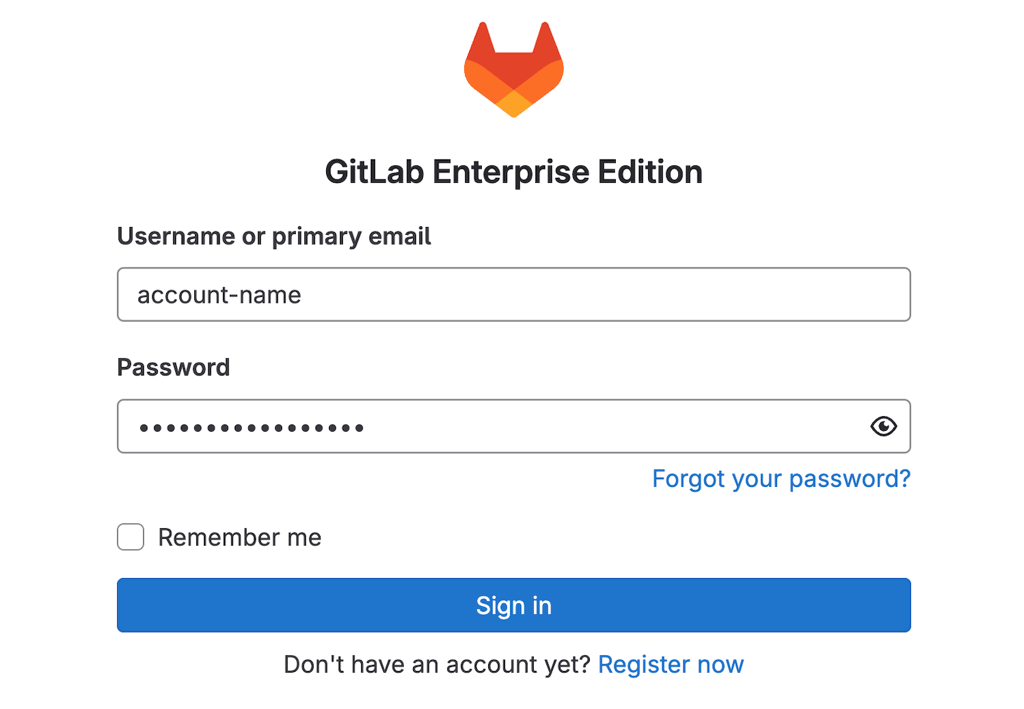
Then, create a GitLab account to access the dashboard. Open GitLab by entering your server’s IP address into a web browser and then sign up or log in to your account.
Hostinger users can create an account directly from hPanel by entering a new password during the GitLab template installation process. To obtain or reset the login credentials, go to the Panel access tab on hPanel’s VPS overview page.

Important: Changing external URL
Configuring several tools in GitLab requires communication between your local computer and its host server. If the address is incorrect, your VPS might become unreachable.
This issue commonly occurs if you self-host GitLab since this platform will address your server using its hostname by default. Sometimes, the hostname won’t resolve to the corresponding IP address.
To avoid this error, assign your server’s domain name or IP address to GitLab. Here’s how to do so:
- Connect to your server using an SSH client like PuTTY, terminal, or Hostinger Browser terminal.
- Open the GitLab configuration file using the following command:
sudo nano /etc/gitlab/gitlab.rb
- Find the external_url parameter, which is typically located at the bottom of the file.
- Replace the value with your server’s IP address or domain name.
- Hit Ctrl + X, Y, and Enter to save the change.
- Reload your GitLab using the following command:
sudo gitlab-ctl reconfigure
Wait a few minutes for the GitLab to reboot, and you should be able to access the dashboard.
Navigating GitLab
Upon logging in to GitHub for the first time, you will see the main welcome screen, like the following. Here, you can find menus for basic tasks, like creating a new project and adding another user.

From the left sidebar, you can quickly jump to different menus by clicking on their buttons or searching them. If you can’t find this side menu, put your cursor to the leftmost side of your screen or click the Keep sidebar visible toggle on the top left corner.
Let’s create a new project by clicking the Create a Project button. Then, select how to populate the new project – import data from another platform manually or use the provided template. For now, create a blank one.
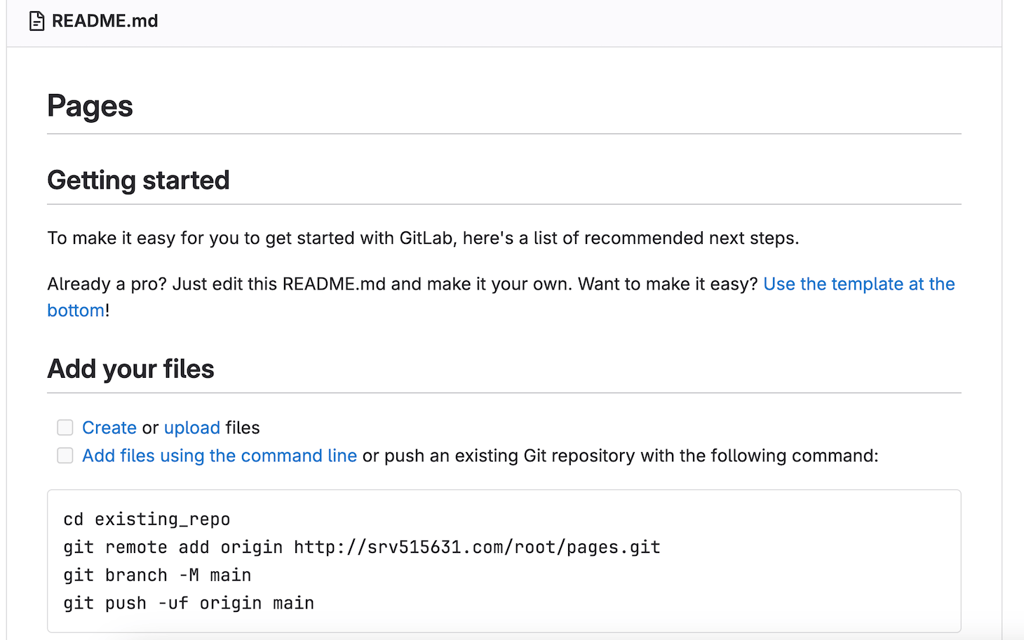
Enter the necessary details and click Create project. Add your project files by uploading them through the dashboard, creating new ones, or pushing existing Git repositories with commands. GitLab provides steps to do so in your new project’s README file.
One of the best GitLab practices when creating a project is structuring your files in a folder. You can also categorize multiple projects into a group, which is accessible only to team members with the correct permissions.
If you are inside a project, the sidebar will show menus for managing it. The most basic one is organizing the repository, like changing its name, adding a new icon, or setting new topic tags. You can adjust this information by going to the sidebar → Settings → General.
Important! Remember to create private repositories for your closed-source project since the public ones are accessible by all users online.
Creating merge requests
Before pushing changes to a project’s repository, developers will send a merge request. After the reviewer checks the proposed modifications, they will approve the requests, pushing the code into the main codebase.
In GitLab, you can create merge requests directly or based on an issue. We recommend setting up an issue first since it helps you easily check the changes and avoid further errors. Here’s how to do so:
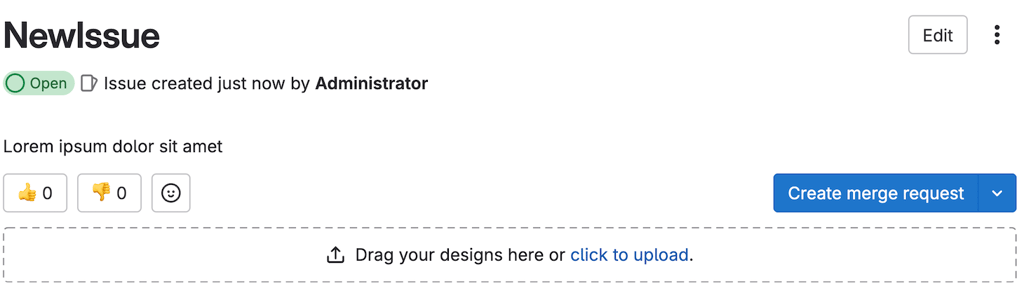
- Open your GitLab project → sidebar → Issues. Click New issue.
- Enter information about the issue, including the assignee, deadline, and labels. Click Create issue to confirm.
- Let’s say you have worked on that issue and are ready to push the changes. Click Create merge request.
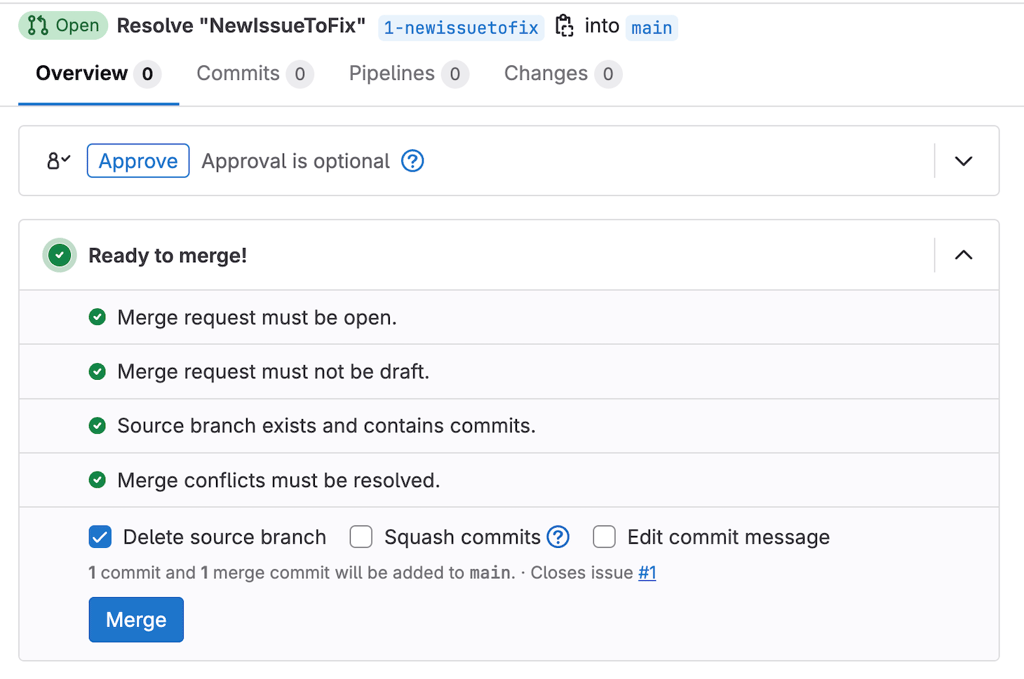
- Enter information about the new request. Click Create merge request to confirm.
That’s it. Note that you can only approve a merge request with at least a commit. Otherwise, you can only close it, leaving the issue unresolved.
If you set the commited change as a draft, mark it as ready first. Once GitLab shows a ready message, you can approve the request and merge the code by clicking their buttons.
Once the process is complete, GitLab will automatically close the issue and request. To reaccess it, go to the sidebar and click Issues or Requests, depending on what you want to check. Then, select the Closed tab.
Using GitLab automation
GitLab has a robust built-in feature that lets you configure a CI/CD pipeline and runner for task automation.
To configure task automation, we need a runner – an agent that executes specific tasks, known as jobs, specified in your CI/CD pipeline. To begin, install the GitLab Runner utility on your local machine.
The steps vary greatly depending on your operating system. For example, here’s how to do so in Debian-based distros like Ubuntu:
- Access the GitLab Runner index to find the latest filename and version.
- Open your local system’s terminal by pressing Ctrl + Alt + T or accessing it from the application launcher.
- Enter the following command. Replace the URL according to the filename you want to download:
sudo curl -LJO "https://s3.dualstack.us-east-1.amazonaws.com/gitlab-runner-downloads/latest/deb/gitlab-runner_amd64.deb"
- Make the new filename executable using the following command:
sudo chmod +x /usr/local/bin/gitlab-runner
- Run the following commands one by one to install and activate GitLab Runner:
cd ~

gitlab-runner install

gitlab-runner start
- Restart your computer to apply the changes.
Important! When choosing the runner from the index, consider the CPU architecture code. For example, choose AMD64 if you are using a 64-bit processor. Meanwhile, download ARM64 if you use ARM-based chips like the Apple M series.
Now, we can create a runner via the GitLab dashboard. To start, make a new blank project by navigating to the sidebar → Projects → New project.
Then, create a new file called .gitlab-ci.yml. It is where you will specify all the jobs and how the runners should act in a specific scenario, like an error. For example, we will add the following script to create a simple pipeline with two jobs – build and test:
stages:

  - build

  - test

job_build:

  stage: build

  script:

    - echo "Building the project"

job_test:

  stage: test

  script:

    - echo "Running tests"
Commit the changes. Note that the steps depend on whether you use the built-in integrated development environment (IDE) or the text editor. Once the GitLab pipeline setup is complete, we can proceed with the runner creation:
- From your project page, navigate to the sidebar → Settings → CI/CD.
- Find the Runners section, click Expand, and hit New project runner.
- In the creation menu, enter the tags for your runner to assign which jobs it is responsible for. You can also assign untagged jobs by checking the Run untagged jobs box.
- Click Create runner.
- GitLab will redirect you to the runner registration page. Select your local system’s operating system.
- Open your local system’s command line. Enter the command you obtain from the GitLab runner configuration page, which might look like the following:
gitlab-runner register --url http://hostname.com --token abc-defg123456
- Your command-line interface (CLI) will ask you to enter the GitLab instance URL. Hit Enter to use the default value, which is your server hostname.
- Add a description for your new runner. Hit Enter.
- Choose an executor – the tool that will handle your build process in different environments. We’ll use shell as it is the default.
- Enter the following command to start the new runner:
gitlab-runner run
Return to GitLab, and you should see a message confirming that you have successfully set up a runner. If you go to your project sidebar → Settings → CI/CD → Runners, the new runner will have a green dot indicating its online status.

Important<strong>Important!</strong>If the runner registration page is unreachable, check if your GitLab URL uses a hostname. If so, try replacing it with your server’s IP address. If you encounter this issue, set your IP address or domain name as the default external URL.
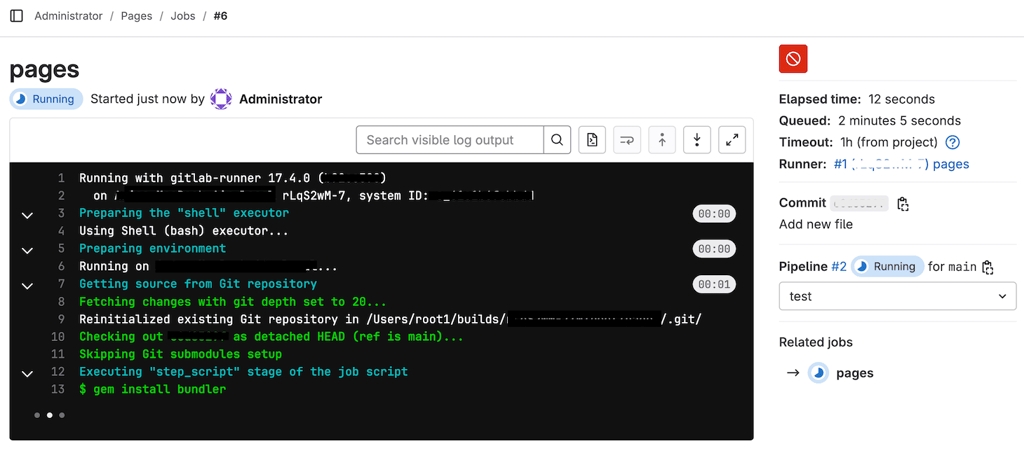
After setting up your CI/CD pipeline and runner, check whether it works properly. To do so, go to your project dashboard → sidebar → Build → Pipelines. Select a job, and you should see the execution log.
Managing issues and milestones
Issues
Issues in GitLab are crucial for task division and setting up goals. There are different ways to create a new one, including the method we explained in the previous Creating merge request section.
You can also create one from another issue or incident. To do so, open an issue, click the three-dot icon on the top right, and click New related issue. Enter the required information and make sure to check the Relate to issue # box.
To change settings like the assignee, labels, deadlines, and confidentiality, simply open the issue and click the respective menu on the right sidebar. You can also do so in bulk by going to your project’s sidebar → Plan → issue and clicking Bulk edit on the top right.
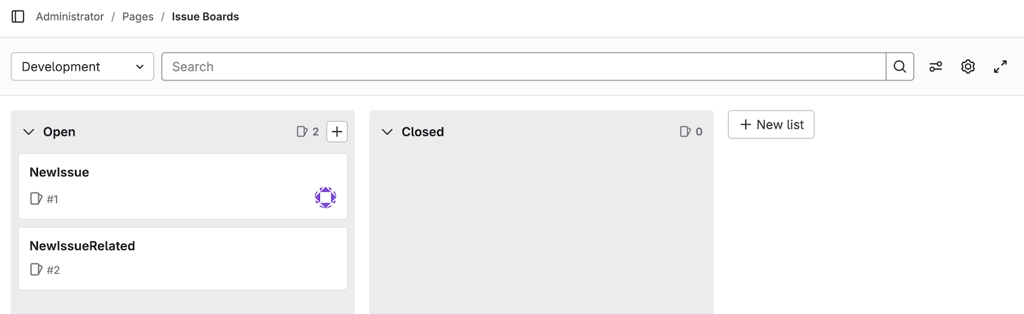
If your team members collaborate on a complex project with hundreds of issues, organize them using the Issue boards. On this page, GitLab classifies the issues based on their labels to simplify navigation.
From this board, you can also create an issue by clicking the plus button on the list. To organize issues, simply drag and drop them onto different columns.
Milestone
You can group issues and merge requests into a milestone to track the progress of a goal more easily. For example, you can set a milestone as a target to release a new feature, with the issues covering different services to integrate.
To create a milestone, open your project’s sidebar → Plan → Milestones → New milestone. Enter its information, including the title, start date, and deadline. Click Create milestone to confirm.

Now, open your issue and go to the Milestone menu on the right sidebar. Assign your new milestone, and its name should show up under the issues on the list or board.
Most common GitLab commands
Like other Git platforms, commands are essential for interacting with your GitLab project. For advanced users, these utilities let them manage repositories more efficiently without opening the GitLab web application.
Here are the most important Git commands:
- Git commit – saves the changes you made as a snapshot called commit. Using the -m option, you can add a description of the modification.
- Git clone – copies a specific repository and creates a new working directory containing all its data.
- Git add – specifies the files to push during the next commit.
- Git blame – shows the author who modified specific lines in a file.
- Git branch – manages branches in your repository, including listing, deleting, creating, and renaming them.
- Git merge – combines a new change from a branch to the main codebase.
- Git fetch – updates your local repository without altering the current branch.
You can run these commands on various areas depending on your development environment. For example, execute them on your IDE terminal or local machine’s command-line interface.
Remember, your system must have Git installed to use these commands. Windows users can set it up by downloading and extracting the installer package from the official website. Meanwhile, this software is pre-installed in most MacOS operating systems.
In Linux, install Git using your package manager command. For example, enter the following if you are using Ubuntu or other Debian-based distros:
sudo apt install git
GitLab also has additional commands specifically for managing runners. The syntax looks as follows:
gitlab-runner [task] [option]
The acceptable tasks and their functions are:
- Register – sets a runner active.
- Start – enables a specific runner.
- Stop – terminates a particular runner.
- Unregister – disables a runner.
We recommend reading the GitLab Runner documentation to learn more about the command usage. You can also check this utility’s manual by running the following in your CLI:
gitlab-runner --help
Advanced GitLab features
GitLab has several advanced features that can help you handle various tasks. Here are two of the most common ones.
Integrating Webhooks for automation
Webhooks are HTTP callback functions that run when a specific event occurs. Unlike runners, you use them to automate more general tasks instead of complex jobs within your CI/CD pipeline.
For example, you can set a webhook to trigger CI/CD jobs, update issues, or deploy your applications to the live environment. Moreover, it lets you connect external applications, including alerting platforms like Twillo.
You can create a webhook for groups or projects using the same steps. Here’s how to do so:
- Open your project or group and navigate to the sidebar → Settings → Webhooks.
- Click Add new webhook.
- Enter the webhook URL endpoint, which is obtainable from the platforms or services you want to connect.
- Enter information like the webhook name or description.
- In the Event section, check GitLab events that your webhook will trigger.
- Click Add webhook to confirm.
Test the new webhook to ensure it works properly. To do so, open your project or group page and navigate to the sidebar → Settings → Webhooks. Scroll down to the list of webhooks. Click Test and select the type of event you want to trigger.
Using GitLab Pages for web hosting
The GitLab Pages platform lets you host a static site for free directly from your GitLab repository. It is excellent for simple projects with small traffic, like a portfolio website or public documentation.
You can host static pages written in plain HTML, CSS, and JavaScript. In addition, GitLab Pages support popular site generators, such as Jekyll, Hugo, and Gatsby.
Here are the steps to deploy a static site from your GitLab repository to GitLab Pages. Before proceeding, ensure you have installed Docker and Jekyll.
- Create a new blank project in GitLab.
- Add a new HTML file called index.html and populate it with your site content. For example, here’s a basic page outline:
<html>

 <head>

   <title>Home</title>

 </head>

 <body>

   <h1>Hello World!</h1>

 </body>

 </html>
- Create a new gemfile.html file specifying Ruby dependencies, which we will use to build this website. Here’s how the file content looks like:
source "https://rubygems.org"

gem "jekyll"
- Make a .gitlab-ci.yml file containing the script for deploying and building the website. Here’s an example:
image: ruby:3.2

pages:

  script:

    - gem install bundler

    - bundle install

    - bundle exec jekyll build -d public

  artifacts:

    paths:

      - public
- Save and commit all the files.
- Go to your project sidebar → Settings → CI/CD to create a runner for untagged jobs. Refer to the previous section if you are unsure how to do so.
- Go to Build → Pipeline → Run Pipeline to start your deployment pipeline.
- Once the pipeline is completed, go to Deploy → Pages to obtain your GitLab Pages website’s link.
If you want to modify your website later, simply commit the changes and push the new code to your repository. This will trigger the build and deployment script specified in the GitLab YAML file.
Check your pipeline status to see if GitLab has finished deploying the changes. Once the process is complete, your site should now update.
Conclusion
GitLab is a powerful platform that helps improve software development efficiency through version control and automation. This tool organizes your codebase and files into a repository called project, which you can create from the main dashboard.
To manage a project, navigate to the left sidebar and select the appropriate menu. For example, you can create an issue to define tasks and create a merge request to propose changes to your project files. Use the issue tracker to organize your tasks easily.
Moreover, you can set up a CI/CD pipeline for automation by creating a runner and a YAML file. To improve your GitLab workflow efficiency, use Git commands to interact with your repository directly from your local machine’s command-line interface.
GitLab also offers additional features that help handle other tasks. For example, webhooks integrate third-party tools and automate general tasks like alerting. Meanwhile, use GitLab Pages to deploy static pages directly from your repository.
GitLab Tutorial FAQ
How do I create a GitLab account?
To create an account, open the GitLab sign-up page. Enter details like your name, email address, and password. Then, click Continue to finish. If you set up your GitLab repository using Hostinger’s VPS template, simply enter a panel password, and our system will create the account.
What are GitLab repositories?
In Git platforms, repositories are centralized storage for your project’s code, files, data, and version control history. Specifically for GitLab, a repository and project are interchangeable. That said, a project commonly refers to a more general storage containing additional data like issues.
How can I manage branches in GitLab?
To manage branches in GitLab, open the project in question and navigate to the sidebar → Code → Branches. From this menu, you can check, create, or delete branches. Since other management options are on different menus, we recommend checking the GitLab Branch documentation page.
What is an issue tracker in GitLab?
The GitLab issue tracking feature lets you check all tasks in your project, including ongoing and completed ones. You can also see their important information, like the deadlines. Moreover, the issue tracker lets you organize tasks based on their status or tags for a more efficient workflow.

Aris is a Content Writer specializing in Linux and WordPress development. He has a passion for networking, front-end web development, and server administration. By combining his IT and writing experience, Aris creates content that helps people easily understand complex technical topics to start their online journey. Follow him on LinkedIn.


Comments
0 responses