What is a website backup and how to do it
Mar 09, 2026
/
Ratna & Saulius L.
/
6 min Read
Website backups are essential for every website owner. Whether to prevent data breaches, technical issues, or human errors, a dependable backup system keeps your online presence secure.
This article provides a step-by-step guide on how to back up your website using popular control panels like hPanel and cPanel, as well as a manual method for people who prefer a more hands-on approach.
Download glossary for web beginners
What Is a Website Backup
A website backup is a saved copy of your site’s content, databases, and code. It’s a safety net for restoring your site if it’s compromised by data loss, hacking, or technical issues, ensuring minimal downtime and data protection.
How to Download and Restore Your Website Backup via hPanel
Let’s go through the steps to back up your website via Hostinger’s control panel, hPanel.
Download Your Website Backup
Hostinger automatically creates weekly or daily backups, depending on your hosting plan. The easiest way to download the backup databases and files is by following these steps:
Step 1 – Download website files
- Log in to the hPanel.
- On the left panel, locate Files → Backups.
- Click the Select button under Files backups.

- Choose the most recent date.
- Press Next step → Download all files to begin the download process.
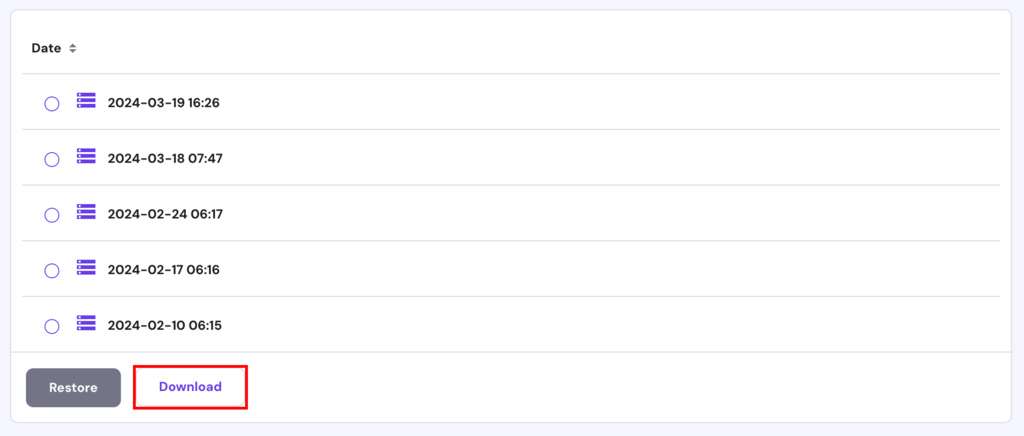
Step 2 – Download website database
- Press the Select button under Database backups.
- Choose which database backup data you want to download.
- Click Show databases.
- Select the most recent backup date.
- Press Download.
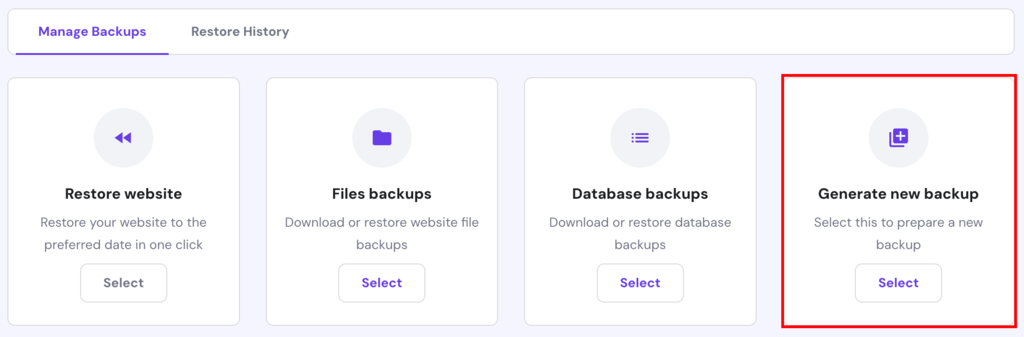
If you want to have the latest copy of your files and databases, click Generate new backup → Select. Keep in mind you can only generate one new backup in 24 hours.
Restore Your Website With a One-Click Feature
If you prefer not to download the website data and simply want to restore your site’s previous version, you can utilize our one-click restore feature.
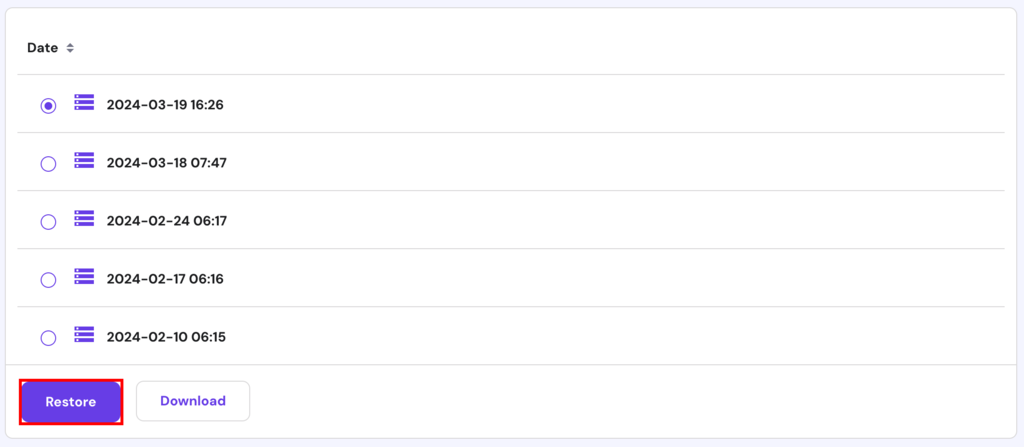
To restore your files
- On your hPanel, navigate to Files → Backups.
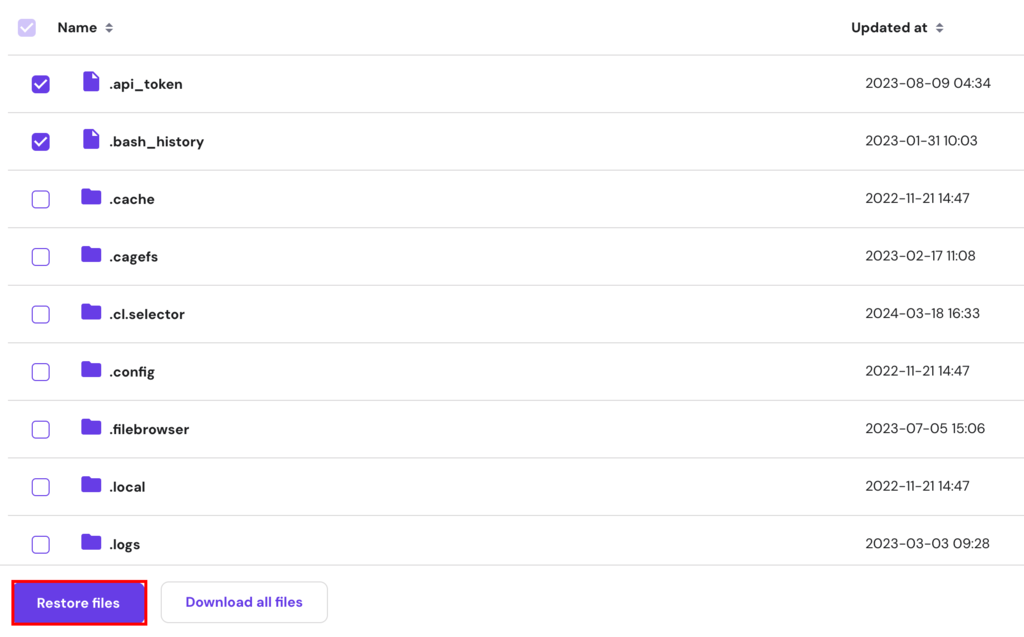
- Press the Select button under Files backups.
- Choose the backup date from the drop-down menu, and click Next step.
- Select the file you want and press Restore files.
To restore your databases
- Go to Files → Backups.
- Select the Database backups.
- Choose the backup data you need, and click Show databases.
- Select the database you wish to restore, and click Restore.
- Wait until the process is complete.
If you encounter any problems or have questions, feel free to contact our support team.
Additionally, follow this guide to transfer your web hosting if you’re looking to transfer to hPanel.
Important! Hostinger Website Builder includes tools for creating website backups. However, those backups are not available for download. Learn more in our guide to creating backups at Hostinger.

How to Generate and Download a Full Website Backup via cPanel
cPanel offers several backup options for its users: automatic full backup, a partial backup, and a manual backup.
Option 1 – Automatic Full Account Backup
This type of backup solution lets you create a full account backup, including the website’s home directory, MySQL databases, emails, and DNS settings. It’s mainly used to transfer your account to another hosting provider.
Start by logging into your cPanel, then follow these steps:
- Head to Files → Backup.
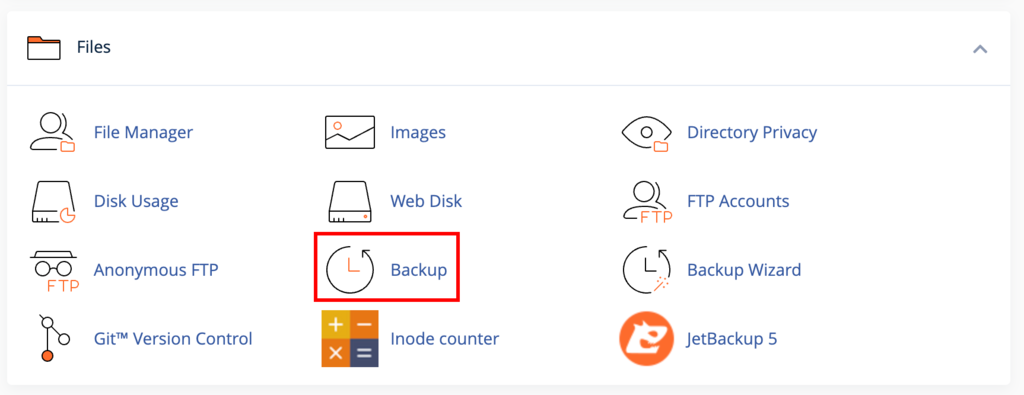
- Under Full Backup, press Download a Full Account Backup.
- On the Backup Destination drop-down menu, select Home Directory.
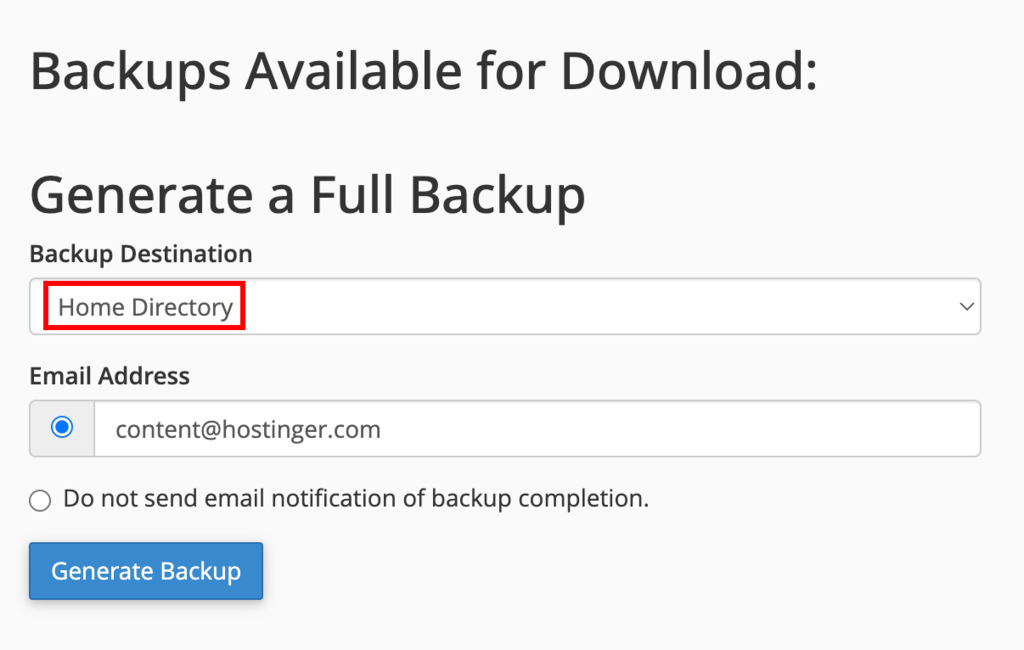
- Click Generate Backup, and the backup will start automatically.
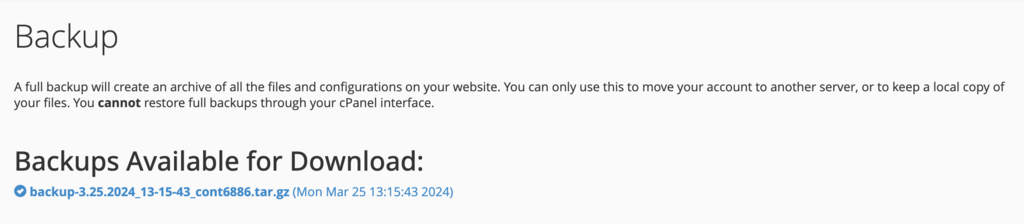
- Press Go Back to check whether or not your files are ready for download. If it’s still in progress, wait for a few minutes and refresh the page.
- Choose the latest link under Backups Available to download.
Option 2 – Automatic Home Directory Backup
This backup method is the simplest out of the available options since it only requires a single click. However, it only saves your files and emails.
Here’s a way to download a home directory backup:
- From your cPanel dashboard, navigate Files → Backups.
- Find the Partial Backups section and click on the Home Directory button.
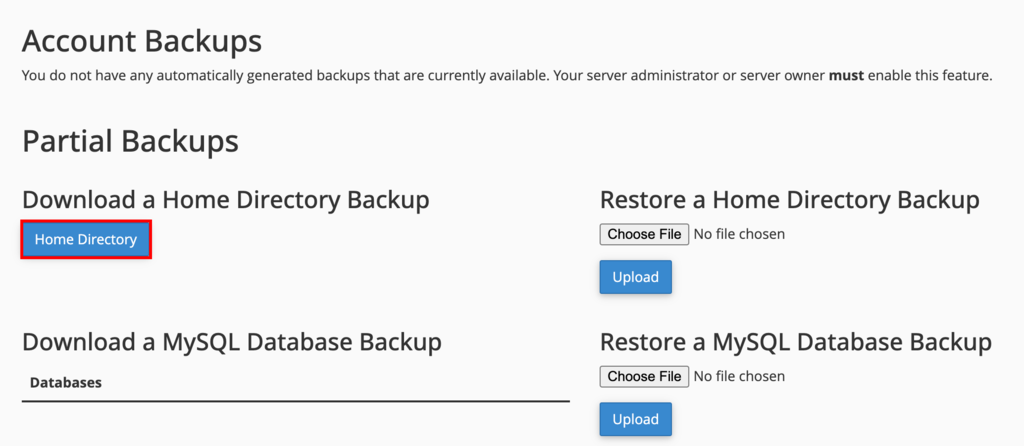
- The download process will start automatically.
Option 3 – Manual Website Backup
This backup feature allows you to backup selected files only. However, the steps to backing up the site’s content without a specialized backup tool are a bit more complicated.
Before proceeding, you need to find the root folder where your site files are located. It’s usually in the public_html directory, but it is also possible for your website to be installed in a subdirectory like /w/.
Here’s what you need to do to start the backup process:
- Log into cPanel and head to Files → File Manager.
- Locate the root folder of your site and right-click to Compress.
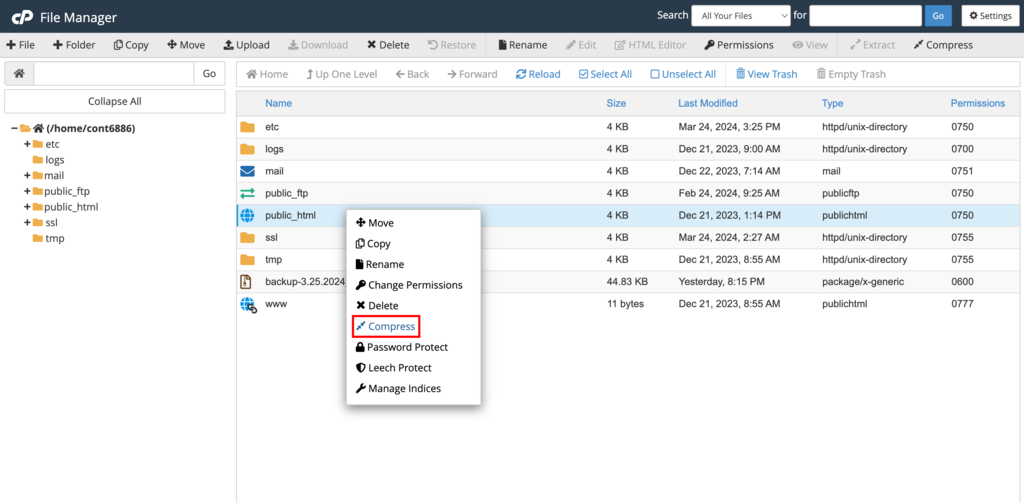
- Choose a Compression Type. We recommend either ZIP or TAR, then click Compress Files.
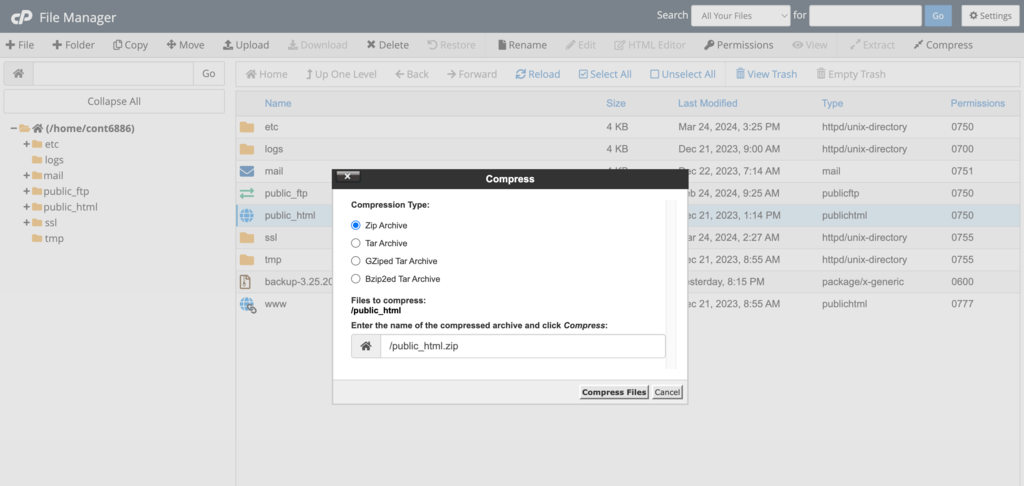
- Close the Compression Results window.
- Head over to the File Manager to locate the generated file.
- Select the file, in this case, public_html.zip. Head to the upper menu bar and click Download.
Once the last step is done, you will have backed up all the necessary files on your site.
Option 4 – Using the Backup Wizard
cPanel offers user-friendly backup software, which is especially beneficial for those new to website backups. If you’re hesitant about making errors while manually backing up your site, just follow the steps below:
- Login to your cPanel, and go to Files → Backup Wizard.
- Press the Back Up button.
- Choose the type of backup you want – Full Backup or Partial Backup.
- Pick Home Directory as the Backup Destination.
For Partial Backup, the download process will begin automatically.
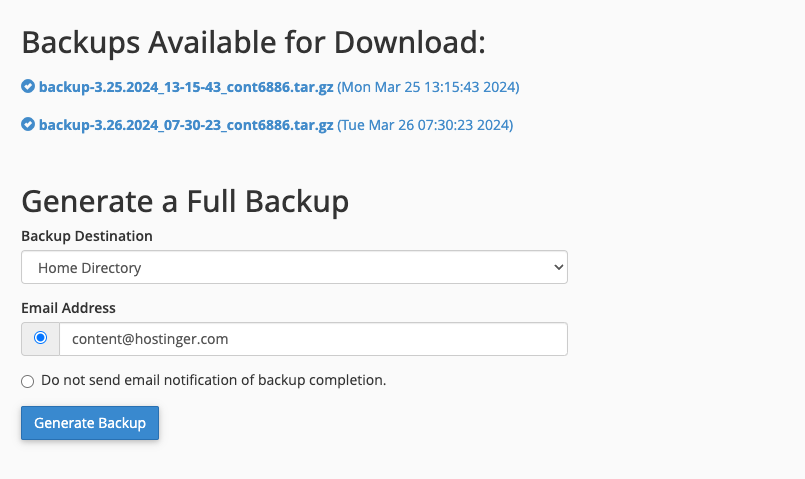
For Full Backup, here are the additional steps you need to do:
- Feel free to type in your email address if you want to receive an email notification once the backup is complete.
- Click Generate Backup, wait for a couple of minutes, and press Go Back.
- Under the Backups Available for Download, click on the link to download the backup file.
How to Back Up Your Website Manually
Most web hosts offer an automatic website backup solution. However, there are times when this backup service may not work, and you will need to do it yourself.
Keep in mind that you need to download both the website files and the database when backing up your site manually. Otherwise, the backup will not work, and your data may be lost.
Back Up Your Website Manually via FTP
With FTP, you won’t need to log in to your hosting account every time you want to back up your entire website files and data. However, you will need an FTP client.
For this guide, we’ll be using the FileZilla FTP client.
Step 1 – Connect to the FTP server via an FTP client
- Open FileZilla.
- Gather all of your FTP details from your hosting account. For Hostinger users, follow our tutorial on how to configure FileZilla.
- Open FileZilla, click File → Site Manager → New Site.
- Fill in your website’s FTP information, such as:
- Host – your website’s domain name.
- User – FTP account username.
- Password – FTP account password.
- Set Logon Type to Normal.
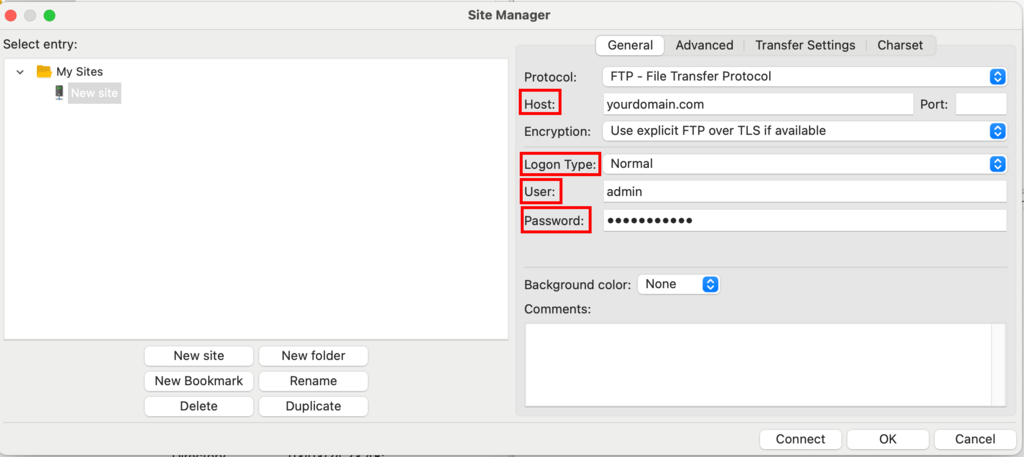
- Press Connect once you are done.
Step 2 – Download the website files to your computer
- On FileZilla’s interface, find and click Documents or any other folder where you want to save your backups.
- Right-click on the lower-left quadrant, select Create directory and enter it. Name the new directory – Website Backup, for example.
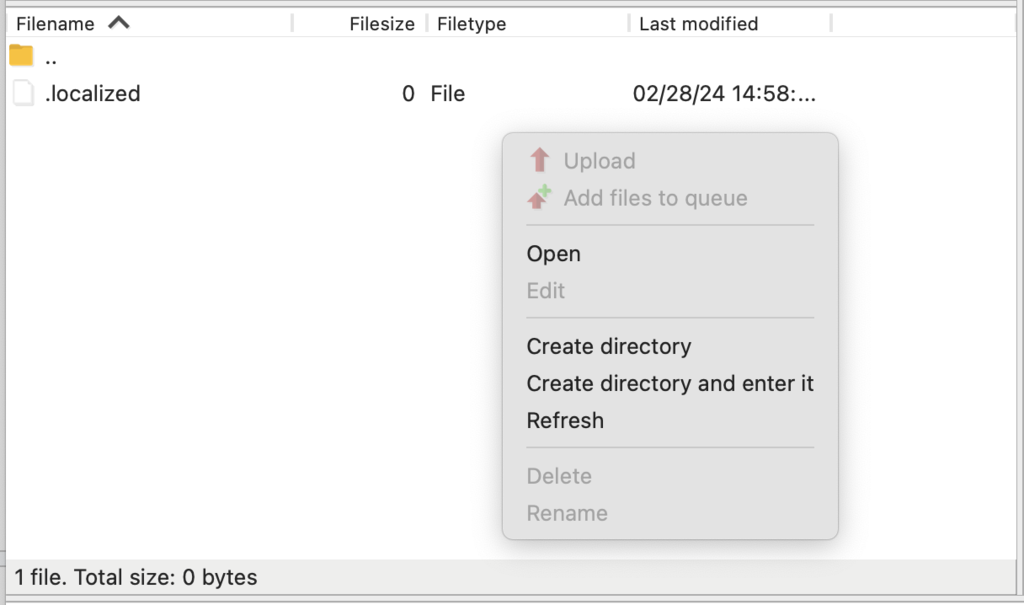
- On the upper-right quadrant of the FileZilla interface, click on your domain and find the public_html folder.
- Drag and drop the public_html folder to the lower-left quadrant or the previously created Website Backup folder.
- Wait until the download is complete.
Back up Your Website Database via phpMyAdmin
Next, you need to download the website’s database from the phpMyAdmin control panel. We will be using hPanel for this guide.
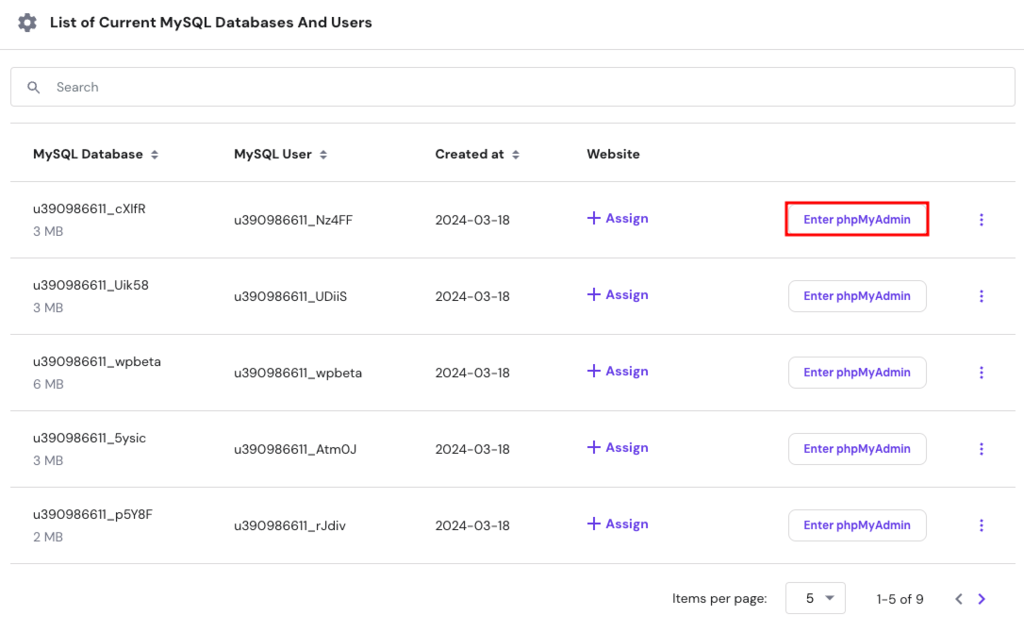
- Log in to your hPanel.
- On the Dashboard page, click Databases. This will open the database management page and show all your MySQL databases and users.
- Click Enter phpMyAdmin on your recently created MySQL Database.
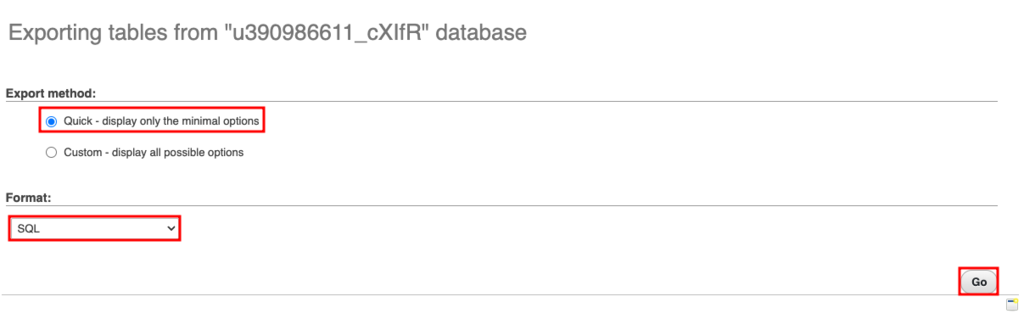
- Once inside phpMyAdmin, press Export.
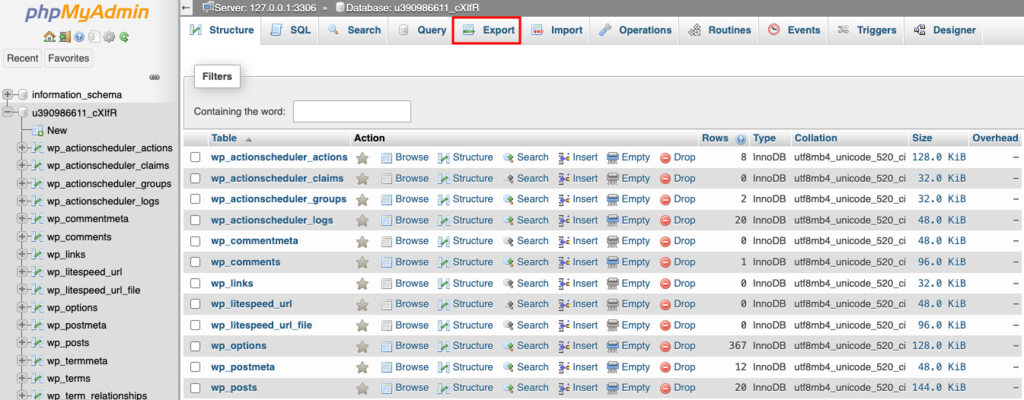
- Select Quick for the Export method and SQL for the Format.
- Click Go to proceed.
After downloading the SQL file, ensure to save it in the folder where the backup files are located on your computer.
To restore your WordPress site, follow our step-by-step restore guide.
Conclusion
Regularly scheduling or manually conducting website backups is crucial to prevent problems in the future. Despite having top-notch website security measures, accidents can lead to substantial data loss.
If your site has been backed up, the reupload process will be simple. You won’t need to start from scratch or risk losing any vital data.
In summary, you have three options to back up your site:
- Use hPanel to download an entire website backup and utilize the one-click restore feature.
- Use cPanel along with the backup wizard to download a complete account, home directory, and selected file backups.
- Use FTP and phpMyAdmin for manual backup and restore.
While all of these methods are effective, we highly recommend using the hPanel or cPanel for more comprehensive and automated backup solutions.
Website Backup FAQ
To ensure your website’s safety and continuity, it’s essential to understand the why, how, and when of website backups. Here are some frequently asked questions to guide you:
Why Is It Important to Back up My Website?
Backups prevent data loss from hacks, errors, or updates gone wrong, safeguarding your online presence and user trust. With a backup, you can avoid losing all of your website’s content and potentially having to start from scratch.
How Often Should You Backup Your Website?
The backup frequency depends on website updates and traffic. The most common backup schedule is daily for active sites and weekly for less dynamic ones. This ensures safety without excess.
How Long Does It Take To Restore a Website From a Backup?
Restoration time varies with backup size and method. For hPanel and cPanel, it typically takes a few minutes. Manual backups through FTP or phpMyAdmin can take longer.
What Steps Should Be Taken Before Performing a Website Backup?
Prioritize checking website health, ensuring sufficient storage, and verifying backup tools and paths for a smooth backup process.

Ratna is a web hosting expert. With her experience with all things tech and SEO, she is ever-ready to share. In her spare time, Ratna likes to read a good book or resume her cross-stitch project.

As VP of Product at Hostinger, Saulius oversees Web Hosting Platform & Tools, Managed WordPress, and WebPro Experience. Saulius enjoys observing users through their daily life activities, looking for problems to solve, and building products that make users more efficient online, help them spend more time on the things they love, and leave all the rest for technology to solve. Follow him on LinkedIn.