How to create a post in WordPress
Mar 10, 2026
/
Larassatti D.
/
7 min Read
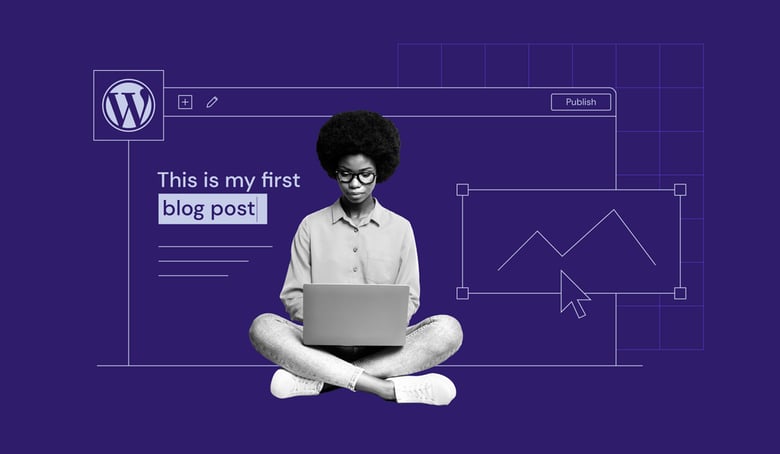
Creating a post in WordPress is the primary way you add and manage content on the platform. Every article, announcement, or update you publish goes through the post editor – where you write, format, organize, and schedule content from one place. To create a post, you need to:
- Navigate to the posts section. Open the WordPress admin area and access the post editor.
- Write the content. Add a title, write content using the block editor, and structure it with headings.
- Add images and other media. Insert images, set a featured image, and add alt text.
- Set the post URL. Customize the permalink to keep it clean, descriptive, and SEO-friendly.
- Select categories and tags. Organize your post so readers and search engines understand where it fits on your site.
- Preview and publish your post. Review formatting across devices, then publish immediately, schedule for later, or save as a draft.
The entire process gives you full control over how your content looks, when it goes live, and how it’s organized. Whether you’re publishing your first blog post or managing content for a business site, WordPress keeps every step flexible and accessible.
1. Navigate to the posts section
To create a blog post in WordPress, start from the admin dashboard area you see after logging in. Click Posts → Add Post in the left sidebar. The WordPress post editor will open.
Before going further, it’s important to understand the difference between posts and pages.
Posts, which we’re going to create right now, are time-based content displayed in reverse chronological order – your newest post appears first. On the other hand, pages contain static content, such as About or Contact information, that doesn’t change often.
Expert tip
Pro Tip: Not every user has permission to create and publish posts. This depends on the WordPress user role assigned to the account. Administrators, Editors, and Authors have full access to post creation.
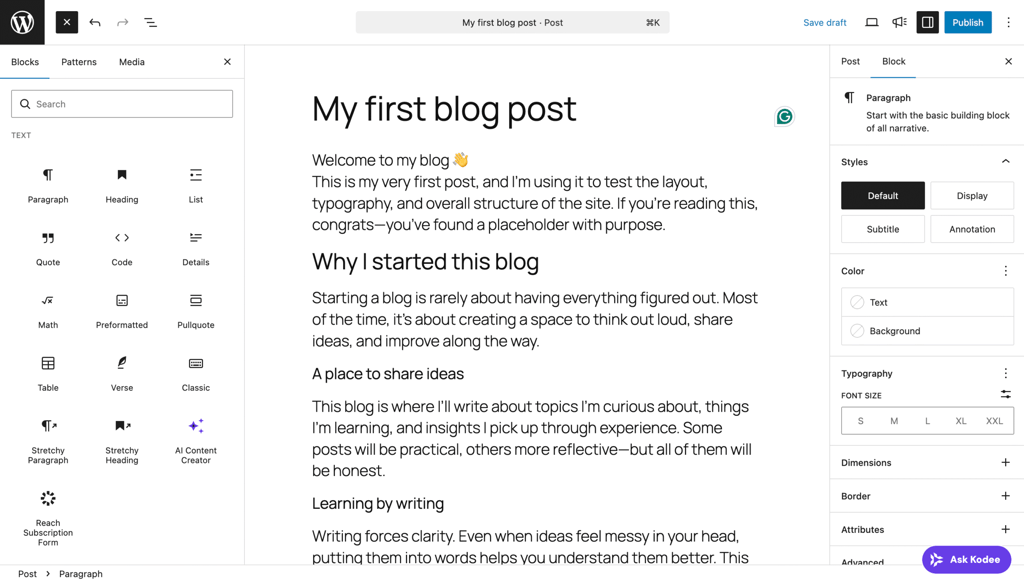
2. Write a new post
WordPress uses the Gutenberg block editor by default, a modular writing environment where each piece of content exists as a separate block.
To write a new post, you’ll need to complete a few key actions:
- Adding a title. Click the Add title field at the top of the editor and type your post title. This becomes the H1 heading of your post and appears in browser tabs, search results, and your site’s blog page.
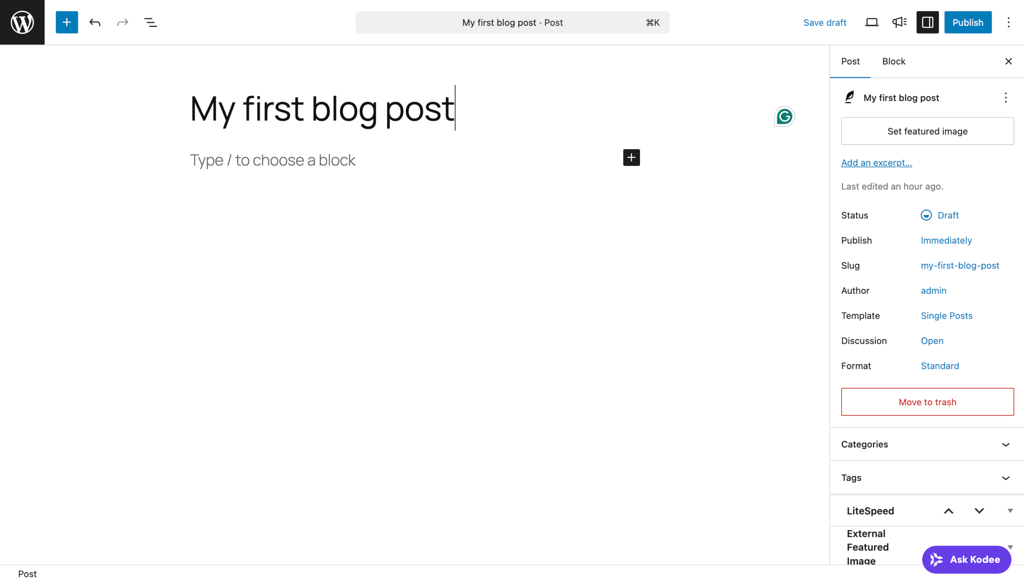
- Writing your content. Click the area below the title labeled Type / to choose a block and start writing. WordPress creates a paragraph block by default – this is the standard text block you’ll use often. Press Enter to create a new paragraph block.
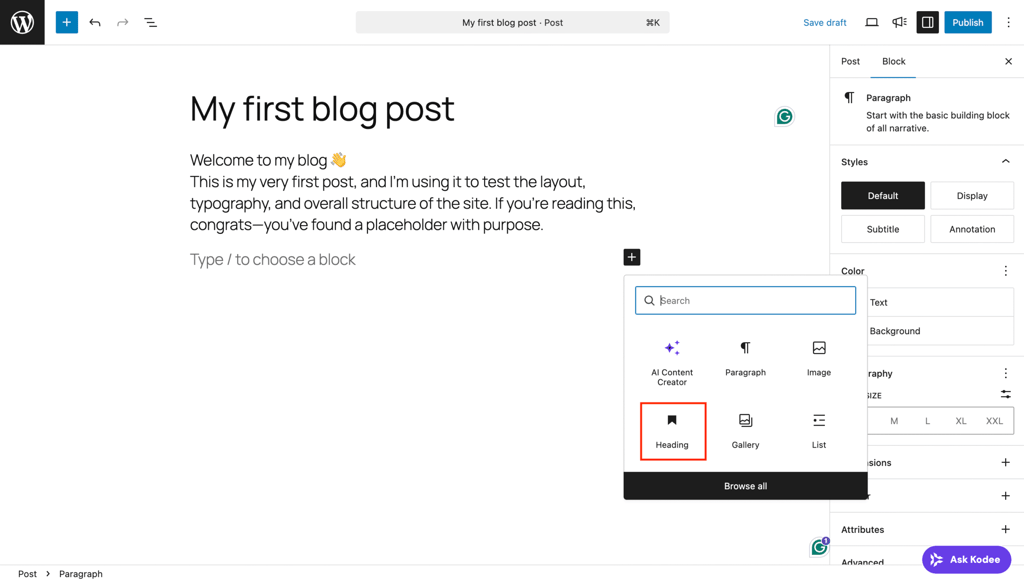
- Structuring your content with headings. To add a heading in WordPress, click the + button in the post editor, then search for Heading. As a shortcut, you can also type /heading in the post editor.
- Format your text. Select text within a paragraph or heading block to open the block toolbar. Use Bold or Italic to add emphasis, Link to insert internal or external hyperlinks, and alignment options (left, center, or right) to adjust text positioning.
In addition to these, use other WordPress blocks to structure information more effectively. To add an item, click the + button or type / followed by the block name.
Expert tip
Pro Tip: WordPress auto-saves your work as you write. If your browser crashes or you accidentally close the tab, your content is safe.
You also have access to previous versions through the Revisions option in the post Settings panel on the right sidebar. This lets you compare changes and restore earlier versions if needed.
3. Add images and other media
Images make your posts more engaging and easier to read. They break long sections of text into shorter ones and help illustrate key points.
To insert an image in the WordPress post editor, click the + button, search for Image, and select the block. Then choose between Upload, Media Library, or Insert from URL.

The WordPress Media Library is especially useful if you’ve already uploaded images to your site before. It stores every file you’ve ever uploaded, so you don’t need to re-upload the same image twice.
If you want to add photo galleries or side-by-side comparisons, use the Gallery block to arrange multiple images in a grid layout and control the number of columns.
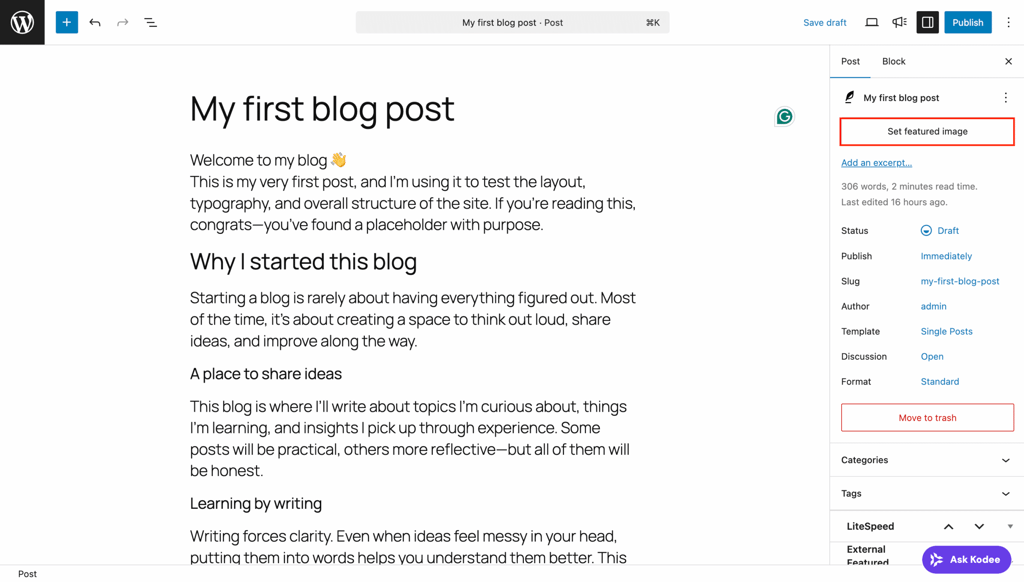
Apart from the images you add to the body text, don’t forget to add a featured image as the main visual to represent your post. It makes your post more engaging, as it will appear on your blog page, archive pages, social media shares, and search results.
To add a featured image, open the Settings panel on your WordPress post editor toolbar and click Set featured image. From there, you’ll be prompted to upload or select an image from the Media Library.
Expert tip
Pro Tip: After inserting an image, always make sure to add alt text. It makes your content accessible to screen readers and helps search engines understand your post content better, enhancing SEO.
4. Set the post URL
Your post URL, also called a WordPress permalink, is the web address where your published post lives. WordPress generates URLs automatically from post titles, but in most cases, they’re too long.
A clean, descriptive URL improves SEO and makes it easier for readers to understand what your post is about before clicking.
To edit your WordPress slug (the part of your URL after the slash), open the post Settings panel on the right sidebar, click the default Slug, and a new window will open. Edit the slug to something short, descriptive, and keyword-relevant.
Keep your slugs short, lowercase, and separated by hyphens. Avoid dates, filler words, and unnecessary details. Ideally, the slug should describe the post’s content in three to six words.
Expert tip
Pro Tip: Here's what a good slug looks like compared to a bad one:
✅ Good: /how-to-create-wordpress-post
❌ Bad: /my-first-blog-post-in-2025-january-update
5. Select categories and tags
To organize your content and help readers navigate your site, you can set categories and tags when creating a new post. Categories define the broad topic, tags describe the specific details.
You can find the Categories and Tags sections on the WordPress post Settings panel.

For a more detailed walkthrough on organizing your site’s categories and tags, head to our complete guide on managing WordPress taxonomies.
Expert tip
Pro Tip: As a general rule, use one main category for every post and only add tags if they genuinely help group related content.
6. Preview and publish your post
Before publishing, review your post to catch formatting issues, broken links, or missing images. A quick review catches most issues that are easy to miss while writing.
Click the Preview button in the top-right corner of the editor. WordPress lets you preview how your post looks on three screen sizes – Desktop, Tablet, and Mobile. Check all three, since formatting that looks fine on desktop sometimes breaks on smaller screens.
Once you’re sure everything looks great, you can click Save draft to revisit the post later, or hit the Publish button to open two publishing options:
- Visibility. You can choose to publish the post in Public (everyone), Private (only site admins and editors), or Password protected (anyone with the password).
- Publish. This section lets you choose when your post is published. By default, it’s set to publish immediately. If you want to schedule it for a specific date and time, select your preferred date and time from the calendar in the panel. WordPress will then publish the post automatically at the scheduled time.
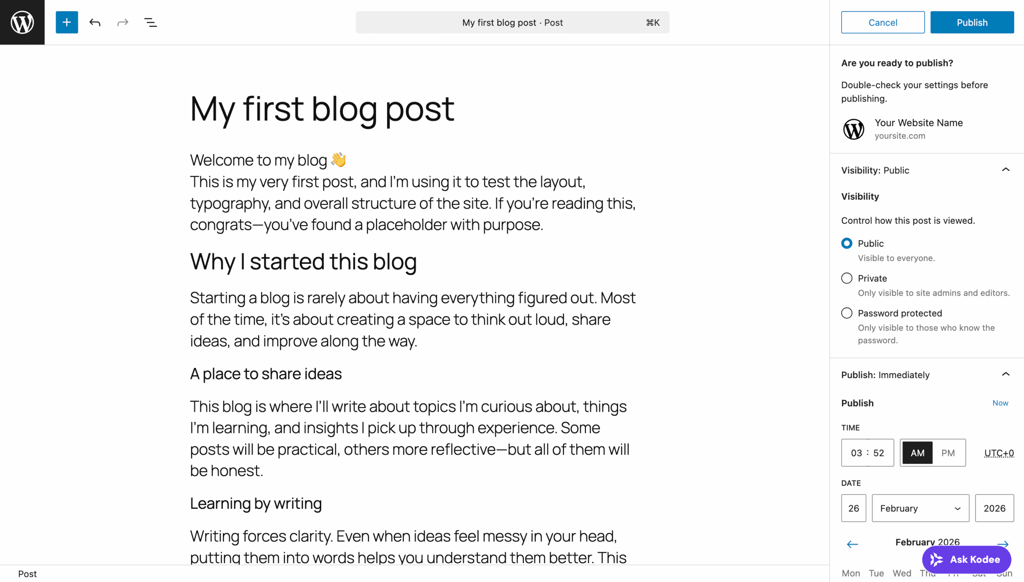
Once that’s done, hit Publish to finish.
Expert tip
Pro Tip: Note that you can always edit a published post. Simply navigate to Posts → All Posts from your WordPress dashboard, hover over the post you want to change, and click Edit. After making the changes you want, click Update to save and publish them.
Differences between the WordPress block editor and the classic editor
Every step in this guide uses the WordPress block editor (Gutenberg), which has been the default editor since WordPress 5.0, released in December 2018. However, you may still encounter the classic editor in older tutorials or on legacy WordPress sites.
The block editor treats each piece of content, like paragraphs, headings, images, lists, and tables, as an individual block.
This modular system lets you visually move, rearrange, and style content, giving you more control over layout and formatting without writing code. Each block also comes with its own settings, making it easier to fine-tune individual elements.
By contrast, the classic editor works like a word processor. All content is written in a single text field with a basic formatting toolbar, similar to Google Docs or Microsoft Word. While it’s simpler, the layout and design options are more limited.
If you’re starting a new site today, the block editor is the recommended option. It’s more flexible, actively developed, and better supported in the long term.
Best practices for creating WordPress posts
Use this checklist before publishing to keep your posts readable, accessible, and search-friendly:
- Write a clear, descriptive title that tells readers exactly what to expect. Avoid vague or clickbait-style titles.
- Use H2 and H3 headings to break content into scannable sections. Readers skim before they read – headings help them find what they need. At the same time, structuring your content like this improves search engine optimization (SEO).
- Add alt text to every image that describes its content. This improves accessibility and gives search engines more context.
- Write a meta description that summarizes your post in 150-160 characters. WordPress doesn’t include this by default, so consider installing a WordPress SEO plugin like Yoast or Rank Math to add one easily.
- Keep paragraphs short by aiming for two to three sentences each. Large blocks of text are harder to read, especially on mobile devices.
- Include internal links for related content on your site. This helps readers discover more of your content and strengthens your site’s SEO structure.
- Proofread before publishing to check for spelling errors, grammar issues, and broken links. Reading the post out loud is a simple way to catch awkward phrasing.
- Review and update published posts regularly, as content goes stale – especially technical guides and posts with statistics. Set a reminder to review older posts every few months.
How to keep your most important post visible?
By default, WordPress displays posts in reverse chronological order – your newest post always appears first on the blog page. As you publish more content, older posts get pushed further down.
When you need a specific post to stay at the top for announcements, cornerstone guides, seasonal promotions, or any content you want every visitor to see first, you can make a WordPress sticky post.
To do this, open the Settings panel in the WordPress post editor. Find the Status field, click on it until you see the Status & visibility window open. Check the Sticky option.
Click Publish (or Update if it’s an existing post) to finish.
The post now stays at the top of your blog page until you uncheck the option. Keep in mind that sticky posts only affect the main blog page – they don’t change the order on category or tag archive pages.


Larassatti Dharma is a content writer with 4+ years of experience in the web hosting industry. She has populated the internet with over 100 YouTube scripts and articles around web hosting, digital marketing, and email marketing. When she's not writing, Laras enjoys solo traveling around the globe or trying new recipes in her kitchen. Follow her on LinkedIn