How to self-host LibreChat with Docker
May 22, 2026
/
Domantas P.
/
10 min Read
You can self-host LibreChat with Docker by deploying the app on a VPS, connecting your AI provider API keys, and running a private ChatGPT-style interface for multiple models from one dashboard.
LibreChat lets you use OpenAI, Anthropic Claude, Google Gemini, Azure OpenAI, OpenRouter, and local models through Ollama without switching between separate AI chat apps. When hosted on your own server, it gives you more control over user access, chat history, uploaded files, provider configuration, and API key management.
There are two ways to set it up: deploy LibreChat faster with Hostinger’s Docker template or install it manually with Docker Compose. After deployment, you can configure multiple AI models, secure the app for private use, and update the Docker containers when new LibreChat versions become available.
What do you need before installing LibreChat with Docker?
Before installing LibreChat with Docker, prepare the following:
- A VPS or local server – use a VPS if you want LibreChat to stay online and be accessible remotely.
- Docker and Docker Compose – required to run LibreChat and its supporting containers.
- Git – required for cloning the official LibreChat repository during manual installation.
- SSH access – needed to connect to your VPS and run installation commands.
- AI provider API keys – required for connecting models from OpenAI, Anthropic Claude, Google Gemini, Azure OpenAI, OpenRouter, or other providers.
- A domain name – optional, but recommended for production use.
- SSL certificate – optional for testing, but required for secure HTTPS access.
- Enough server resources – choose a VPS with enough CPU, RAM, and storage for LibreChat, its database, search, uploaded files, and team usage.
How to install LibreChat with Docker
You can install LibreChat manually with Docker Compose by cloning the official LibreChat repository, creating an environment file, and starting the application stack from your server. This method gives you full control over the LibreChat files, Docker Compose configuration, API keys, and future updates.
Before starting, make sure your VPS has Docker, Docker Compose, and Git installed. You also need SSH access to the server.
First, connect to your VPS using SSH:
ssh root@your_server_ip
Replace your_server_ip with your VPS IP address.
Next, clone the LibreChat repository from GitHub:
git clone https://github.com/danny-avila/LibreChat.git
Move into the LibreChat project directory:
cd LibreChat
LibreChat uses an environment file to store application settings, API keys, authentication options, and provider configuration. Create this file by copying the example file:
cp .env.example .env
After creating the .env file, open it with a text editor:
nano .env
Add the API keys for the AI providers you want to use. For example, if you want to connect LibreChat to OpenAI, add your OpenAI API key in the relevant environment variable. You can also configure other providers, such as Anthropic Claude, Google Gemini, Azure OpenAI, or OpenRouter, depending on your setup.
Save the file and exit the editor. In Nano, press CTRL + X, then Y, then Enter.
Now start LibreChat with Docker Compose:
docker compose up -d
This command downloads the required Docker images and starts LibreChat in detached mode. Docker Compose also starts the supporting services LibreChat needs, such as the database and search components.
Check whether the containers are running:
docker compose ps
If the containers are active, open LibreChat in your browser using your server IP address and port 3080:
http://your_server_ip:3080
Replace your_server_ip with your VPS IP address.
When the LibreChat interface loads, create the first user account. The first registered account becomes the admin account, so use a strong email address and password.
After logging in, test the setup by selecting one of your configured AI providers and sending a message. If the provider does not respond, check that the API key is correct in the .env file and restart the containers:
docker compose down
docker compose up -d
LibreChat is now running on your VPS with Docker. At this point, you can configure additional model providers, connect a domain name, enable HTTPS, and adjust access settings based on whether you want to use the app privately or with a team.
How to deploy LibreChat using Hostinger’s Docker template
You can deploy LibreChat faster using Hostinger’s Docker catalog instead of setting up the application stack manually. This method installs a preconfigured LibreChat environment on a VPS, so you can launch the app, create an admin account, and connect your AI provider API keys without cloning the repository or editing Docker Compose files first.
- Go to Hostinger’s LibreChat Docker template page. Open the LibreChat Docker template page and choose a VPS plan. LibreChat runs several services in one deployment, including the main application, a database for conversation storage, search components, and optional document query features. Choose a VPS plan with enough CPU, RAM, and storage for the number of users and AI workflows you plan to run.
- Set up your VPS with the LibreChat template. After choosing the plan, continue to the checkout and complete the VPS setup. During setup, select the LibreChat Docker template from the application catalog. Hostinger will automatically provision the VPS and deploy the preconfigured LibreChat stack.
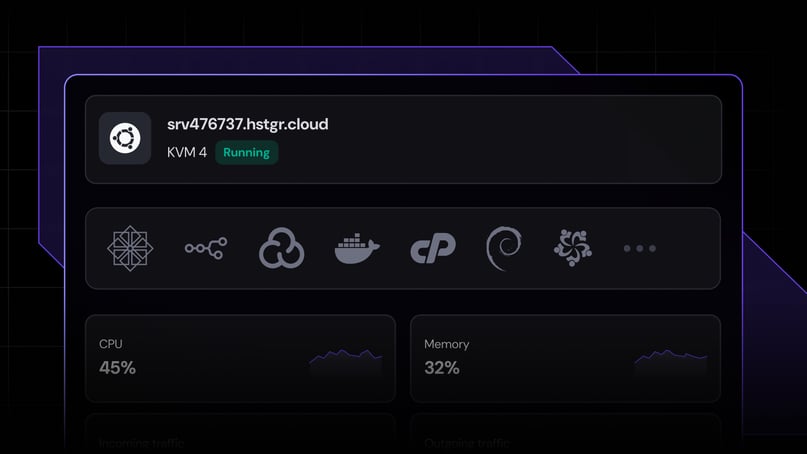
- Check the LibreChat containers. Once deployment finishes, open your VPS dashboard. Go to the Docker manager to check whether the LibreChat containers are running. The Docker manager also lets you view container status, access logs, and manage updates from one place.
- Open your LibreChat instance. Open LibreChat in a browser using your server IP address or connected domain. When the login screen appears, register the first user account. The first account becomes the admin account, so use a secure email address and password.
- Add your AI provider API keys. After logging in, add the API keys for the AI providers you want to use. LibreChat supports multiple providers, including OpenAI, Anthropic Claude, Google Gemini, Azure OpenAI, and local models through Ollama. API keys let LibreChat send prompts to the selected model provider from the same chat interface.
- Test the deployment. Start a new chat and select one of the configured models. Send a short message to confirm that LibreChat can connect to the provider API and return a response.
- Secure the production setup. Connect a domain name to your VPS and enable HTTPS before sharing the app with other users. Review user registration, admin access, firewall rules, backups, and API key permissions before using LibreChat for sensitive conversations or team workflows.
Hostinger’s Docker template is the easiest deployment path if you want a private LibreChat instance without manually configuring the full Docker Compose stack. After the template is running, you can still customize LibreChat by adding more model providers, enabling document-based queries, checking container logs, and updating the deployment from the VPS dashboard.
Why use LibreChat for private multi-model AI chat?
LibreChat is useful for private multi-model AI chat because it gives you one self-hosted interface for working with different AI providers while keeping the application, user accounts, chat history, and configuration on your own VPS. Instead of switching between separate chat apps, you can compare models, manage access, and keep AI workflows in one controlled environment.
There are four main reasons to use LibreChat for this setup:
- You can connect multiple AI providers. LibreChat supports providers like OpenAI, Anthropic Claude, Google Gemini, Azure OpenAI, and Ollama. This lets you choose different models for different tasks, such as writing, coding, research, summarization, or document analysis.
- You control where the chat app runs. A self-hosted LibreChat instance runs on your own server instead of a third-party chatbot platform. This gives you more control over user accounts, app settings, stored conversations, uploaded files, and server-level access.
- You can keep team AI workflows in one place. LibreChat works well for small teams that need a shared AI workspace. Team members can use the same chat interface while the admin controls access, API keys, available providers, and configuration settings.
- You can use private document-based AI queries. LibreChat supports retrieval-augmented generation, or RAG, which lets the app answer questions based on uploaded documents. This is useful for querying internal notes, project files, documentation, or research material without moving the whole workflow to a public chatbot account.
Self-hosting does not make every AI request fully private by default. When you use third-party model providers, your prompts are still sent to the selected provider’s API for processing. For maximum control, use local models through Ollama or another self-hosted model endpoint. For most users, LibreChat provides a practical middle ground: the chat platform stays on your VPS, while you choose which external or local models handle each request.
How to configure LibreChat for multiple AI models
LibreChat connects to multiple AI models through provider API keys, environment variables, and optional custom endpoint settings. This setup lets you switch between OpenAI, Anthropic Claude, Google Gemini, Azure OpenAI, Ollama, OpenRouter, and other compatible providers from the same chat interface.
1. Choose the AI model providers you want to use
Start by deciding which model providers you want to connect to LibreChat. For example, you can use OpenAI for general writing, Claude for long-context analysis, Gemini for research tasks, and Ollama for local models.
Each external provider needs an API key from its own platform. Local models need a reachable endpoint instead, such as an Ollama server running on the same VPS or another machine.
2. Add provider API keys to the .env file
LibreChat uses the .env file to store API keys and environment variables. To edit it, open the LibreChat project directory on your server:
cd LibreChat
Then open the .env file:
nano .env
Add the API keys for the providers you want to enable. The exact variable names depend on the provider, but the setup usually follows this format:
OPENAI_API_KEY=your_openai_api_key
ANTHROPIC_API_KEY=your_anthropic_api_key
GOOGLE_KEY=your_google_api_key
Replace each placeholder value with the real API key from your provider account. Save the file and exit the editor.
3. Restart LibreChat after changing environment variables
After updating the .env file, restart LibreChat so the containers can load the new API keys:
docker compose down
docker compose up -d
Open LibreChat again and check whether the new providers appear in the model selector. If a provider is missing, check the .env file for typos, missing values, or unsupported model names.
4. Configure custom endpoints with librechat.yaml
For advanced model setups, use the librechat.yaml file. This file lets you define custom endpoints, change available models, configure OpenAI-compatible APIs, and connect services like OpenRouter or local Ollama models.
Create the configuration file if it does not exist:
nano librechat.yaml
A basic custom endpoint configuration can look like this:
endpoints:
custom:
- name: "OpenRouter"
apiKey: "${OPENROUTER_KEY}"
baseURL: "https://openrouter.ai/api/v1"
models:
default:
- "openai/gpt-4o"
- "anthropic/claude-3.5-sonnet"
- "google/gemini-pro"
Then add the matching API key to your .env file:
OPENROUTER_KEY=your_openrouter_api_key
Restart LibreChat after editing librechat.yaml:
docker compose down
docker compose up -d
5. Connect local models with Ollama
If you use Ollama for local models, make sure Ollama is installed and running on a reachable host, and add it as a custom endpoint in librechat.yaml.
For example:
endpoints:
custom:
- name: "Ollama"
apiKey: "ollama"
baseURL: "http://host.docker.internal:11434/v1"
models:
default:
- "llama3"
- "mistral"
- "codellama"
After saving the file, restart LibreChat again:
docker compose down
docker compose up -d
Then open the app, start a new chat, and choose one of the configured local models from the selector.
6. Test each model provider
Test one provider at a time after configuration. Start a new chat, choose the model from the selector, and send a short prompt.
If the model does not respond, check these four settings first:
- the API key is valid
- the model name is correct
- the endpoint URL is reachable
- the LibreChat containers were restarted after the change
Do not add every available model at once. Start with two or three providers, confirm that they work, and then expand the configuration. This makes troubleshooting easier and keeps the model selector useful for everyday chat workflows.
How to use LibreChat as a private ChatGPT-style app
LibreChat works as a private ChatGPT-style app by giving you one self-hosted chat interface for prompts, conversations, model switching, file uploads, and team access. After deployment, you can use it as a personal AI workspace or an internal AI assistant for your team.
Start a new AI chat
Log in to LibreChat and start a new conversation from the main chat interface. Choose the model you want to use from the model selector, then enter your prompt.
For example, you can use LibreChat to:
- summarize long documents
- draft emails, reports, or internal notes
- debug code
- compare model responses
- generate research outlines
- rewrite technical content
- create reusable prompts for team workflows
The main advantage is that your chat history, user accounts, and app configuration stay inside your self-hosted LibreChat instance. This gives you more control than using separate hosted chatbot accounts for every provider.
Switch between different AI models
LibreChat lets you use multiple model providers from the same interface. For example, you can use one model for writing, another for coding, and another for long-context document analysis.
This is useful when different models perform better for different tasks. Instead of copying the same prompt between separate AI tools, you can keep the conversation workflow in LibreChat and choose the model that fits the task.
For a private multi-model setup, start with two or three providers. Add more models only when you have a clear use case for them. This keeps the model selector easier to use and reduces configuration errors.
Upload files for document-based queries
LibreChat can work with uploaded files, depending on your configuration. This lets you ask questions about internal notes, project documents, research files, or technical documentation from the same chat interface.
For example, you can upload a project brief and ask LibreChat to summarize the scope, list action items, or compare requirements against an existing plan.
Use this workflow carefully with sensitive files. The LibreChat app and uploaded files can stay on your VPS, but prompts and file content may still be sent to the selected external model provider if you use third-party APIs. Use local models if you want more control over how document content is processed.
Create a shared AI workspace for your team
LibreChat can also work as an internal AI chat platform for a team. Instead of asking every team member to manage separate chatbot accounts, you can provide one shared interface with controlled access to selected models.
For team use, define the setup before inviting users:
- which users can access the app
- which model providers are enabled
- which API keys are used
- whether registration is open or restricted
- whether uploaded files are allowed
- how chat history and backups are handled
This keeps your private AI workspace organized and prevents uncontrolled use of provider keys or sensitive data.
Use LibreChat for private AI workflows
A self-hosted LibreChat instance works best when it supports specific workflows. For example, a developer can use it for coding assistance, a marketing team can use it for content drafts, and a support team can use it to summarize documentation or prepare response templates.
Here are practical private AI workflows you can run with LibreChat:
Workflow | How LibreChat helps |
Internal research assistant | Summarizes notes, compares sources, and answers questions from uploaded files |
Coding assistant | Helps explain errors, refactor code, and compare model answers for debugging |
Content workspace | Drafts outlines, rewrites sections, and keeps prompt history in one place |
Team knowledge helper | Lets users query internal documentation or project files |
Model comparison tool | Tests the same prompt across different AI providers from one interface |
For the best experience, keep the app focused. Enable the models your team actually uses, document when each model should be used, and review access settings regularly. LibreChat is most valuable when it becomes a controlled AI workspace rather than a cluttered list of every available model.
How to update LibreChat Docker containers
Update LibreChat regularly to get new features, bug fixes, security patches, and model provider changes.
First, open the LibreChat directory:
cd LibreChat
Stop the running containers:
docker compose down
Pull the latest LibreChat files from GitHub:
git pull
Download the latest Docker images:
docker compose pull
Start LibreChat again:
docker compose up -d
Check that the containers are running:
docker compose ps
If LibreChat does not load after the update, check the logs:
docker compose logs api
For Hostinger’s Docker template, you can also check the Docker manager in hPanel to view container status, logs, and available update options.
Is LibreChat the right private AI chat setup for you?
LibreChat is a good fit if you want a self-hosted ChatGPT-style app that supports multiple AI providers, user accounts, chat history, file uploads, and model switching from one interface. It gives you more control over the AI chat environment than a hosted chatbot account, especially when you run it on your own VPS.
Choose LibreChat if you want to:
- run a private AI chat app on your own server
- use OpenAI, Claude, Gemini, Azure OpenAI, Ollama, or OpenRouter from one interface
- manage AI access for yourself or a small team
- keep chat history and app configuration on your VPS
- test different models without switching between separate tools
- build document-based AI workflows with uploaded files
LibreChat is not the best choice if you want a fully managed AI tool with no server setup, updates, or configuration. Since you host the app yourself, you are responsible for maintaining the VPS, securing access, updating containers, backing up data, and managing provider API keys.
For most users, LibreChat works best as a middle ground between public chatbot platforms and fully custom AI applications. You get a familiar chat interface, multi-model flexibility, and more control over your data without building an AI app from scratch.

Domantas is a Content SEO Specialist who focuses on researching, writing, and optimizing content for organic growth. He explores content opportunities through keyword, market, and audience research to create search-driven content that matches user intent. Domantas also manages content workflows and timelines, ensuring SEO content initiatives are delivered accurately and on schedule. Follow him on LinkedIn.