WordPress 6.2 Is Finally Here: A Detailed Overview
The first major release of the year – WordPress 6.2 “Dolphy”, is finally here. This version brought over 900 enhancements and bug fixes in the core software.
WordPress 6.2 also marks the end of the Gutenberg Phase Two project focused on customization. The next major update will begin Phase Three for better collaboration.
This version comes with an improved site editor to make your workflow even more efficient and open more customization possibilities. Let’s dive into WordPress 6.2 and see what it has to offer.
WordPress 6.2 YouTube Video
Find out the highlighted WordPress 6.2 features in this video.

Improved Workflow With the New Site Editor Interface
The Site Editor interface has received several significant changes. Most notably – the Browse Mode. What’s more, the new color-coding system and block settings panel updates result in a more intuitive and better workflow.
Browse Mode
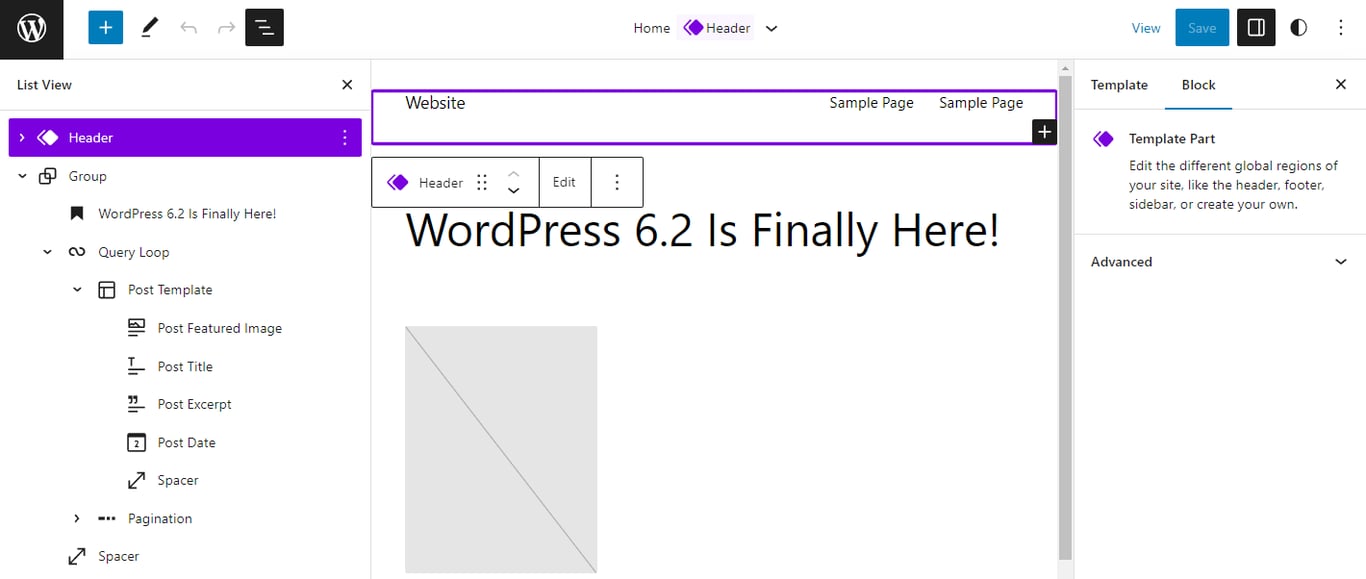
Users can see the new interface immediately when they enter the Site Editor. Instead of taking you to the homepage template with no sidebar, it will start with the template preview that includes a sidebar to navigate the different templates. This interface is also called Browse Mode.
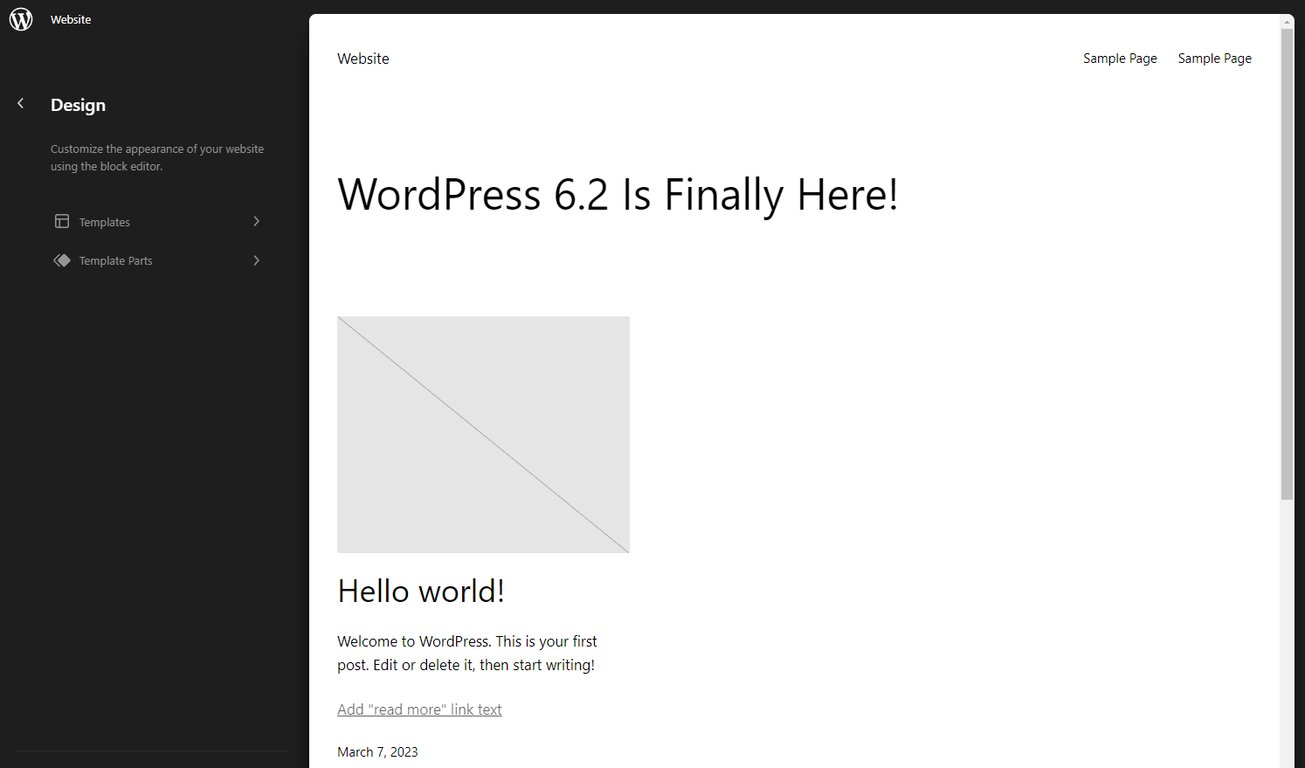
The dark-gray left sidebar lets you browse through the available templates and template parts, while the main editor canvas on the right will preview the selected template. What’s cool is that now you can switch and preview between templates and template parts seamlessly.
While it may not seem significant, this lets you see subtle differences between templates for better design consistency. Previously, you’d have to open the template panel, which took up the whole screen, hindering you from seeing the preview and switching between templates quickly.
Moreover, the sidebar width is adjustable. The preview will also change according to the canvas area, letting you see how the template responds to the changes to the viewport width.
When you’d like to edit the selected template, click on the editor canvas or the Edit icon on the sidebar.
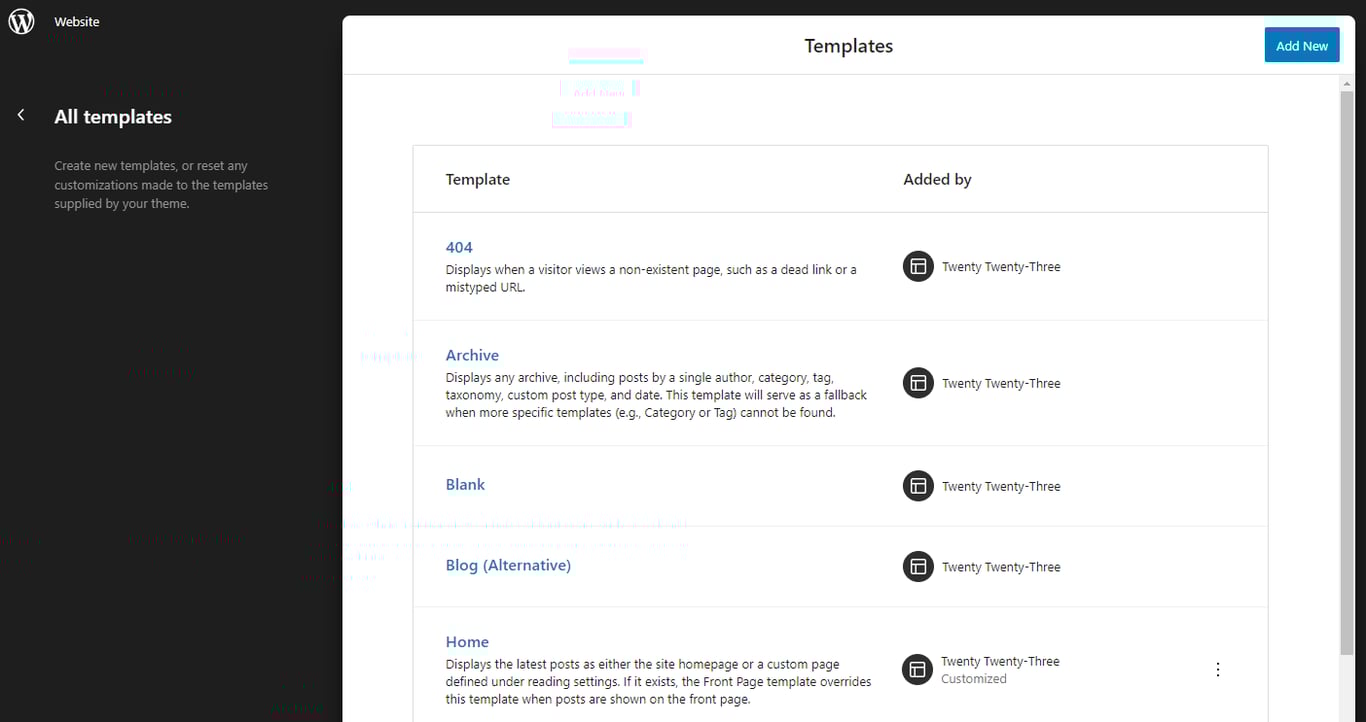
Click the Add New Template button on the sidebar to add a new template or template part from the browse mode. Alternatively, you can still access the old templates and templates parts panel by clicking the Manage all templates or Manage all template parts buttons.
Block Settings With Split Controls
The interface changes don’t end there. The Block Settings panel is also improved – it now has split controls.
Have you ever customized a block and felt annoyed at having to scroll to find a specific setting? Starting from WordPress 6.2, the block settings panel will have two tabs for the controls – Settings and Styles.
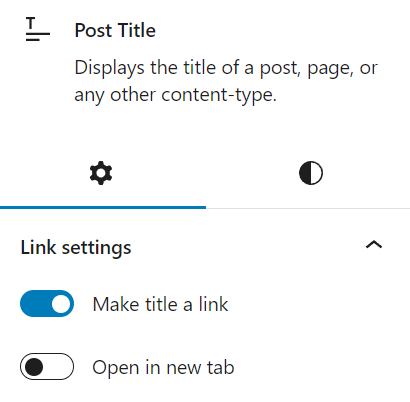
The Settings tab – represented by a gear icon, contains block-specific options. For example, you can find the layout and position settings in the group block settings, while the post date block contains the Date Format and Link to the Post options. All advanced block settings to add CSS classes or HTML anchors are also in the Settings tab.
The Styles tab – represented by the WordPress style icon, contains the general style settings, such as color, dimensions, typography, and border. The customization options may differ for each block.
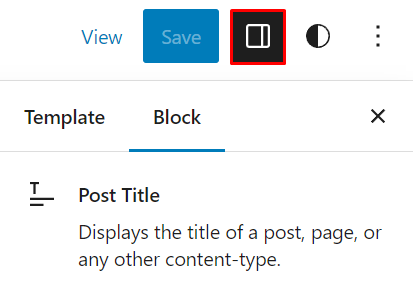
It’s worth noting that the Site Editor block settings icon has been changed. Instead of a gear, it now resembles a screen with a right sidebar.
Color-Coded Template Parts and Reusable Blocks
Have you ever accidentally changed or deleted any reusable block or template component? Doing so may affect other parts of the website that use the same component.
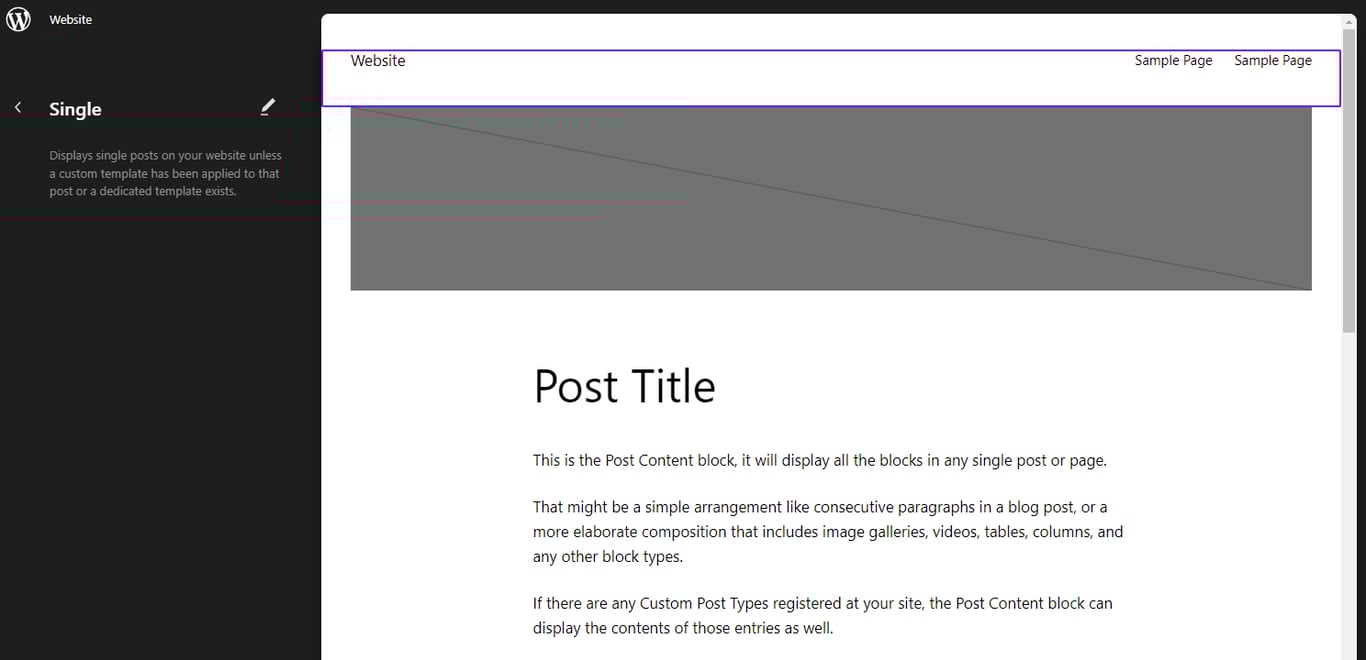
In WordPress 6.2, template parts and reusable blocks are color-coded to differentiate them from other blocks. You will see a purple outline and icons when you select them, helping identify them. This change is applied in the list view, the block toolbar, and the editor canvas.
Improved Content Editing Experience
WordPress is all about creating content. Thus, every update improves the writing and editing experience, and WordPress 6.2 is no exception.
Distraction-Free Mode
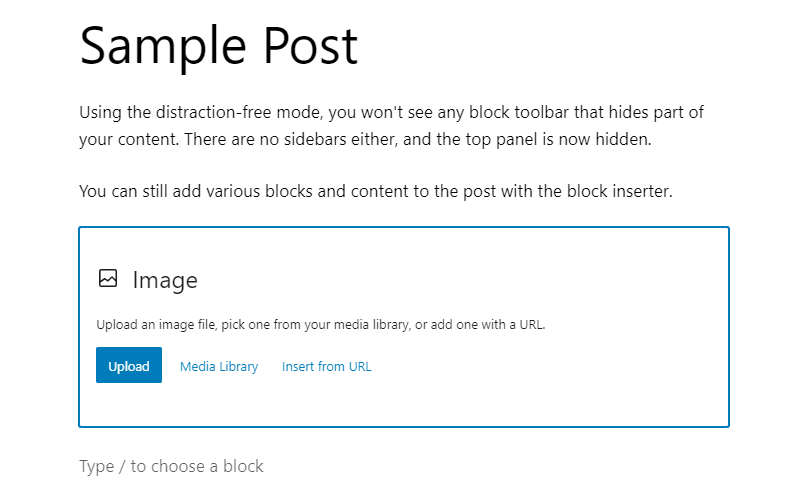
The distraction-free mode is available in the page and post editor. It hides all sidebars, the top navigation panel, and the block toolbar, leaving only the editor canvas and your content on the screen.
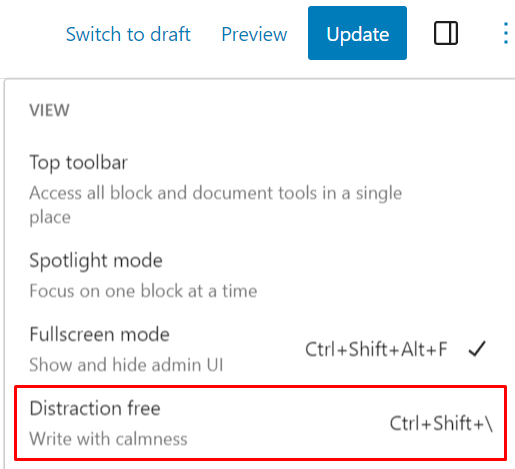
To activate it, open the Options menu at the top-right corner of the screen and select Distraction free. When you want to return to the standard editing, hover over the screen’s top section. The top navigation panel will appear, allowing you to access the Options menu again.
What we like the most about this feature is that it hides the block toolbar. It can be annoying when the block toolbar hides a portion of the text when writing. With the distraction-free mode, this won’t happen.
The beauty of the distraction-free mode is that you can still add various blocks using the inserter in the editor area. This means that you’re not restricted to editing text, and you can create content with images, videos, and other visual elements.
Openverse Integration
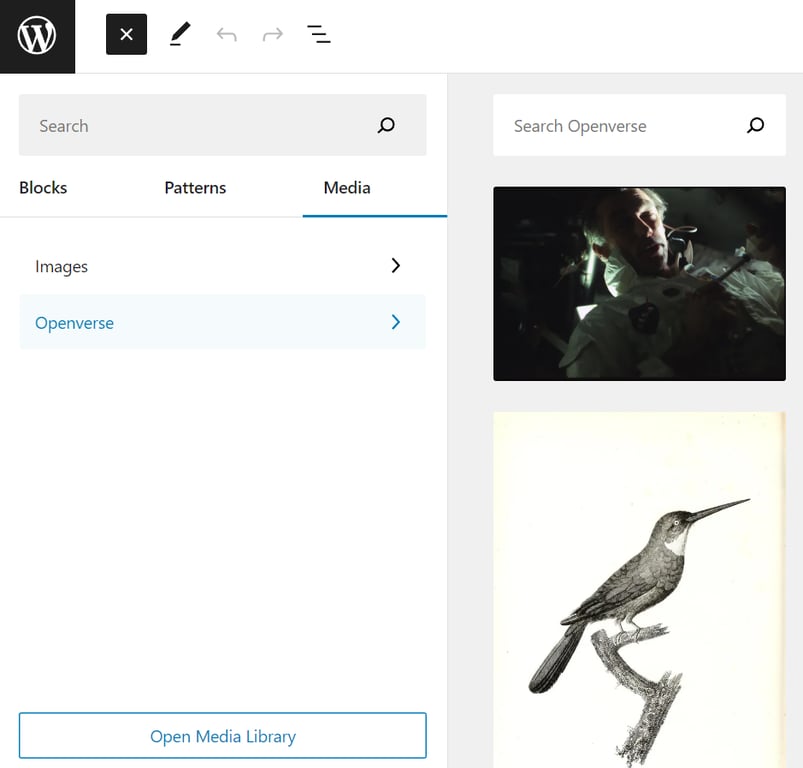
Need to add openly-licensed media to your content? There’s no more need to look for it on a separate site, download it, and re-upload it to your site. The Openverse integration now lets you browse these images straight from your editor.
All you need to do is open the Block inserter from the top-left corner of the editor screen, open the Media tab, and select Openverse. Use the search bar to enter a query and find suitable images you need. When you finally find one, click on it, and it will be automatically inserted into your content.
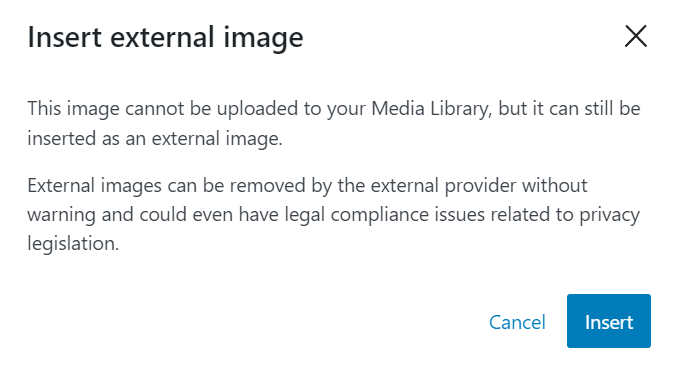
This integration has also been improved since the beta version. It now uploads the image to the media library to avoid problems with hotlinking. If it can’t upload the image to the library, it will warn you before proceeding.
Pattern Inserter Categorization and Interface Improvements
Using block patterns is an easy way to get your content layout done. WordPress 6.2 features a redesigned pattern inserter to improve user-friendliness and at-a-glance navigation.
Now, pattern categories are listed in the inserter panel instead of a drop-down menu. This makes it easier to navigate between categories. The inserter panel also expands rightwards for a preview.
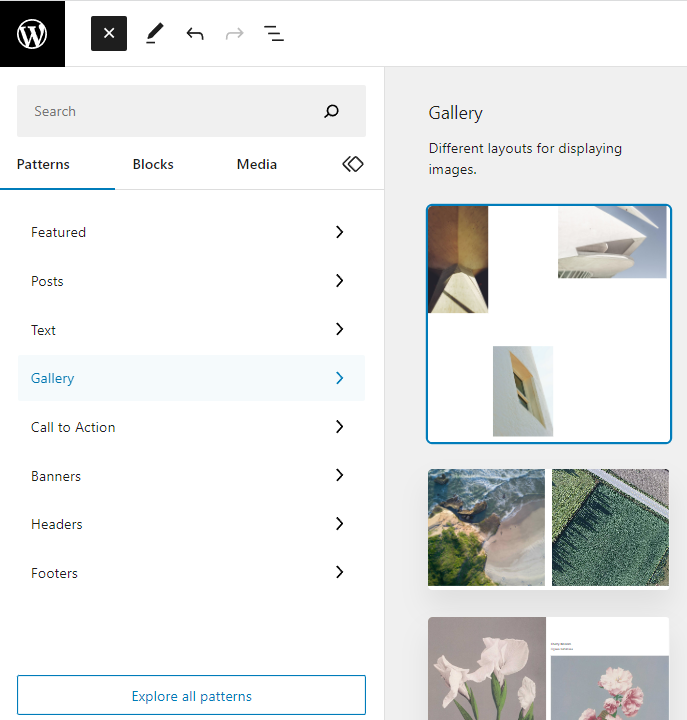
If you want to browse for a pattern using the dedicated block pattern panel, click Explore all patterns, and the pop-up will appear.
Other than the interface, block patterns are also recategorized in this version for better user-friendliness. Some of the changes are as follows:
- Query patterns renamed to posts
- Columns merged with text patterns
- Buttons replaced with calls to action
- Three new categories – banner, header, and footer
Post Outline
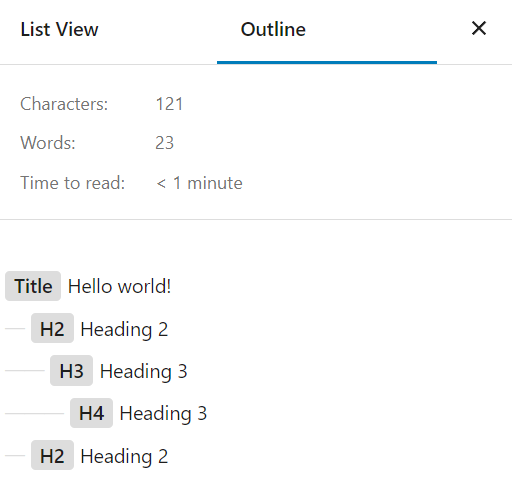
The post outline is now moved into the list view panel. Therefore, you’ll notice the panel is now split into two tabs – List view and Outline.
In the outline tab, you can see the structure of your content, including its word count, time to read, and heading structure.
Styles Customization
Switching and customizing global styles is now more convenient with the refined global styles panel. Some new features will make your life easier, too.
New Global Styles Preview and Style Book
The global styles panel now offers two improved ways to preview any style variation.
The first is the zoomed-out editor canvas to better provide a style overview when you enter the style browser. Previously, when selecting a style variation, the editor canvas would remain the same, so you’d have to scroll down to see the changes on other parts of the site, such as the header and footer.
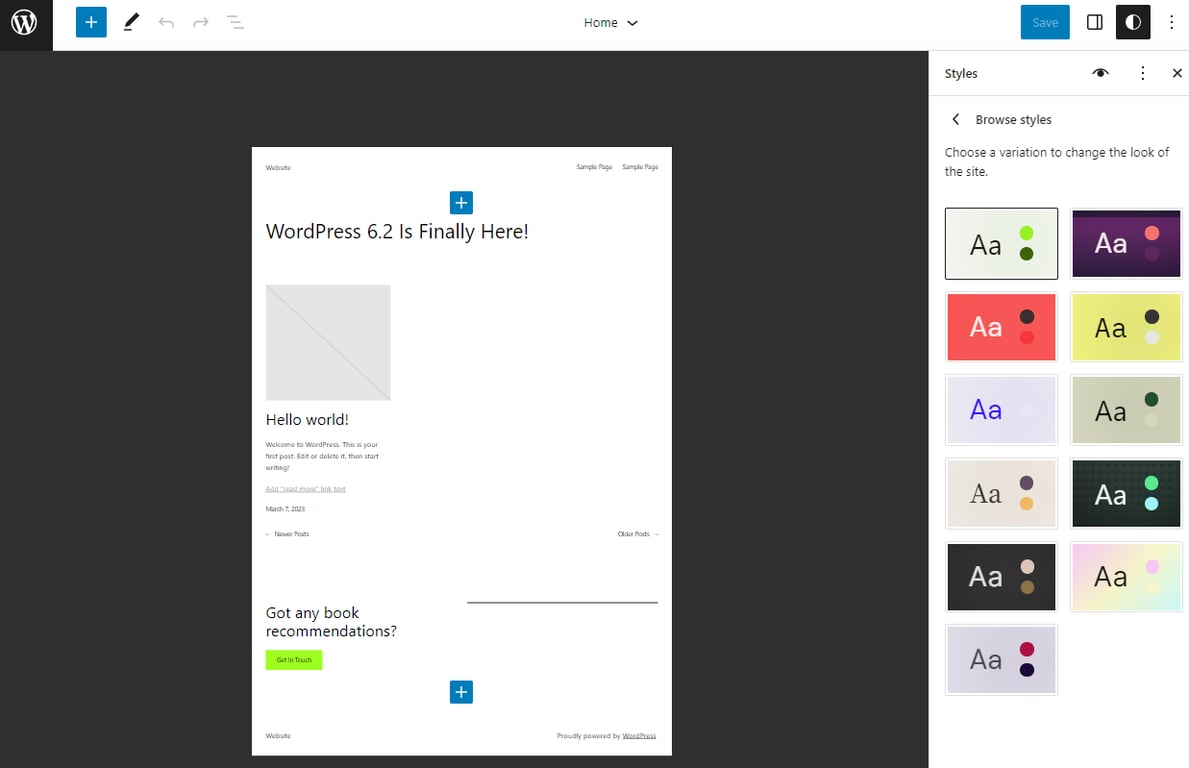
You can also add patterns while in the zoomed-out editor canvas. This will let you experiment with different styles and patterns and choose one you see fit.
Another way to see a broad preview of style variations involves using the style book. You can access it by clicking the Eye icon on the Global Styles panel.
This will show you how all website elements will look with every style variation. For example, in the text section, you can see all the heading levels, paragraphs, and quotes. The design section shows how buttons, columns, and links will look with a style variation.
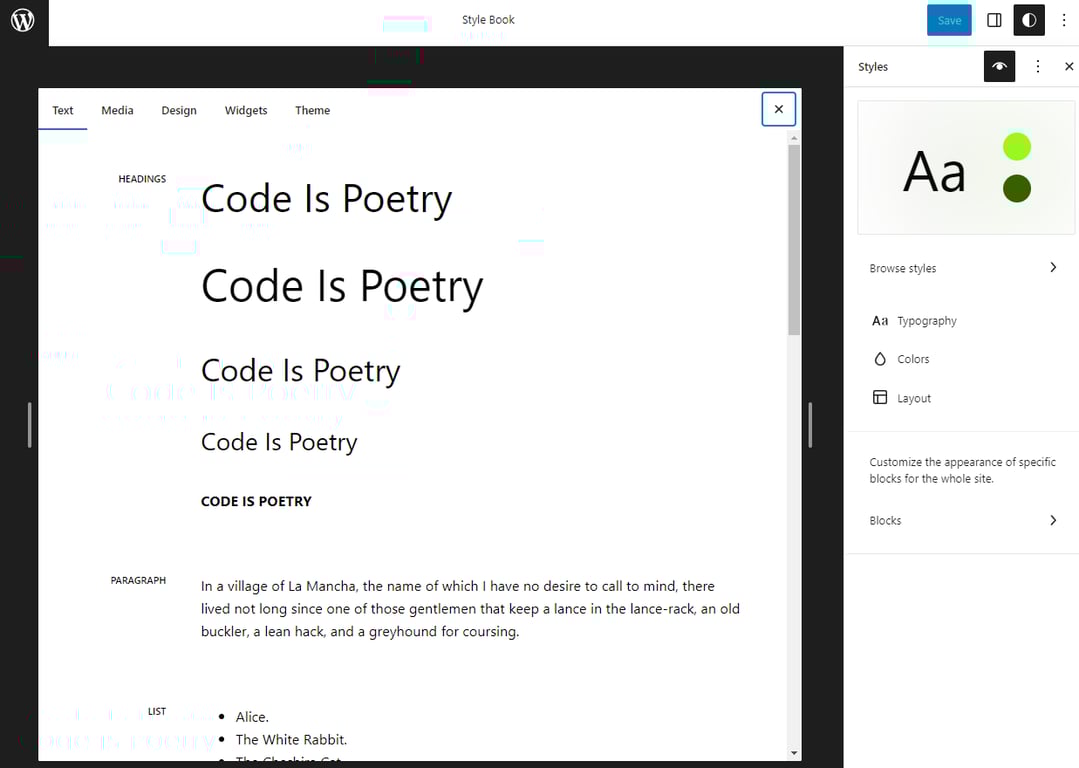
The style book has five tabs – text, media, design, widget, and theme. Each contains main blocks that are often used for site customization.
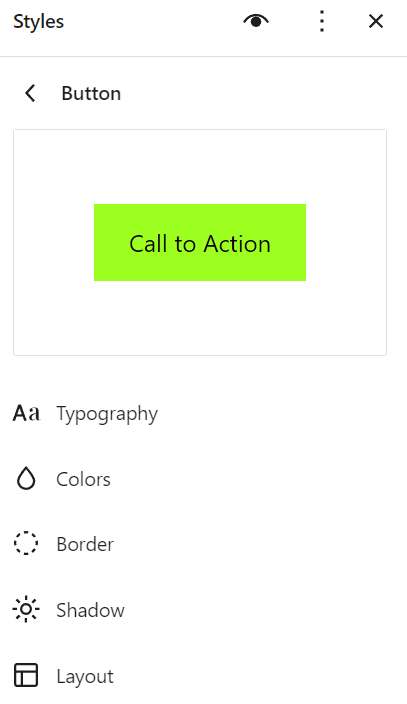
Inline Block Styles Preview
The global styles panel lets you change block styles globally. However, the previous versions were missing the block preview feature. This means you couldn’t see the changes unless the block in question was in the editor canvas.
This is solved in WordPress 6.2, which introduces the inline preview in the global style panels. Now you can see how the block will look at the top of the global styles panel.
Shadow UI Tools
Gutenberg introduced shadow support via the theme.json file in January 2023, allowing theme developers to incorporate shadow elements. This customization was code-based only.
WordPress 6.2 introduces UI tools to let end users change the shadow presets via the global styles panel.
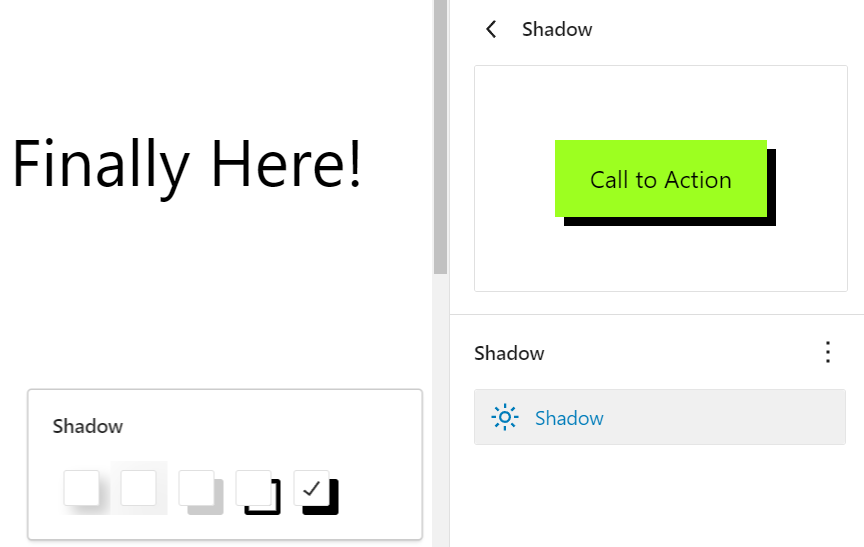
Currently, four shadow presets are available by default, but you can add more via the theme.json file.
Here is a sample code snippet you can use to add a shadow preset:
{
	"version": 2,
	"settings": {
		"shadow": {
			"presets": [
				{
					"name": "Small",
					"slug": "sm",
					"shadow": "0 1px 3px 0 rgba(0, 0, 0, 0.1), 0 1px 2px 0 rgba(0, 0, 0, 0.06)"
				},
				{
					"name": "Medium",
					"slug": "md",
					"shadow": "0 4px  10px 0 rgba( 0, 0, 0, 0.3 )"
				},
				{
					"name": "Large",
					"slug": "lg",
					"shadow": "0 8px  15px 0 rgba( 0, 0, 0, 0.3 )"
				}
			]
		}
	}
}
Push Block Styles to Global Settings & Copy and Paste Block Styles
When editing a block’s style, you may decide to apply it to other similar blocks. For example, after styling a heading, you like the look and want to apply it to all the heading blocks on your site.
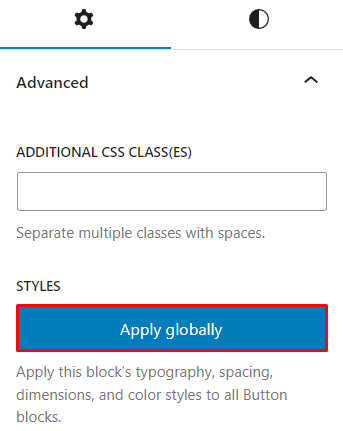
Instead of editing other blocks individually or making the same edit in the global styles panel, you can now open the block settings panel and select the Apply globally option from the Advanced section.
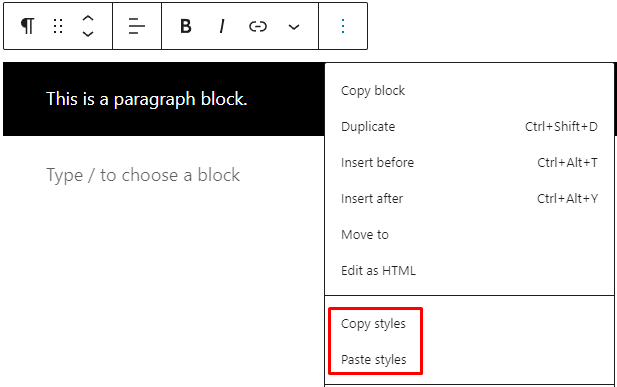
Or, if you want to use the same style for a specific block, you can open the More options menu in the block toolbar, select Copy styles, and click Paste styles on the receiving block.
Intuitive Navigation Block Tools
WordPress 6.2 brings a new way of creating navigation links in the editor with the new navigation block UI tool.
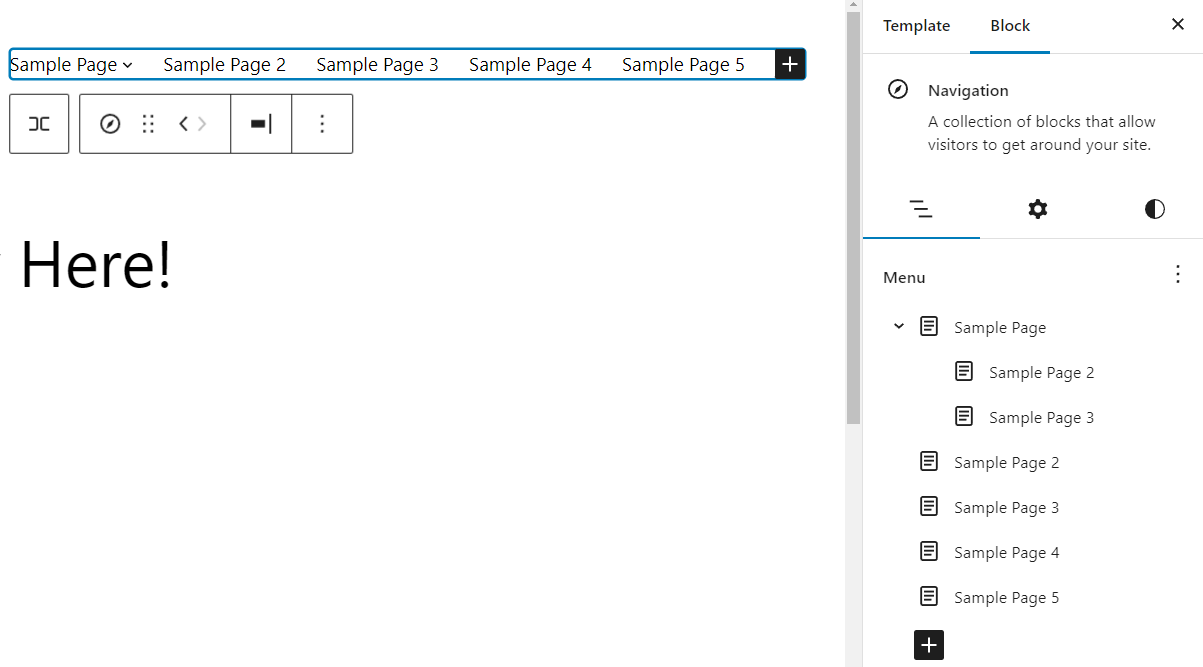
This tool is accessible through the block settings panel. You will notice another tab for the navigation block list view. While this functions similarly to the block editor list view, the tools offer a more focused experience for editing the navigation, helping you implement good navigation on your site.
First, it’s now easier to rearrange navigation items by dragging and dropping them on the UI. This is a great addition – you won’t have to use the main list view or the block-moving tools.
You can also use the drag-and-drop system to create a sub-menu or move a sub-menu level to a higher level. Alternatively, you can open the options menu for each page link block to remove it or add a sub-menu.
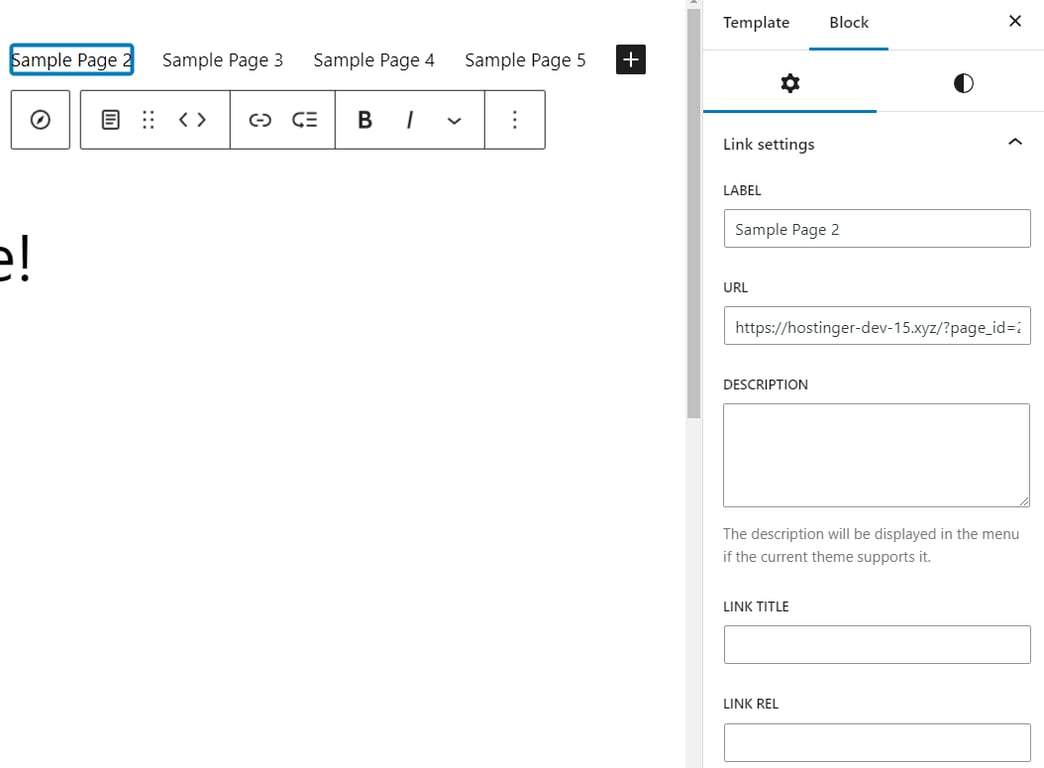
When you click an individual page link, it will open the link settings where you can change the label, URL, description, and link rel attribute.
Another improvement is adding more block types to the navigation block. For example, you can insert a page list block, and it will automatically add all pages to the navigation. Most importantly, it will have a simple single-button option to turn them into individual page link blocks, where you can edit and arrange them more freely.
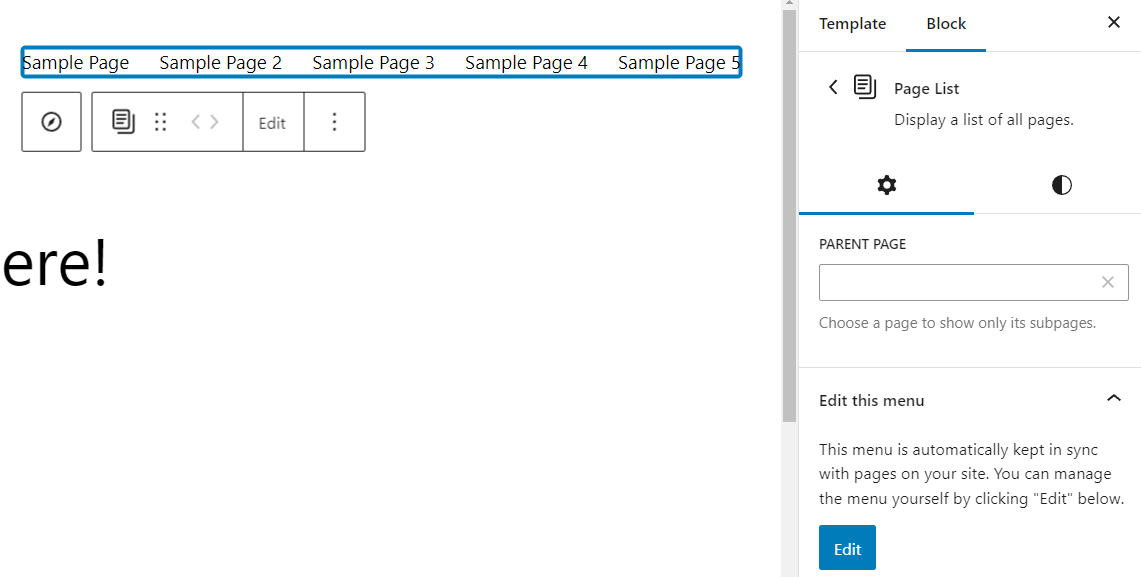
This new process is amazing when you have plenty of pages to add. Adding a page list block lets you get all the pages there without inserting the links individually.
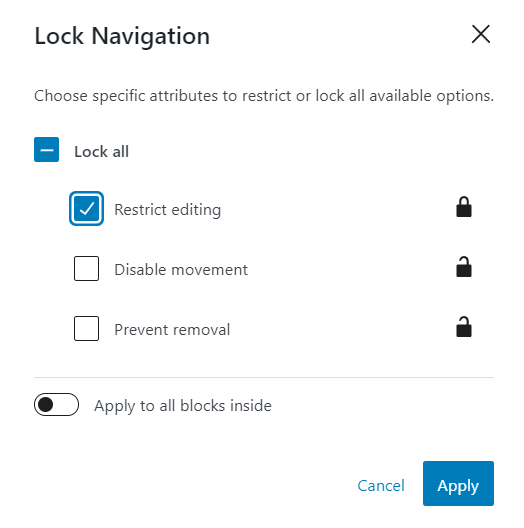
To prevent any link and submenu changes, the Restrict Editing feature is now accessible via the block-locking tool. This feature is helpful for site admins or agencies to ensure the site’s navigation won’t be changed unexpectedly, which may cause the navigation to break.
Other Improvements
Other than the holistic updates we’ve discussed above, some major updates were also made to improve the editing experience in WordPress.
Sticky Positioning
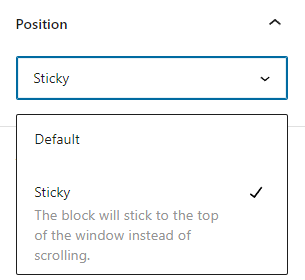
The new sticky position support lets you keep a block at the top of the viewport when users scroll down the page. Currently, this feature is available in group, stack, and row blocks at the root level. You can use these container blocks to put an important notice on your website and set it sticky.
To set a sticky block, make sure it’s in the root level. Then, open the block settings panel and find the Position option. Choose Sticky from the drop-down menu.
Variation Picker in the Group Block Placeholder
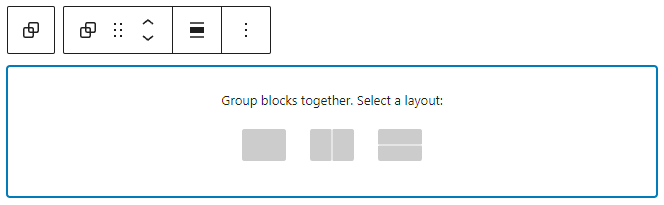
Group, row, and stack blocks have been easily transformable to each other with the dedicated transform tool in the block settings. WordPress 6.2 takes this flexibility further with the variation picker when you add a group block to the editor.
You will see the layout options, which let you start the group block as a row or stack block. Note that these options are not available in row and stack block placeholders.
Drag-and-Drop Support to Add Images Into an Empty Paragraph Block
Adding an image from your computer is now easier than ever. You can drag and drop it from a local folder to an empty paragraph block. It will automatically transform into an image block and upload the image to the media library.
Beta Label Removal and Site Editor Rename
While this seems minor, removing the beta status means that the Site Editor is more stable than ever for WordPress website creation and customization. Plus, it’s been renamed to just Editor.
Although this release officially ends the beta status of the site editor and Phase Two of Gutenberg, the WordPress team will still improve the editor and fix bugs through future WordPress and Gutenberg updates.
Update Your Site to WordPress 6.2 Now
Updating WordPress is relatively simple. However, be sure to create a website backup beforehand and use a staging environment to test the update before committing. WordPress 6.2 is a major release, and updating your live site may result in compatibility issues and errors.
Pro Tip
The staging environment feature is available with WordPress Business and Pro plans. Read our WordPress staging tutorials to set up a test environment.
Once you’ve created a backup and tested the new version in a staging environment, you can update your main site without worry. Follow our tutorials to update your WordPress website, and enjoy the new features in WordPress 6.2!

Leo is a Content SEO Specialist and WordPress contributor. Armed with his experience as a WordPress Release Co-Lead and Documentation Team Representative, he loves sharing his knowledge to help people build successful websites. Follow him on LinkedIn.